VYROX Very Intelligent Platform (VIP)
Face Access Control
1. Introduction
This tutorial describes a thorough procedure for using the Face Access Control system. Find out how to create a fresh face profile for every unit. Find out how to fix registration issues and activate and deactivate face access. Examine the security measures used to safeguard biometric information. This lesson explains how to handle Face Access Control. To provide each unit with easy and safe access, create a new face profile.
2. Set Up Face Access Control
This tutorial offers a thorough process for using the VYROX VIP Smart AIoT Devices, created by VYROX INTERNATIONAL SDN BHD, to optimise and improve building and facility operations. Property managers, building administrators, and facility operators can easily use the Face Access Control system with VYROX's VIP AIoT tools, which are a complete set of smart solutions. These AIoT devices provide for improved security, more operational efficiency, and more intelligent decision-making by integrating hardware and software into a single, cohesive platform.
2.1 Face Recognition Access
Go to Face Recognition Access > New Face Recognition Access > Fill in details > Add
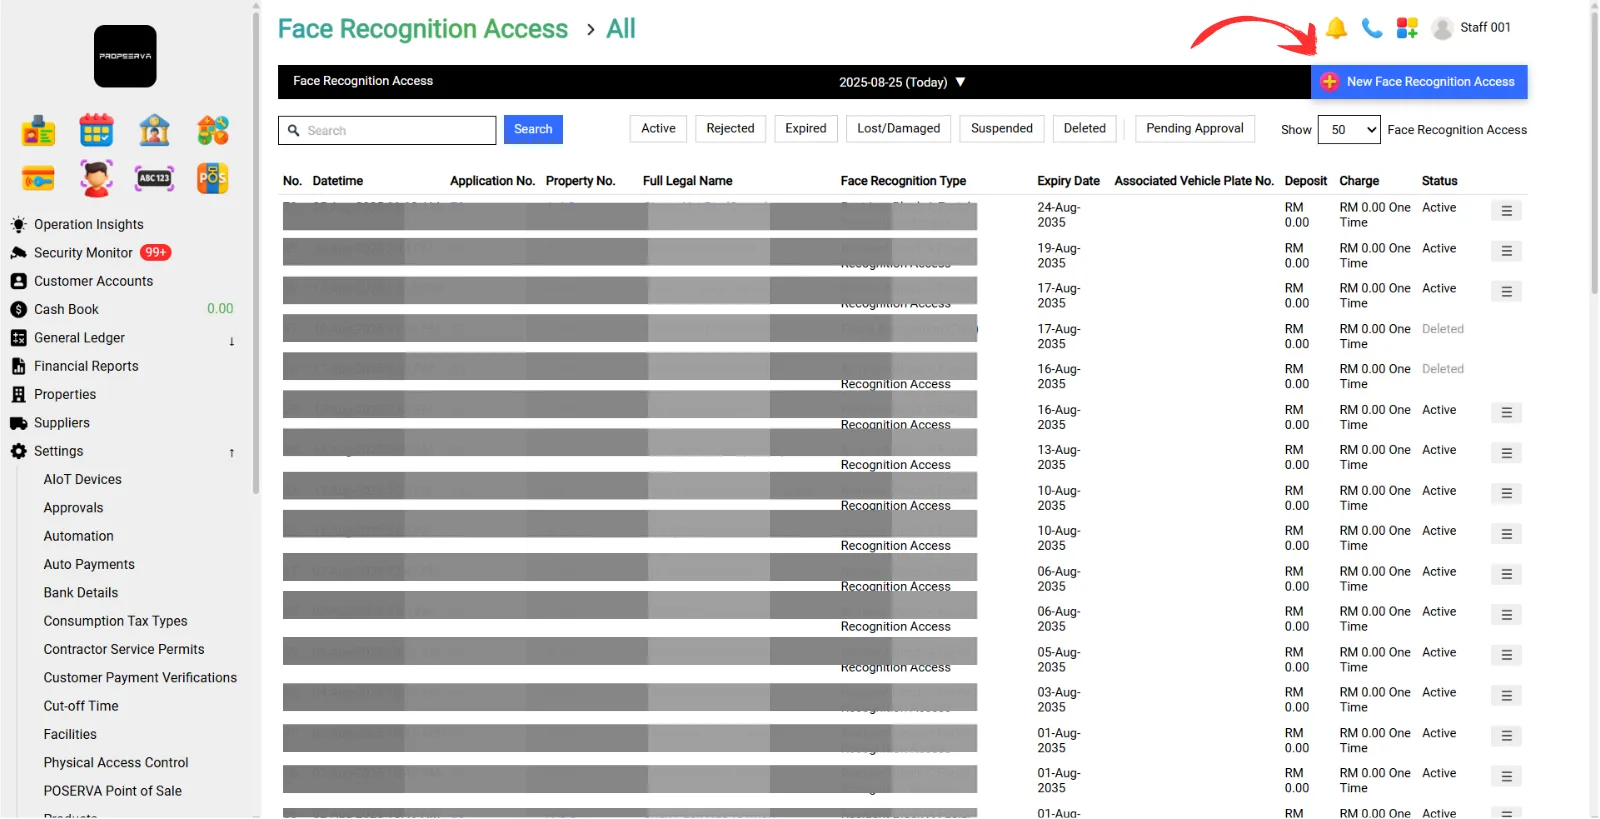
Details include:
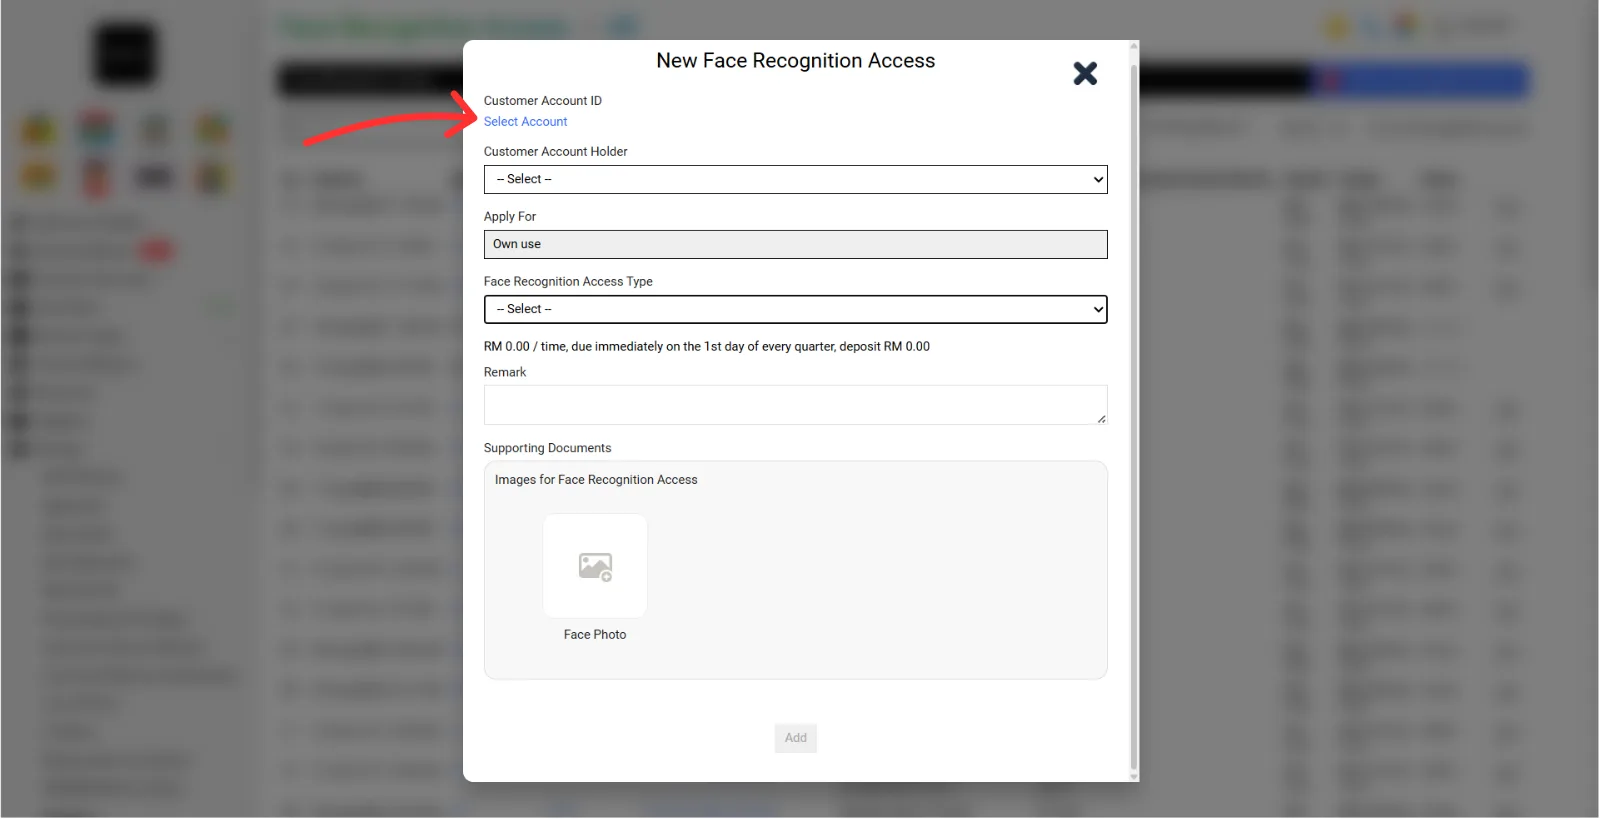
- Select Account
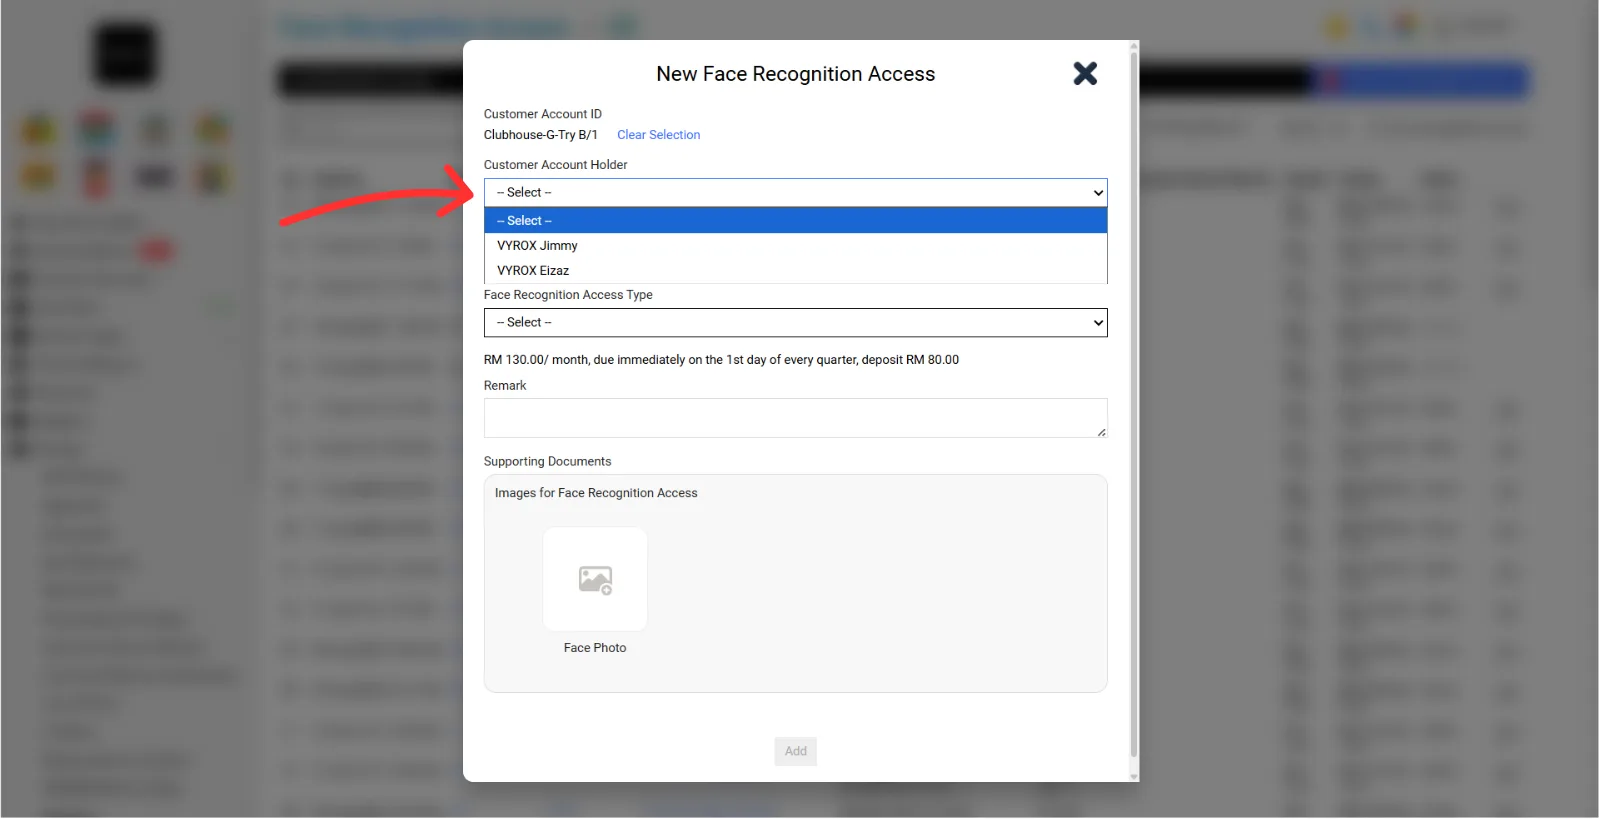
- Customer Account Holder
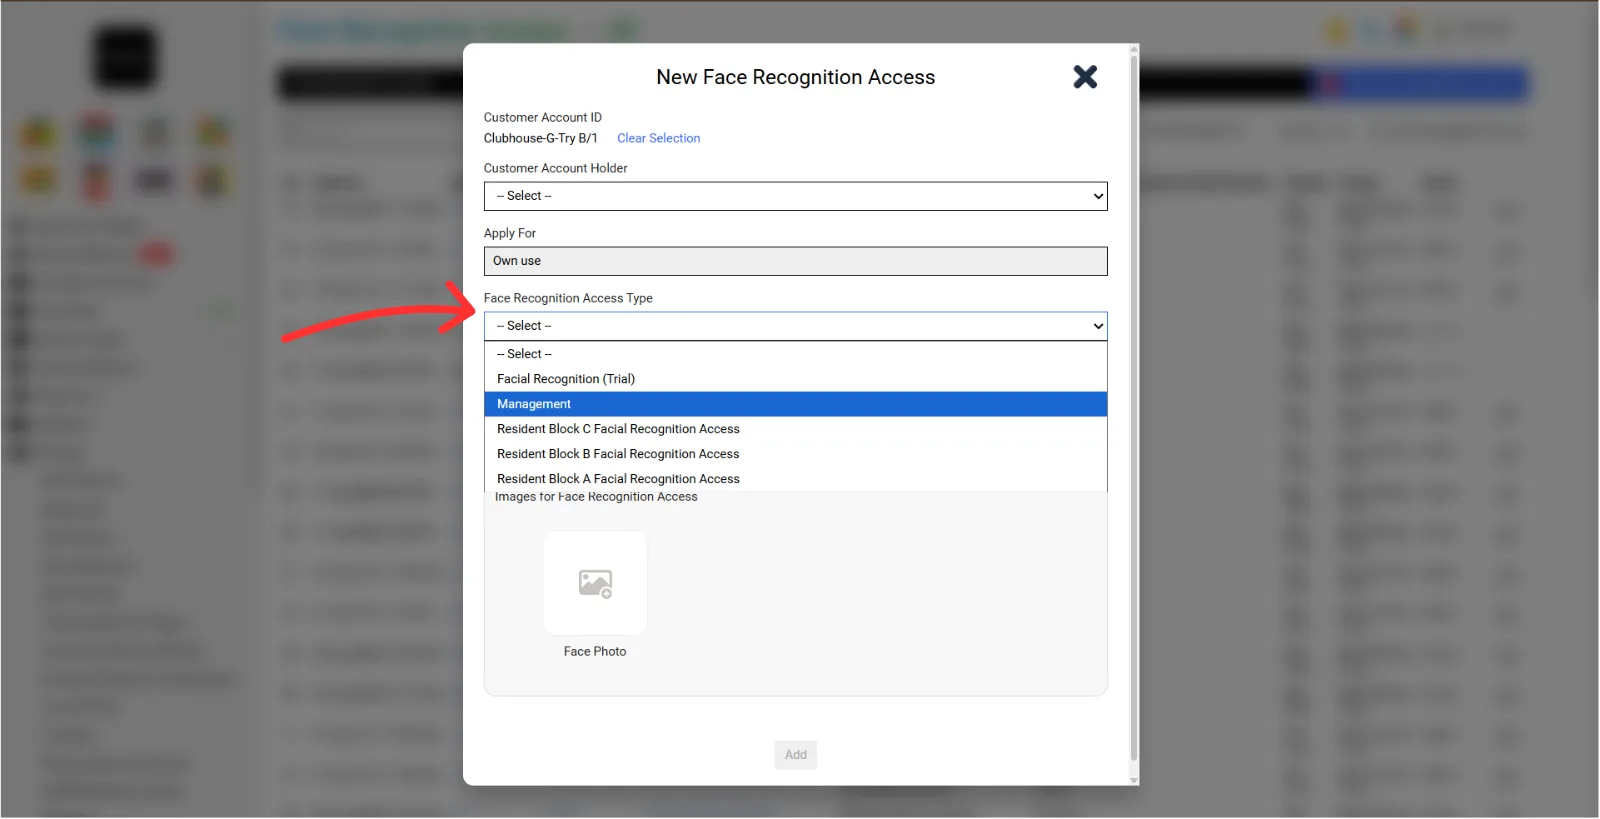
- Face Recognition Access Type
- Images for Face Recognition Access
Step 1:
Click "Select Account"
Step 2:
Select "Customer Account Holder"
Step 3:
Select "Face Recognition Access Type"
Step 4:
Take picture and insert at "Images for Face Recognition Access"
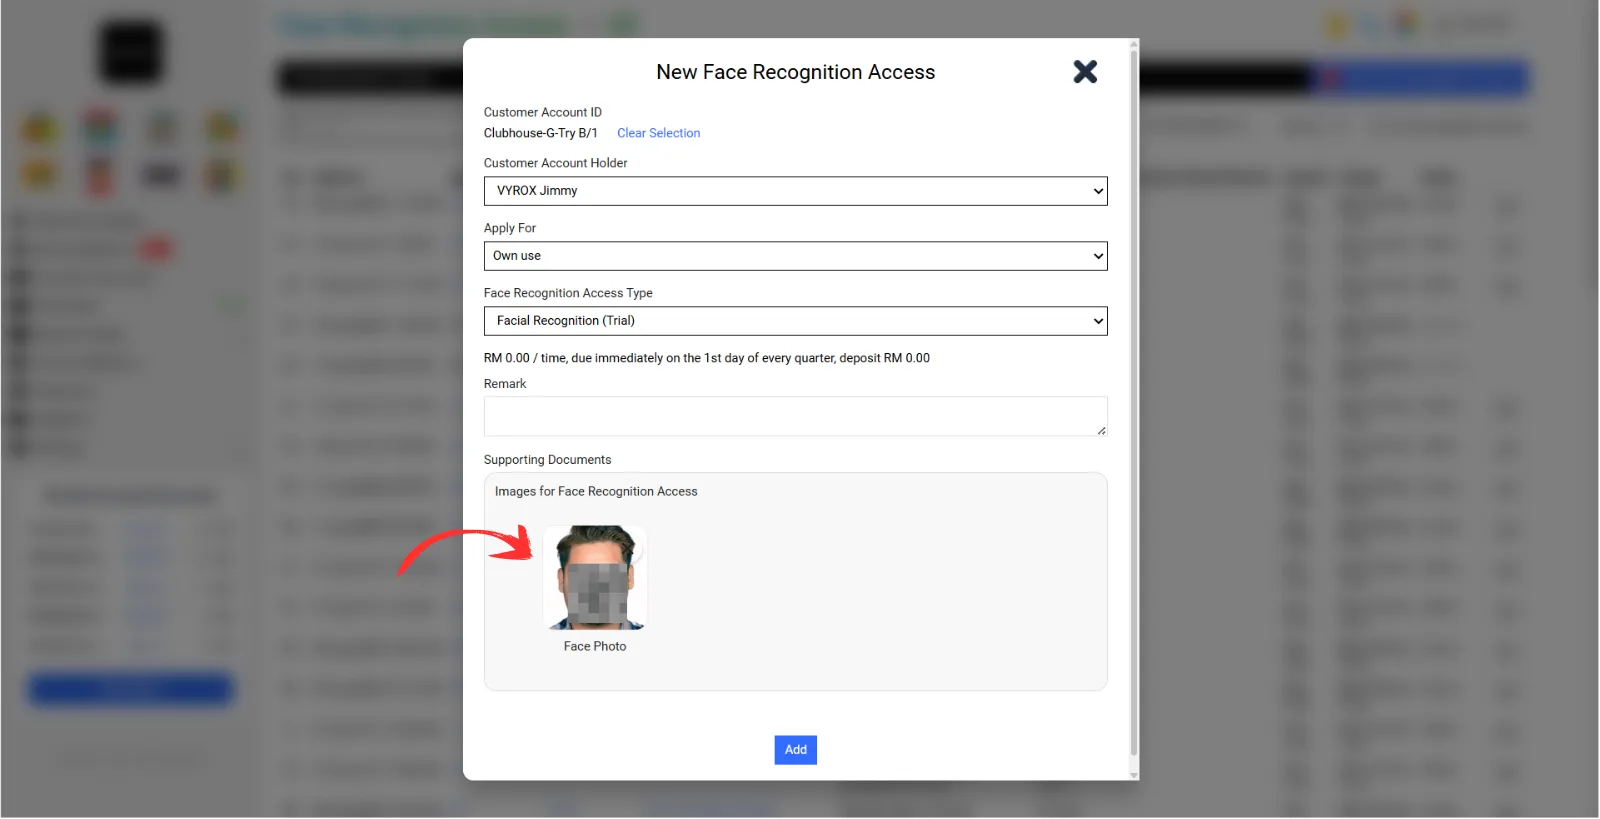
After that, Click "Add"
2.2 UltraPass Face
Go to Setting > AIoT Devices > SuperPAss-Face
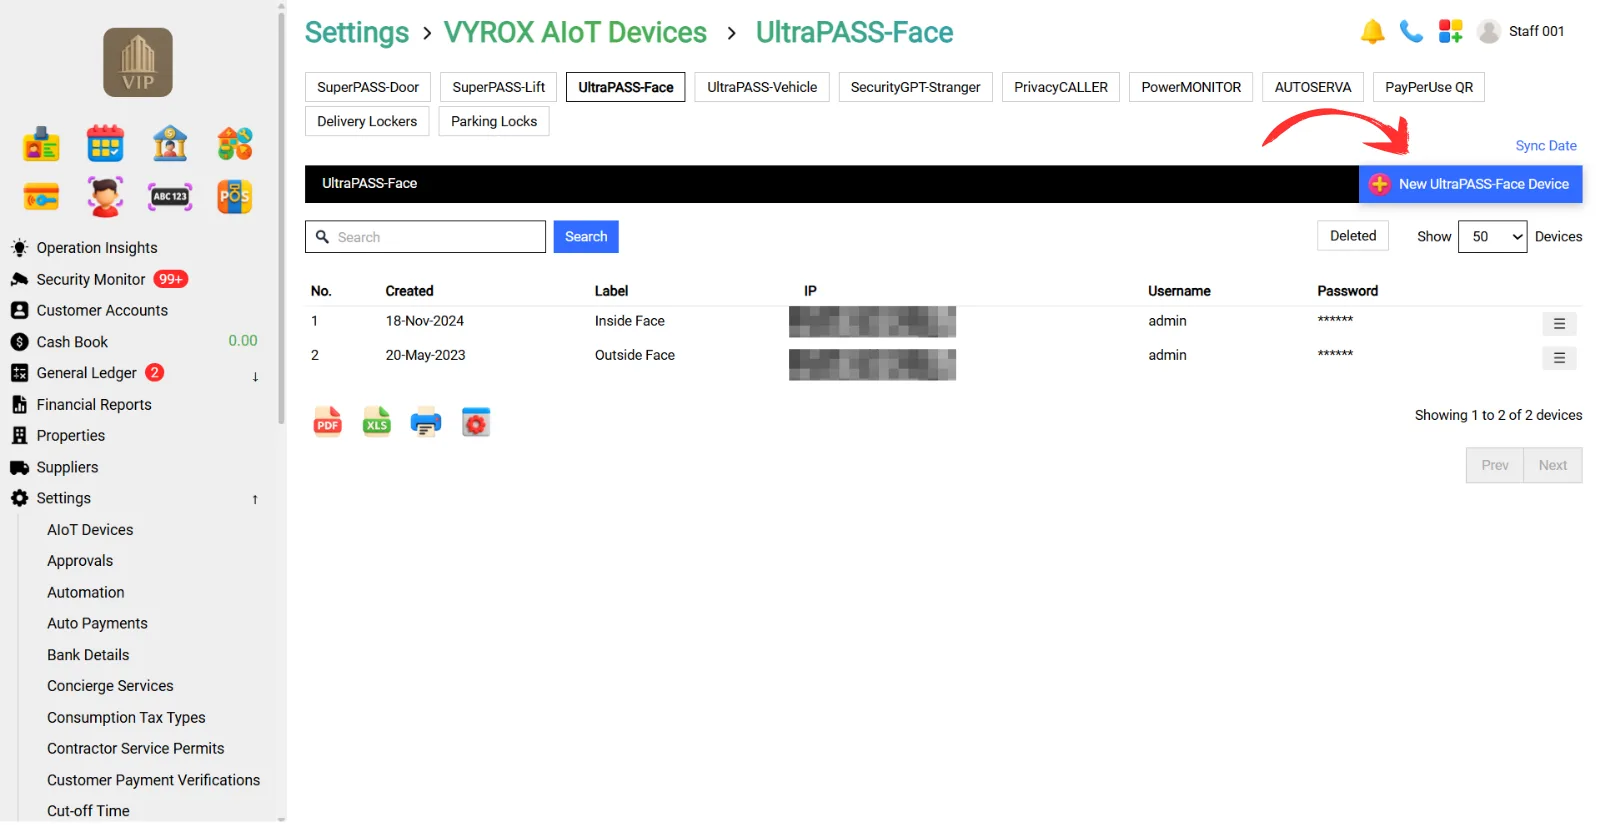
Details include:
- SuperPass-Face Controller Name
- Access Direction
- Server IP
- Server Port
- Username & Password
Step 1:
Fill in blank “SuperPass-Face Controller Name”
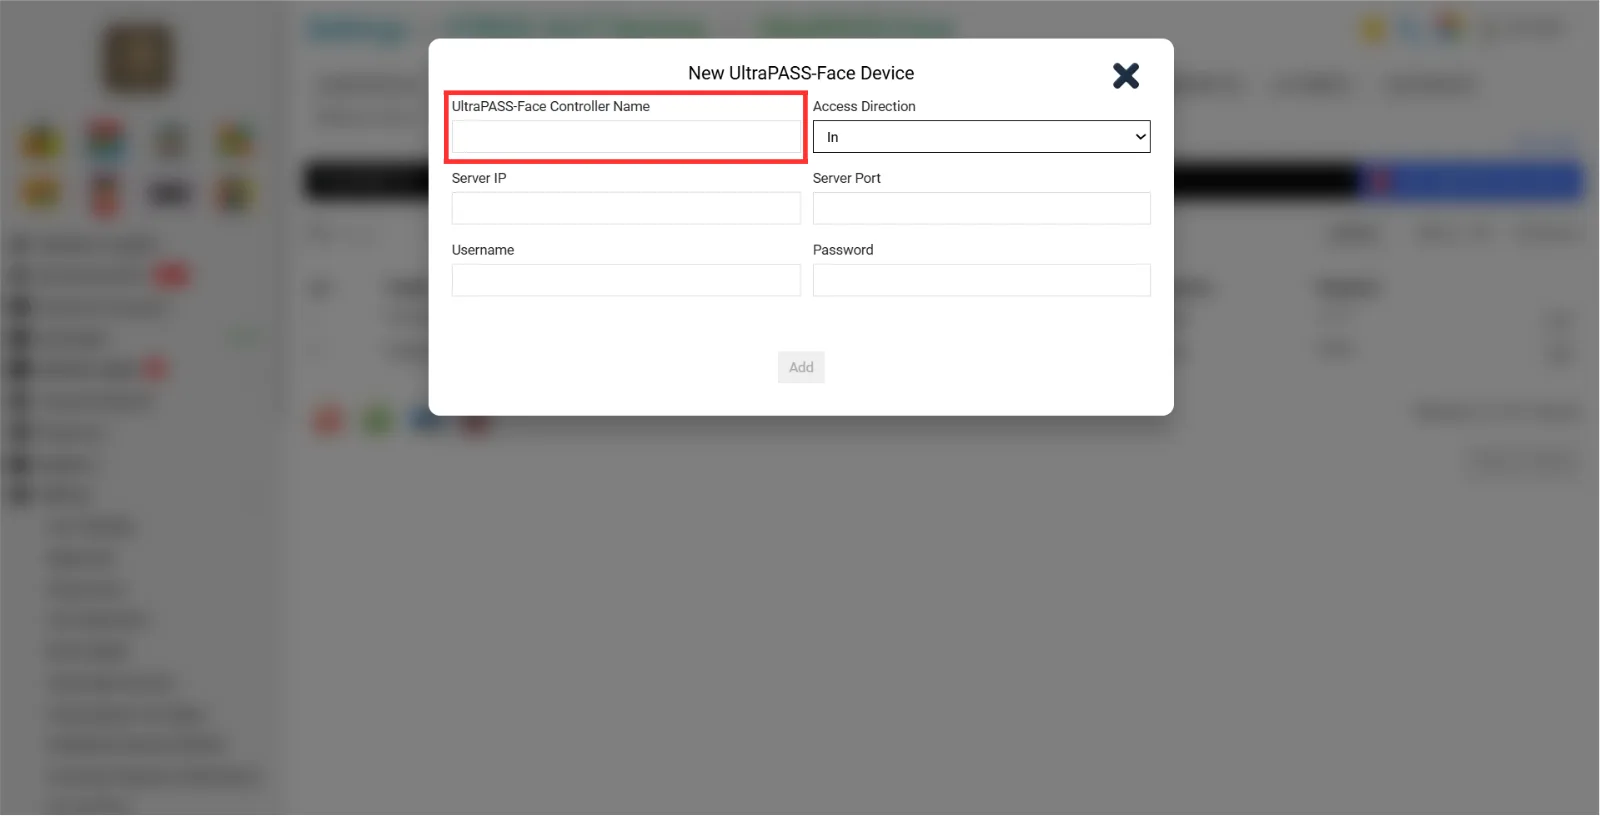
Step 2:
Select “Access Direction”
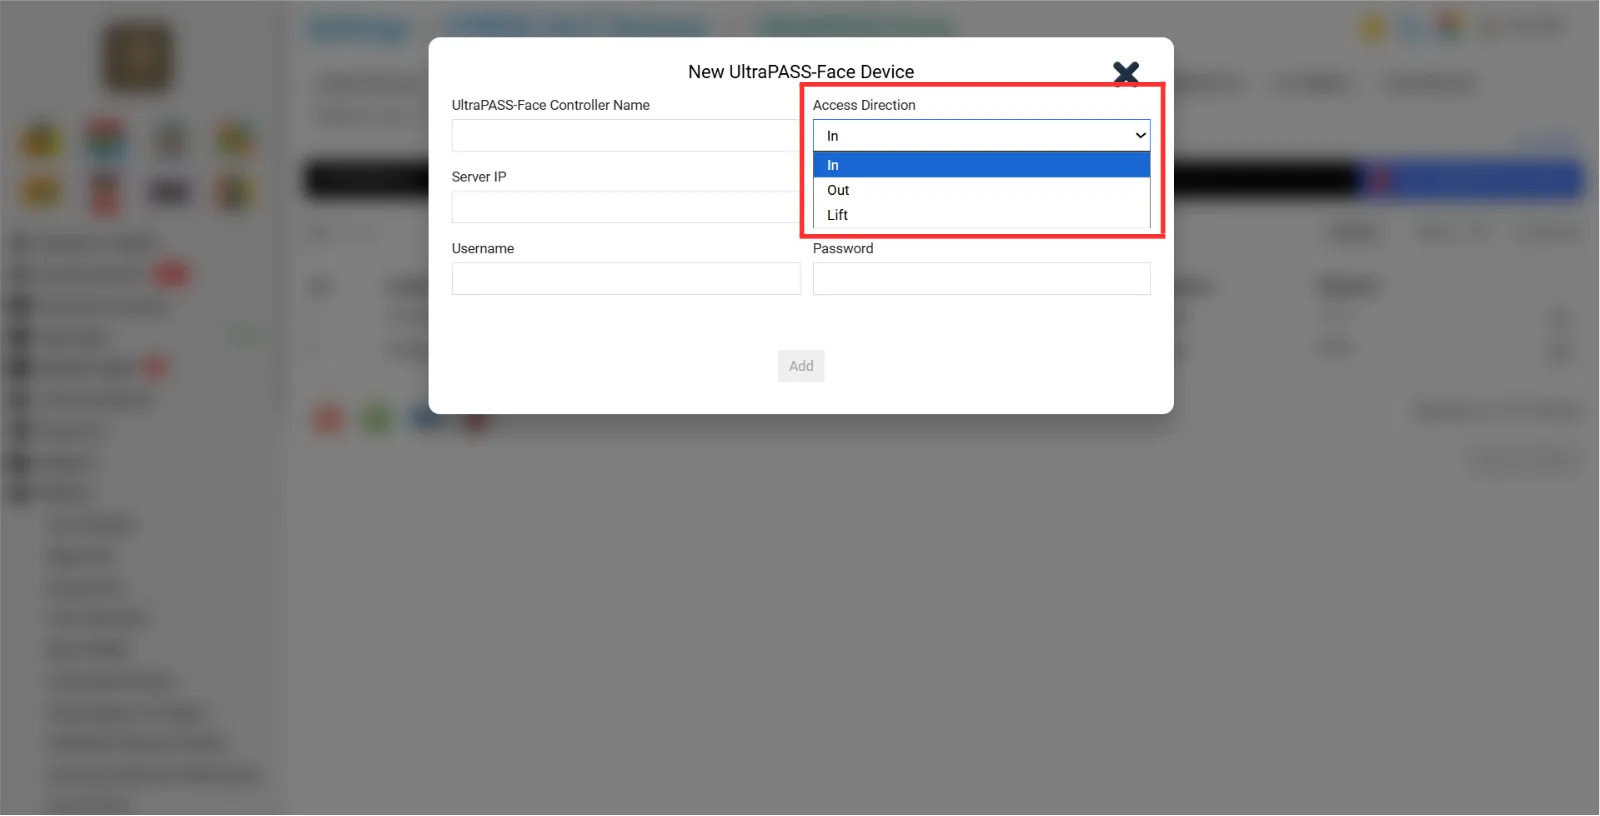
Step 3:
Fill in the Blank “Server IP & Server Port”
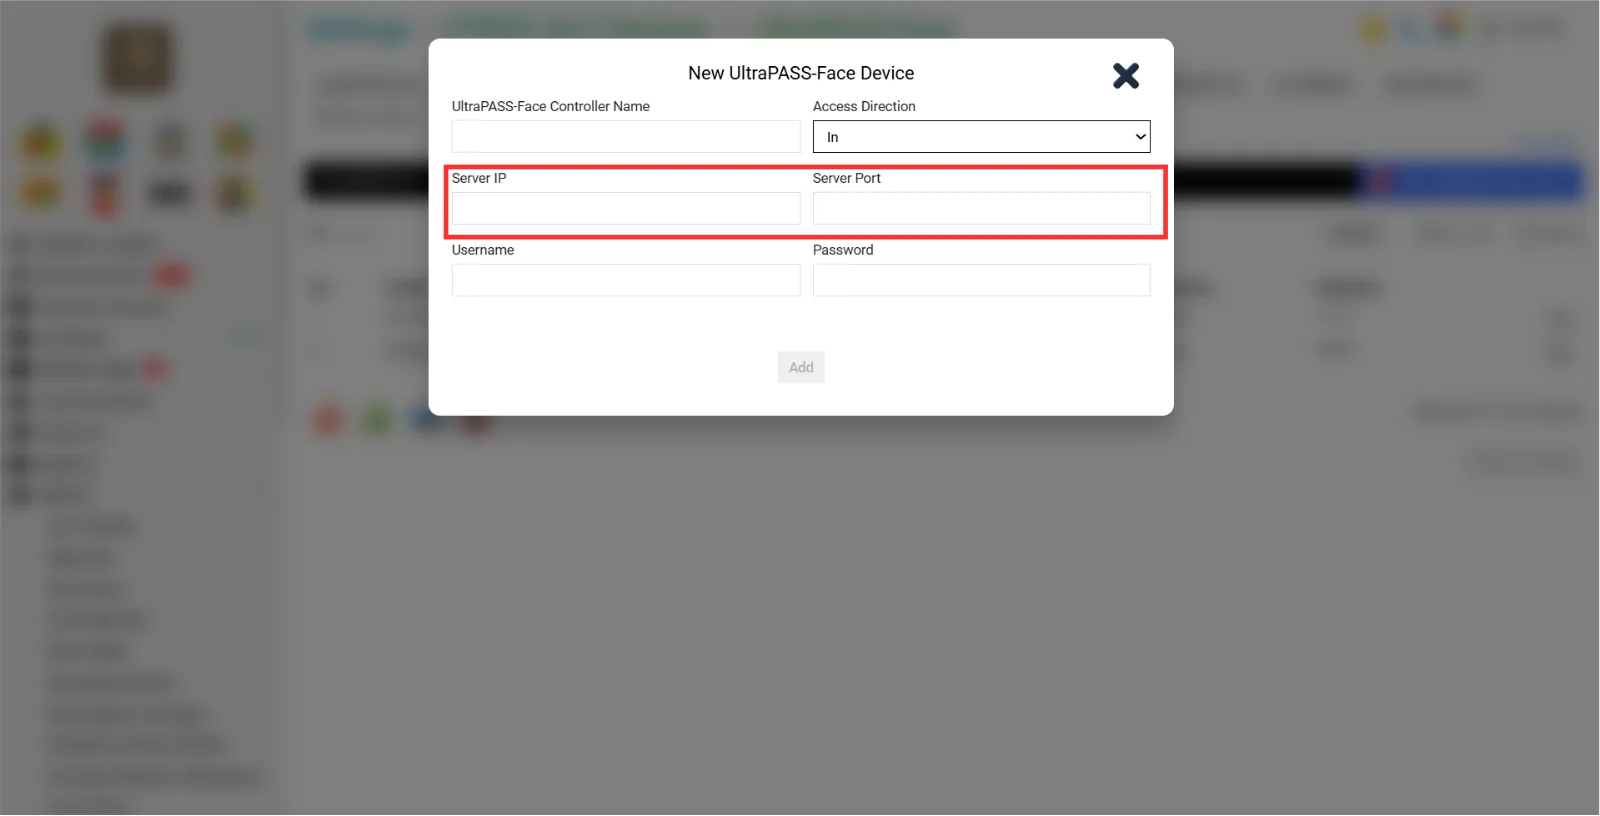
Step 4: Fill in the blank “Username & Password”.
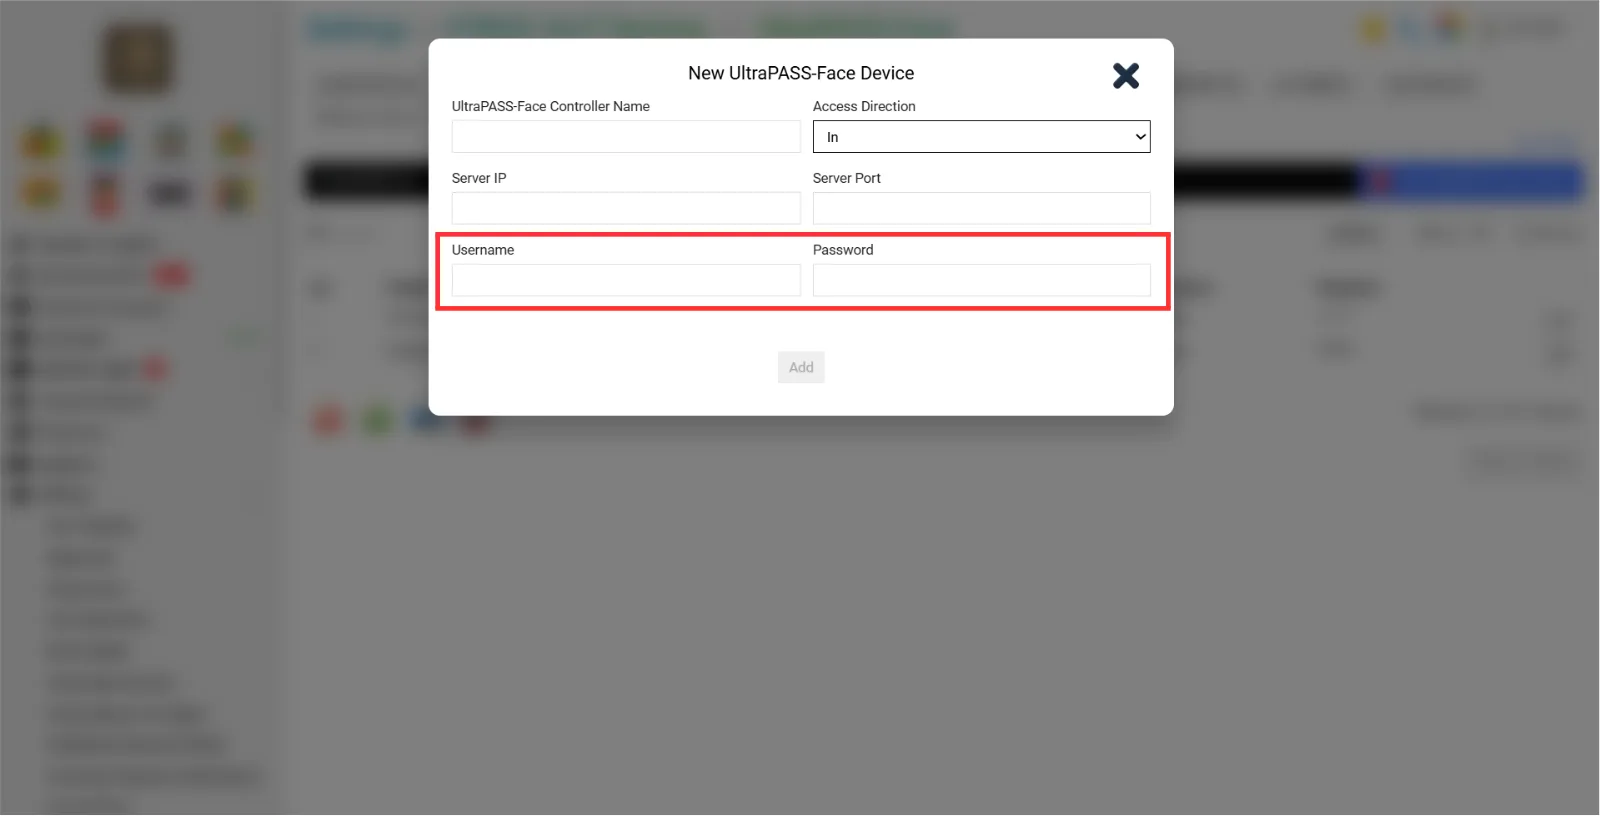
After done keying in all information, Click “Add”
3. Configuration Instructions for Properties
This guide shows you step-by-step how to set up the Properties Unit part of VYROX VIP Smart Integrated Property Management System, which was created by VYROX INTERNATIONAL SDN BHD. Property managers, building officials, and facility workers can make and handle each unit, making sure that the information about each unit is always correct. Then, each unit can be easily connected to access control modules like SuperPass-Door for door entry, SuperPass-Lift for lift access, and UltraPass Face for face recognition. This way, unit records can be directly linked to automated and safe access permits.
3.1 Configuration Properties
Go to Properties > Units > Three Lines in the box.
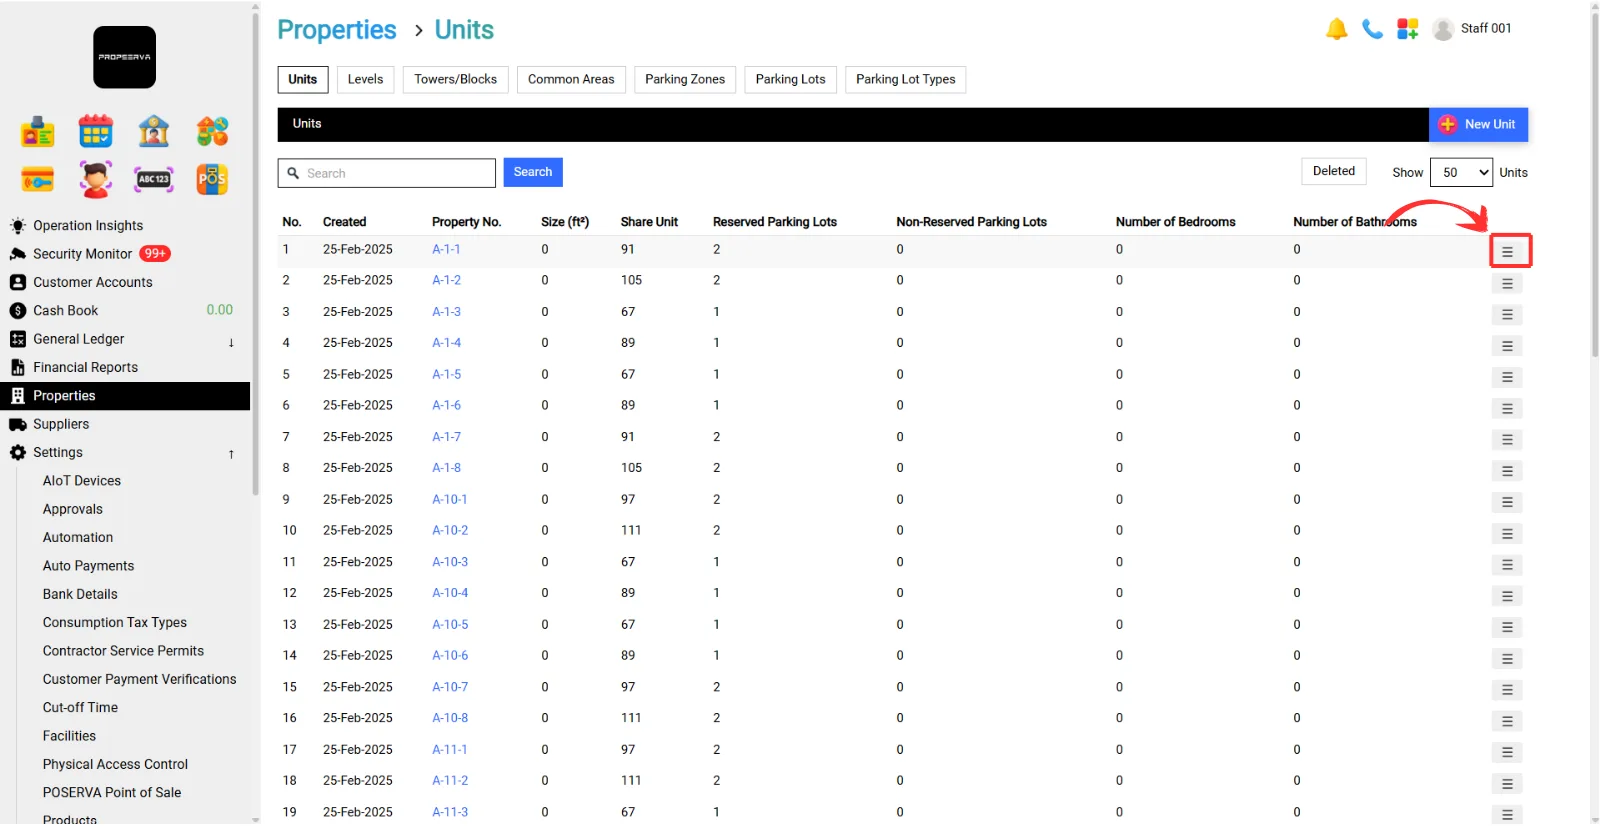
Step 1
Tick, “Default UltraPASS-Face Settings for Main and Sub User Accounts”
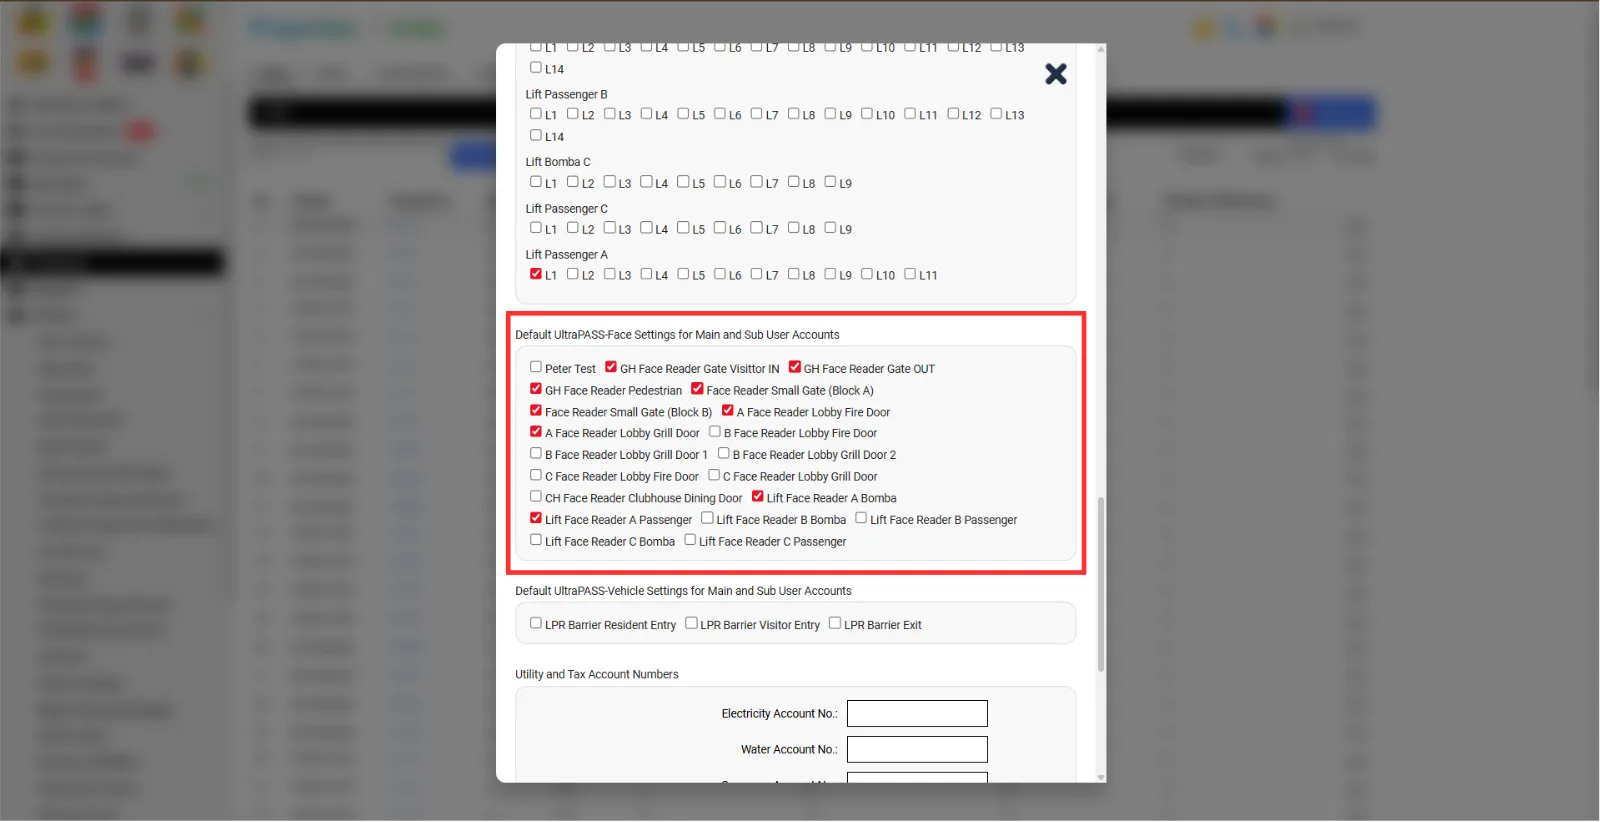
Note: Please tick which one the unit uses for door access.
3.2 SuperPass-Door
Go to Setting > AIoT Devices > SuperPAss-Door
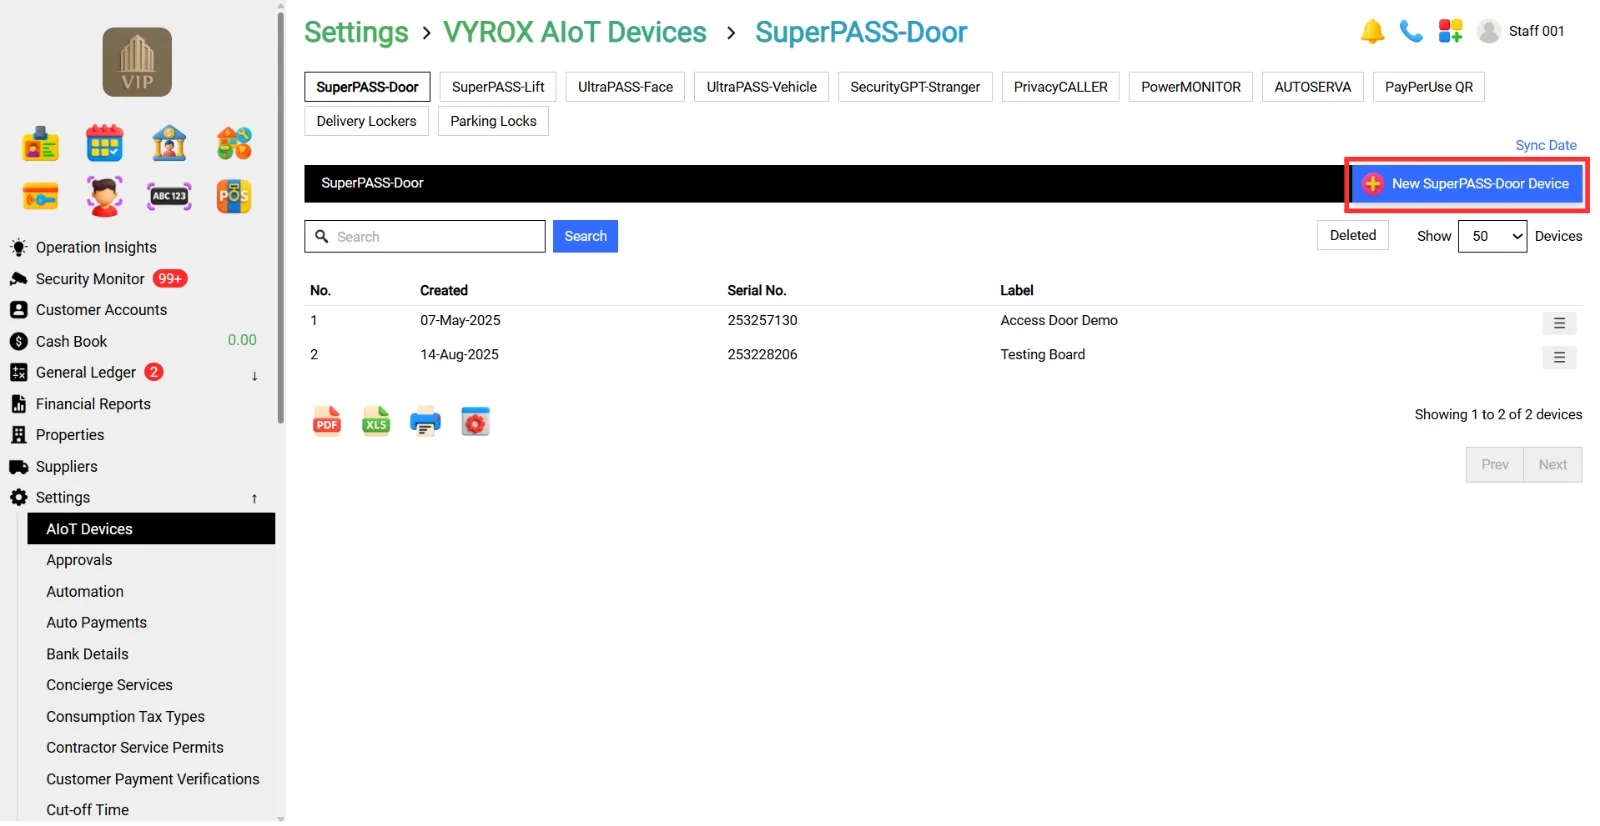
Details include:
- SuperPass-Door Controller Name
- Number of Doors Supported
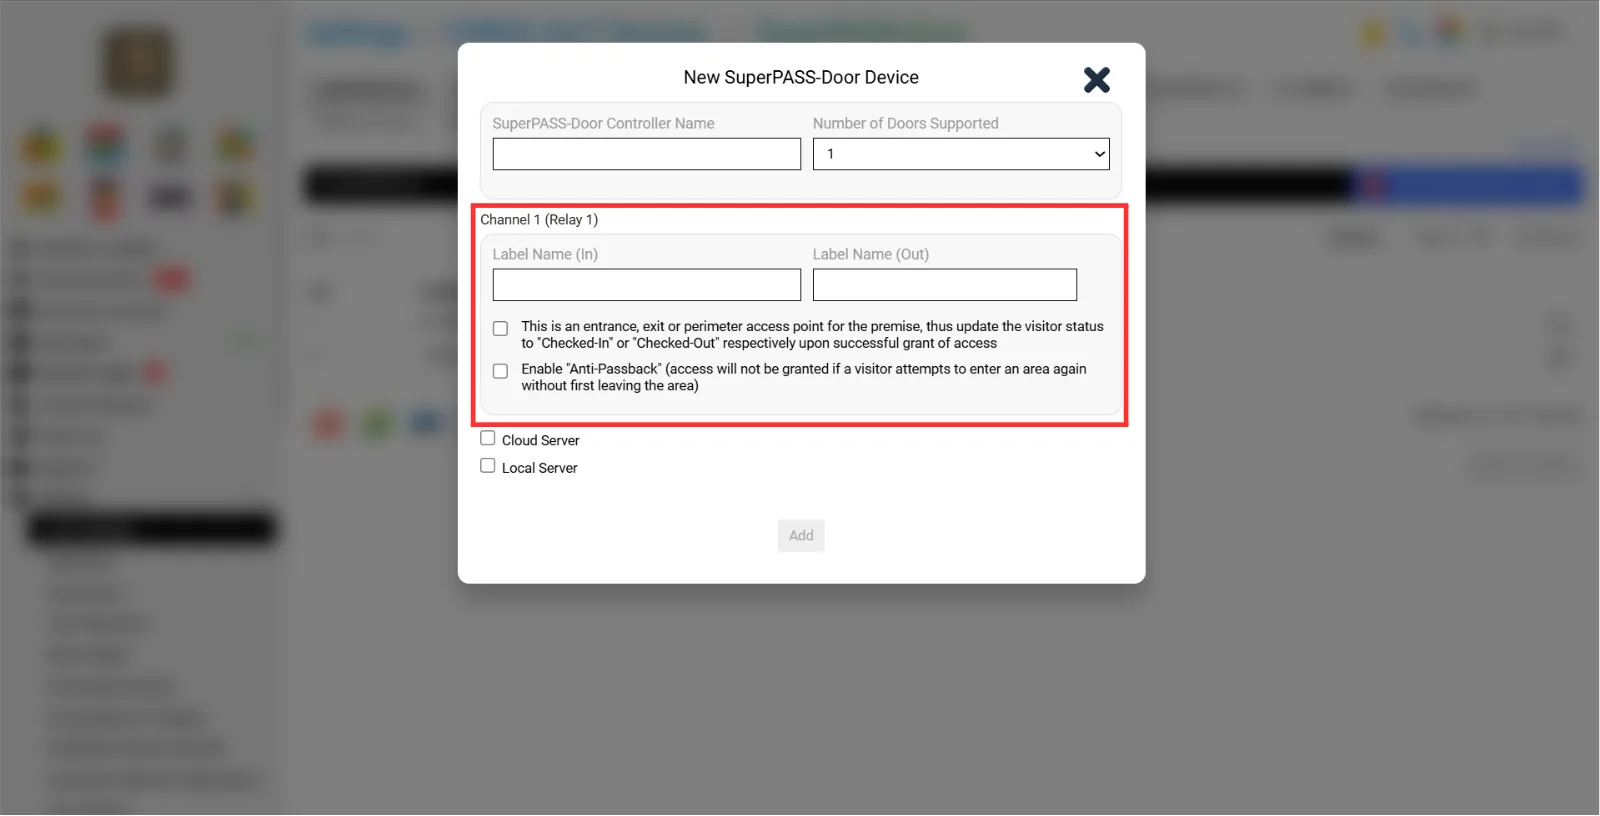
- Label Name in Channel
- Cloud Server
- Cloud Server API Key
- SuperPASS-Door Controller Serial Number
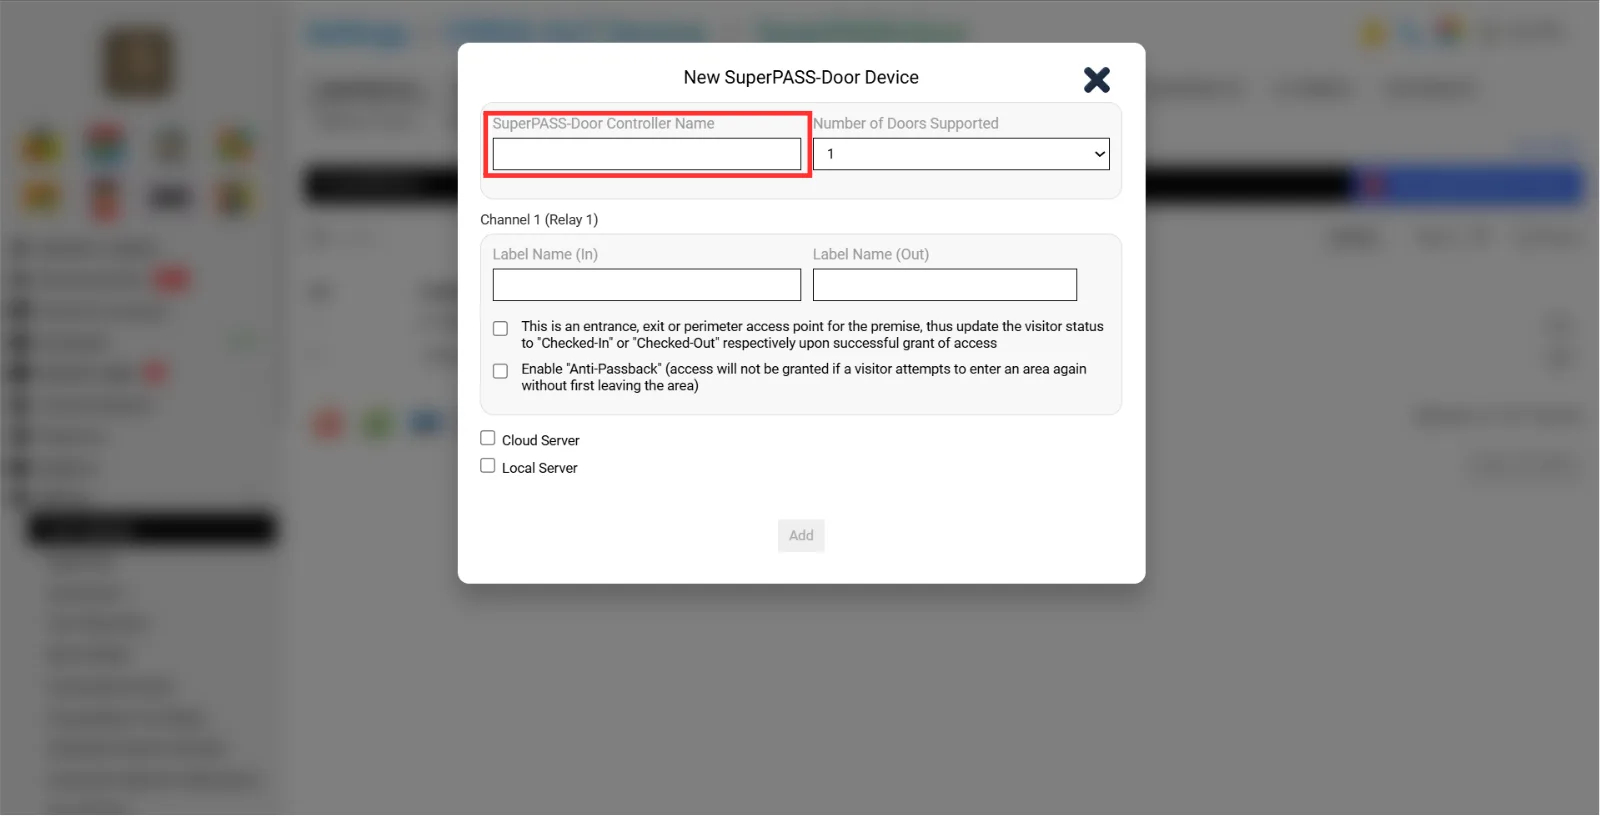
Step 1:
Fill in the blank. “SuperPass-Door Controller Name”
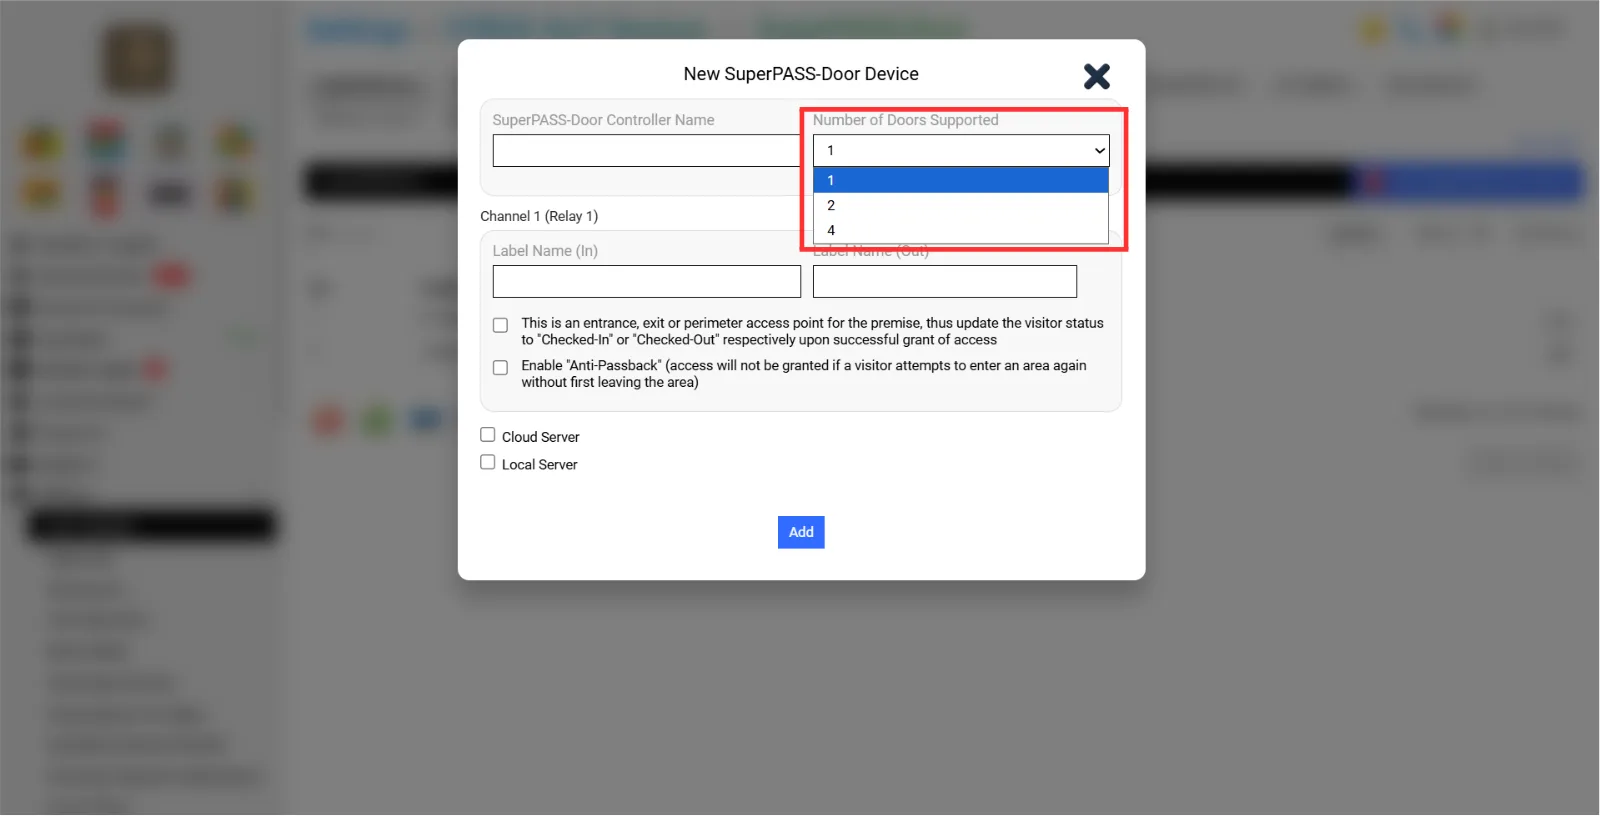
Step 2:
Select “Number of Doors Supported”
Step 3:
Fill in the Blank “Label Name in Channel”
Step 4: Tick Cloud Server and Fill in the blank “Cloud Server API Key & SuperPASS-Door Controller Serial Number”.
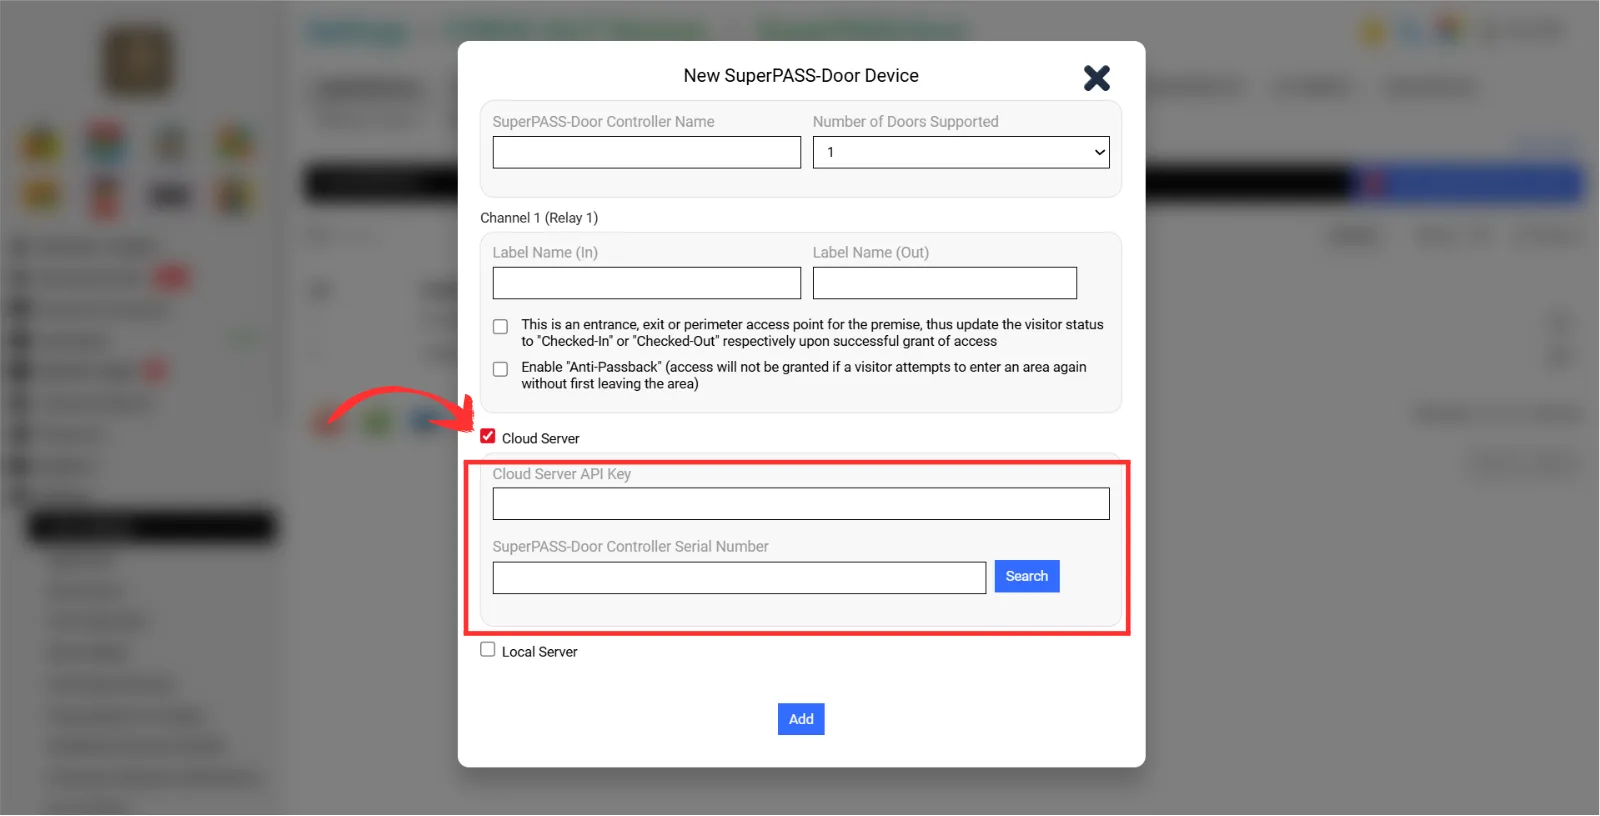
After done keying in all information, Click “Add”
3.3 SuperPass-Lift
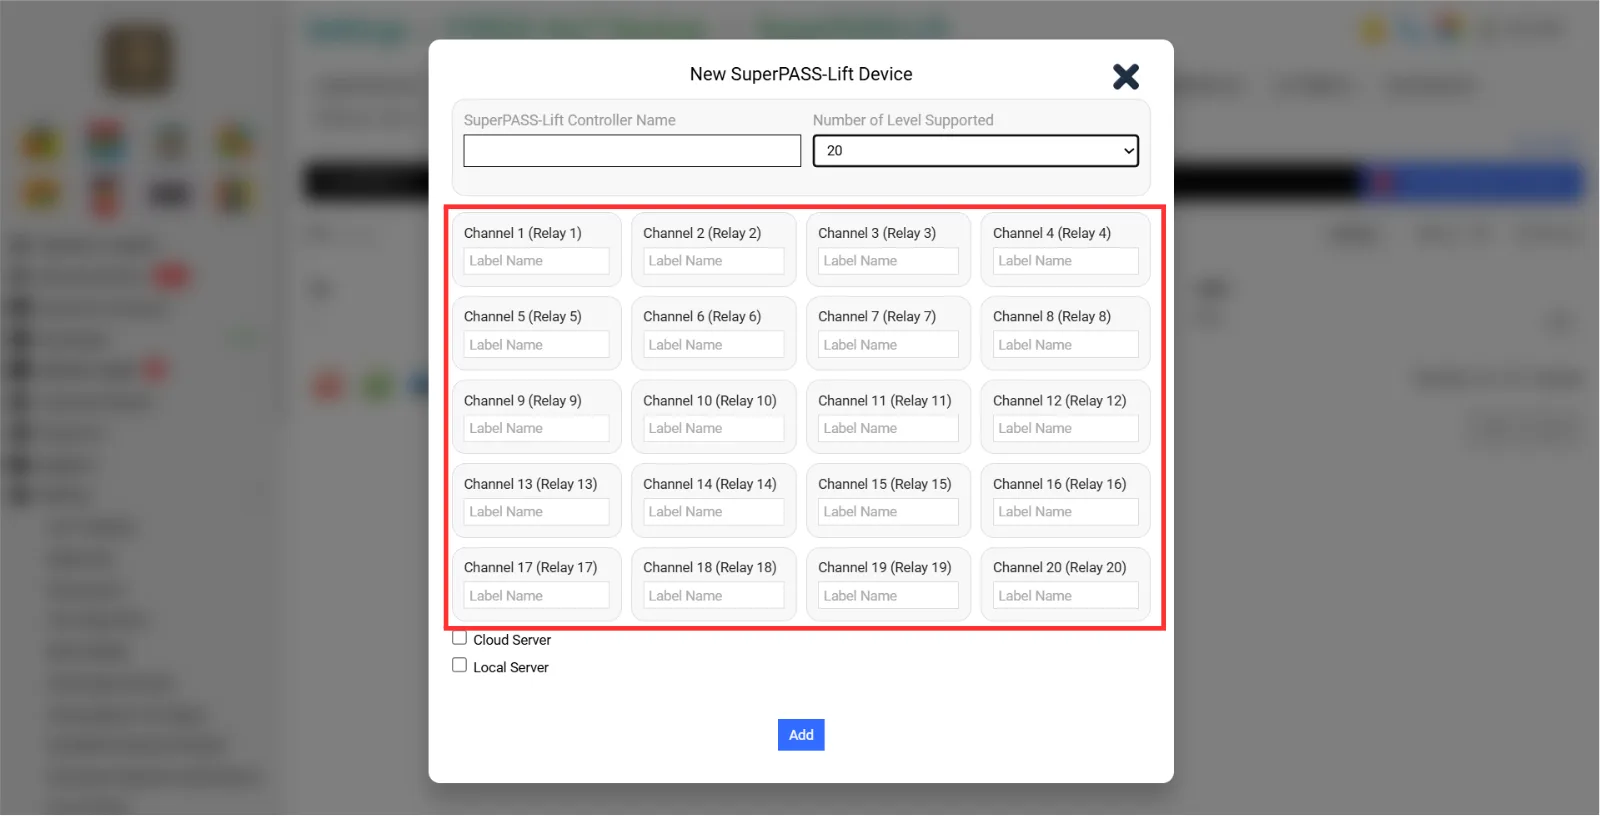
Go to Setting > AIoT Devices > SuperPAss-Lift
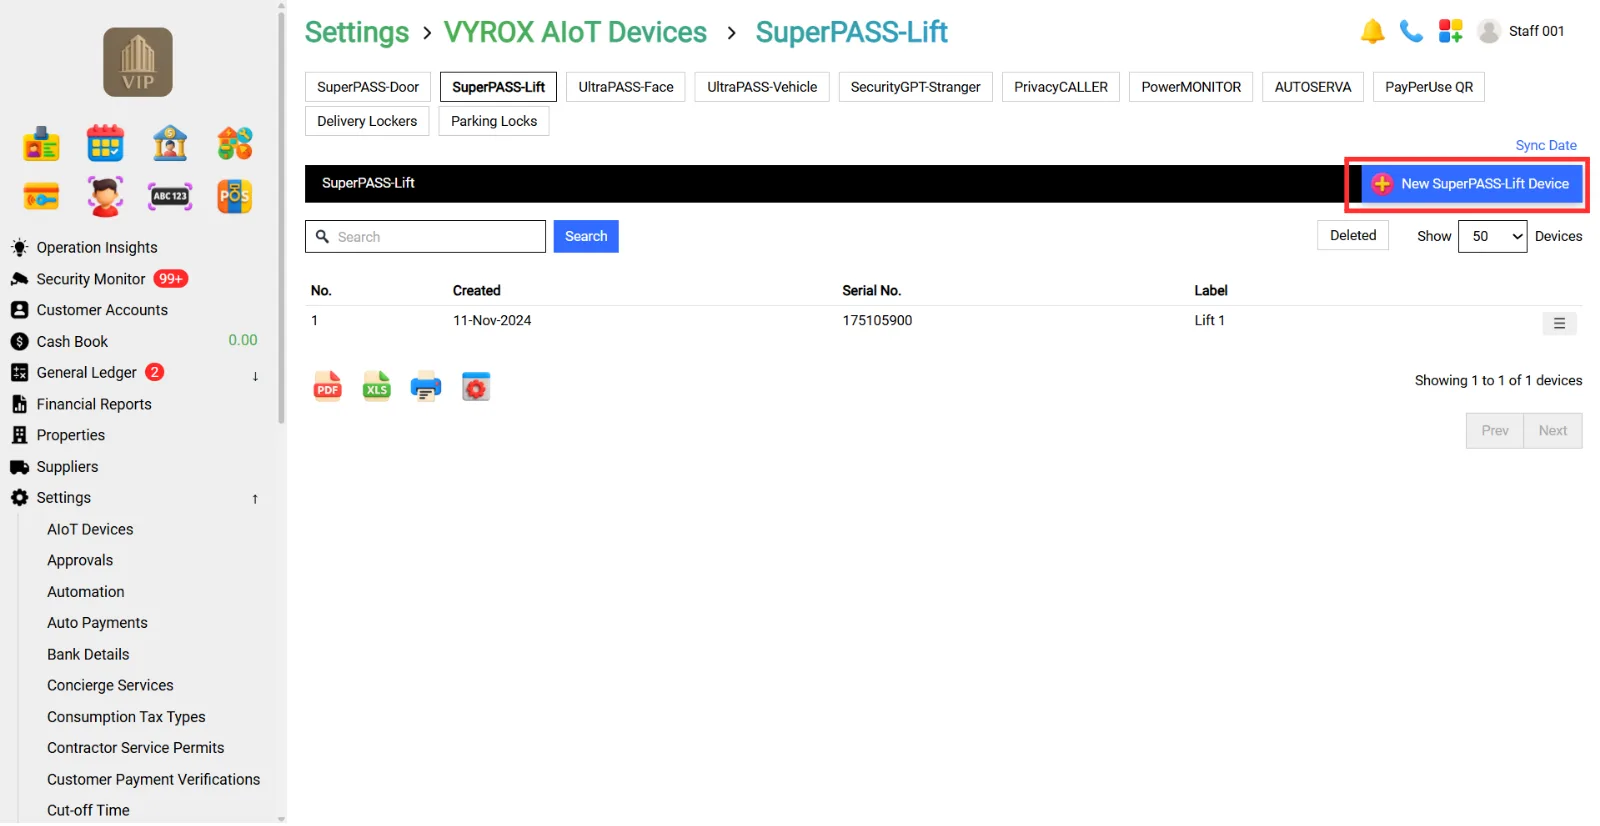
Details include:
- SuperPass-Lift Controller Name
- Number of Level Supported
- Label Name in Channel
- Cloud Server
- Cloud Server API Key
- SuperPASS-Lift Controller Serial Number
Step 1:
Fill in blank “SuperPass-Lift Controller Name”
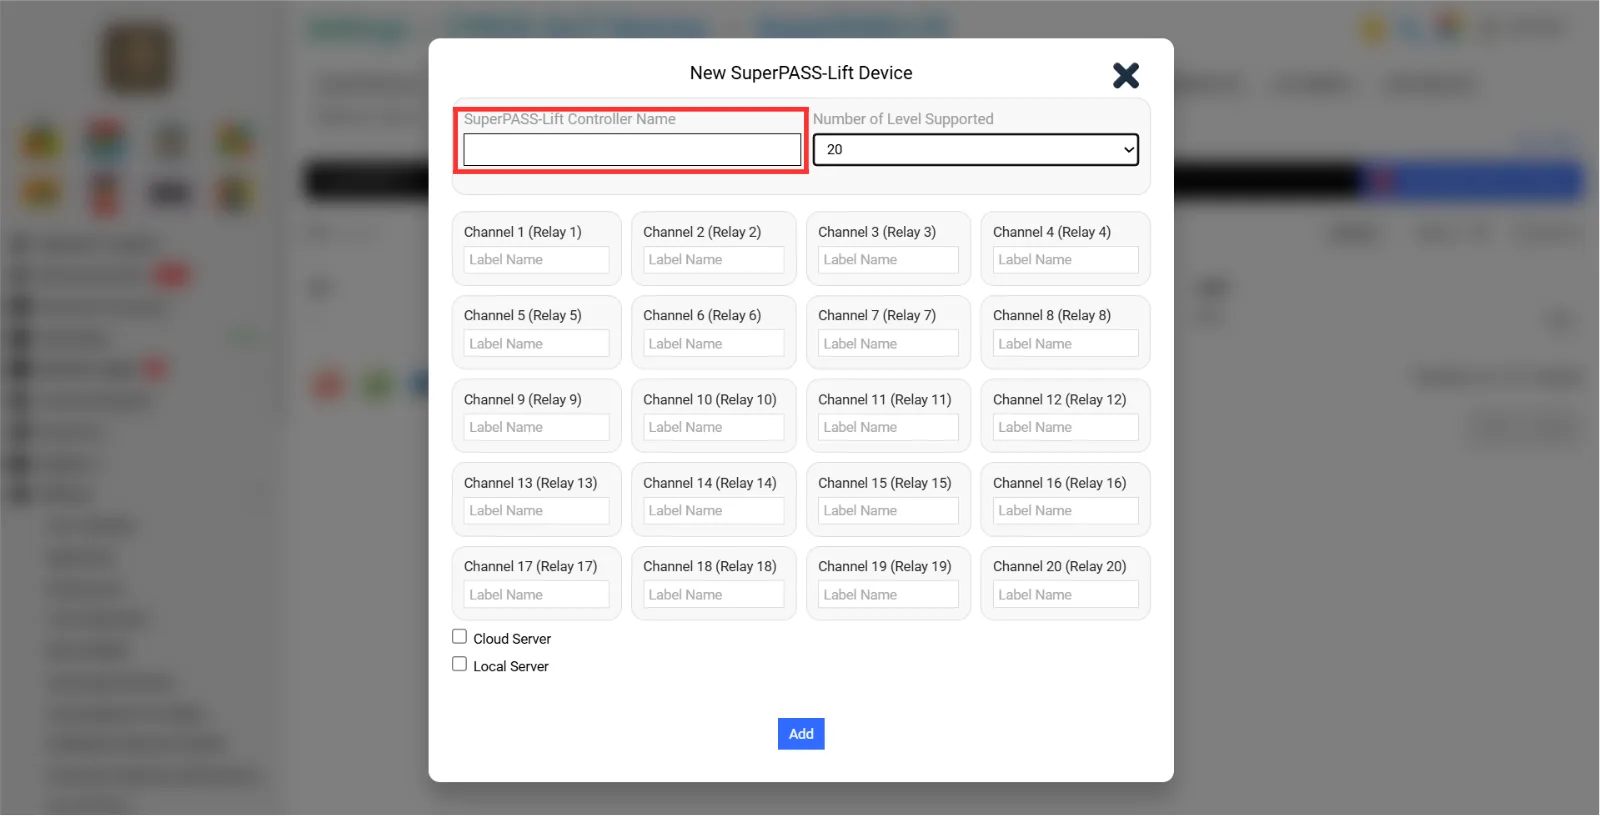
Step 2:
Select “Number of Level Supported”
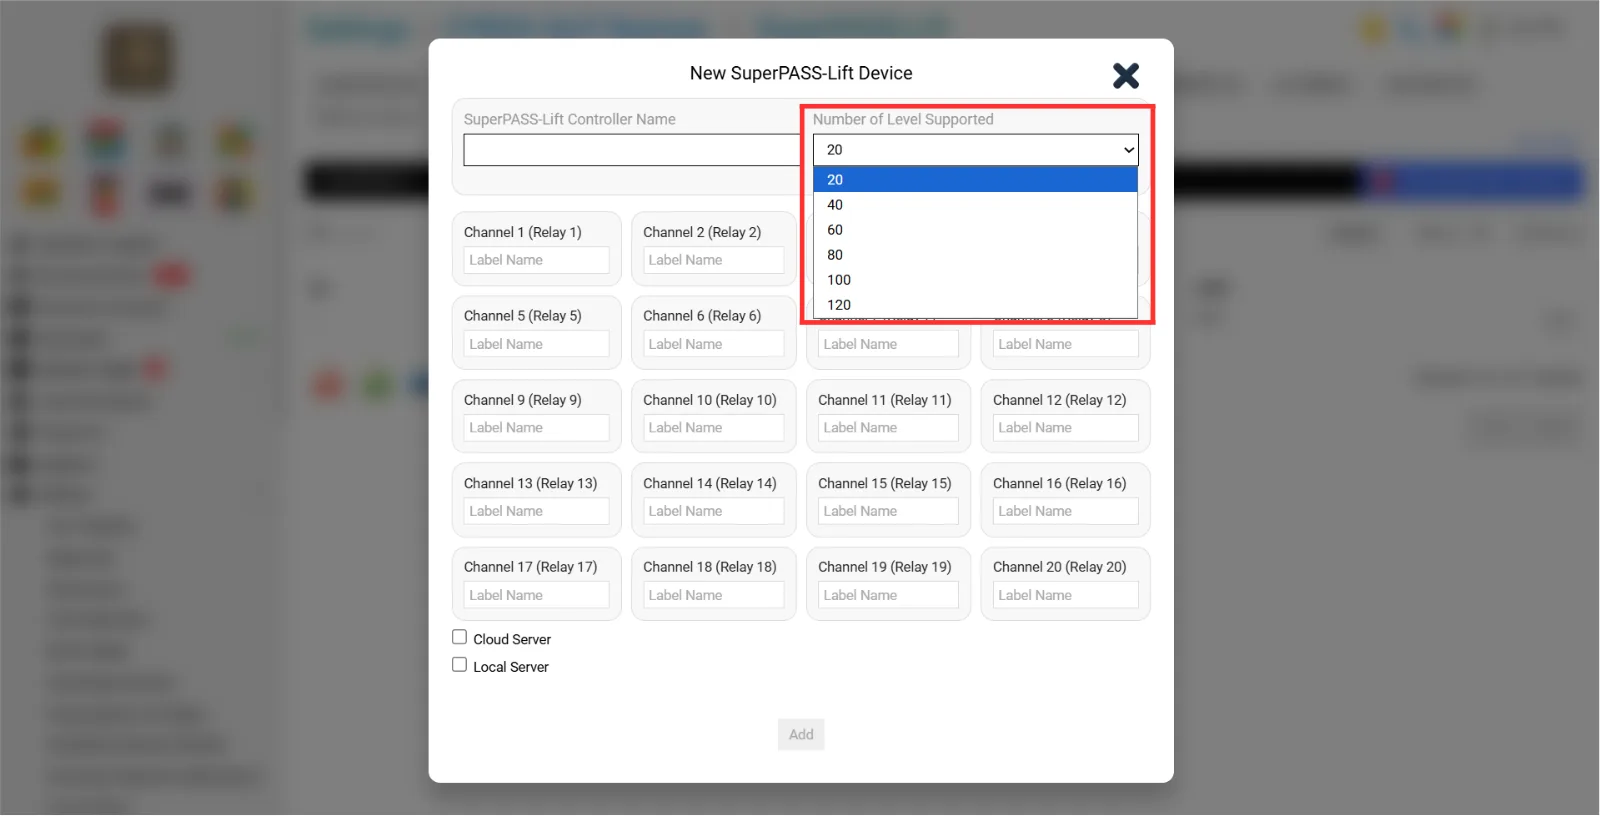
Step 3:
Fill in the Blank “Label Name in Channel”
Step 4: Tick Cloud Server and Fill in the blank “Cloud Server API Key & SuperPASS-Door Controller Serial Number”.
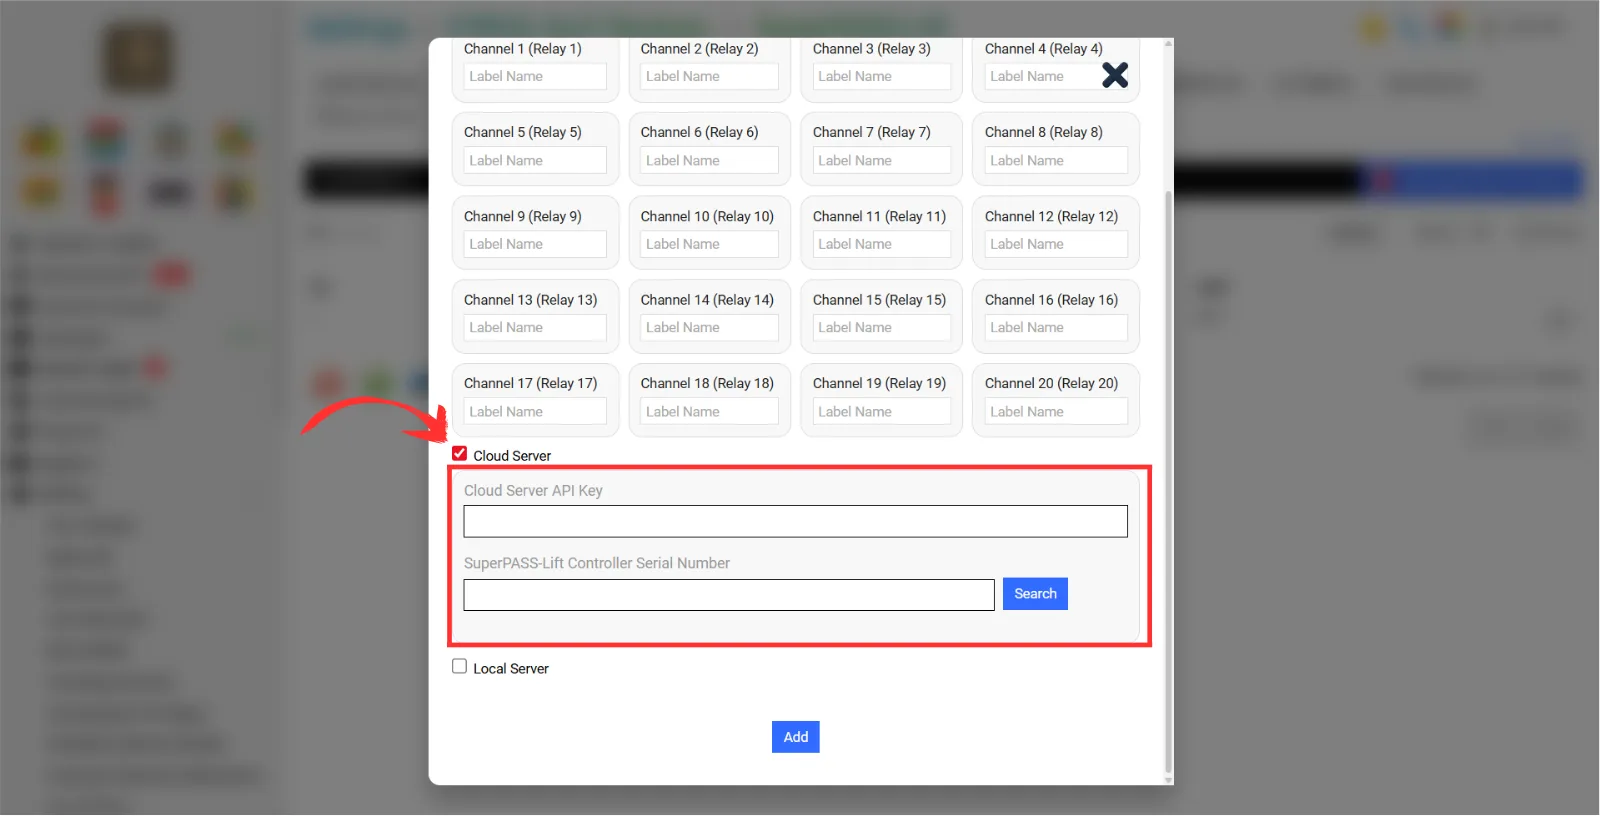
After done keying in all information, Click “Add”