VYROX Very Intelligent Platform (VIP)
E-Invoicing (LHDN MyInvois) in VYROX VIP
Introduction
VYROX Very Intelligent Platform (VIP) E-invoicing provides a secure, effective, and eco-friendly substitute for conventional paper-based invoices by streamlining invoice handling digitally. LHDNM's MyInvois Portal is a specialised platform that offers free digital invoicing services for Malaysian companies, particularly MSMEs. This introduction highlights the possibilities and intuitive features of the portal, which was created especially to make the e-invoicing process easier. Staff can effectively browse, create, and manage electronic invoices using VYROX VIP thanks to this comprehensive tutorial.
1. Set Up E-Invoice
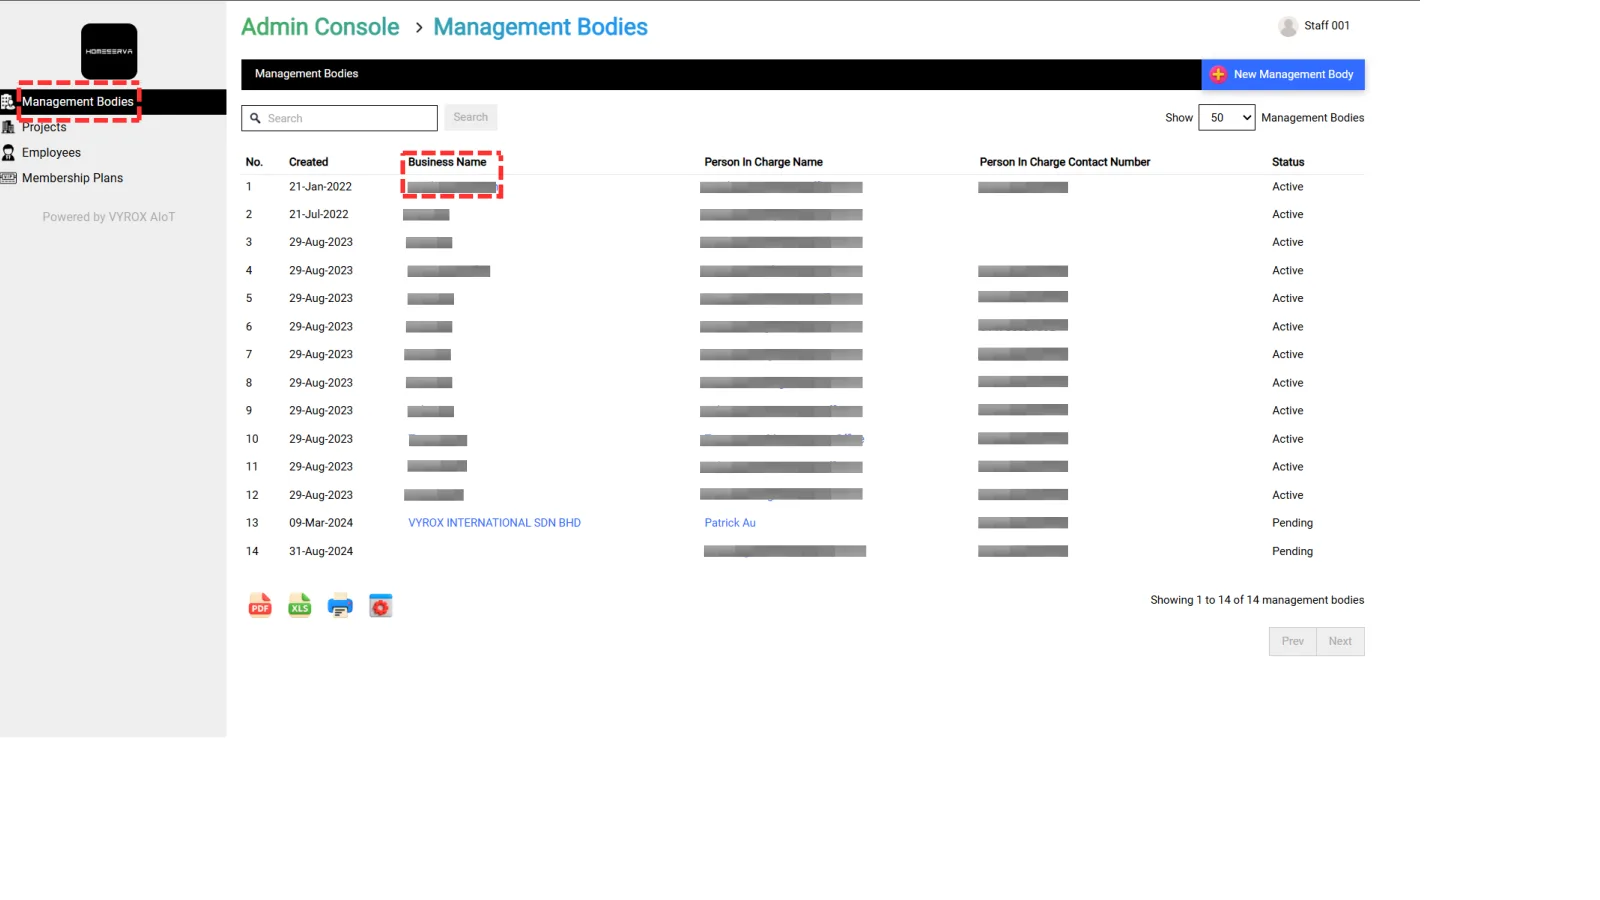
1.1 Access Management Bodies
Go to Admin Console > Management Bodies > Select Business Name.
1.2 Integrate MyInvois
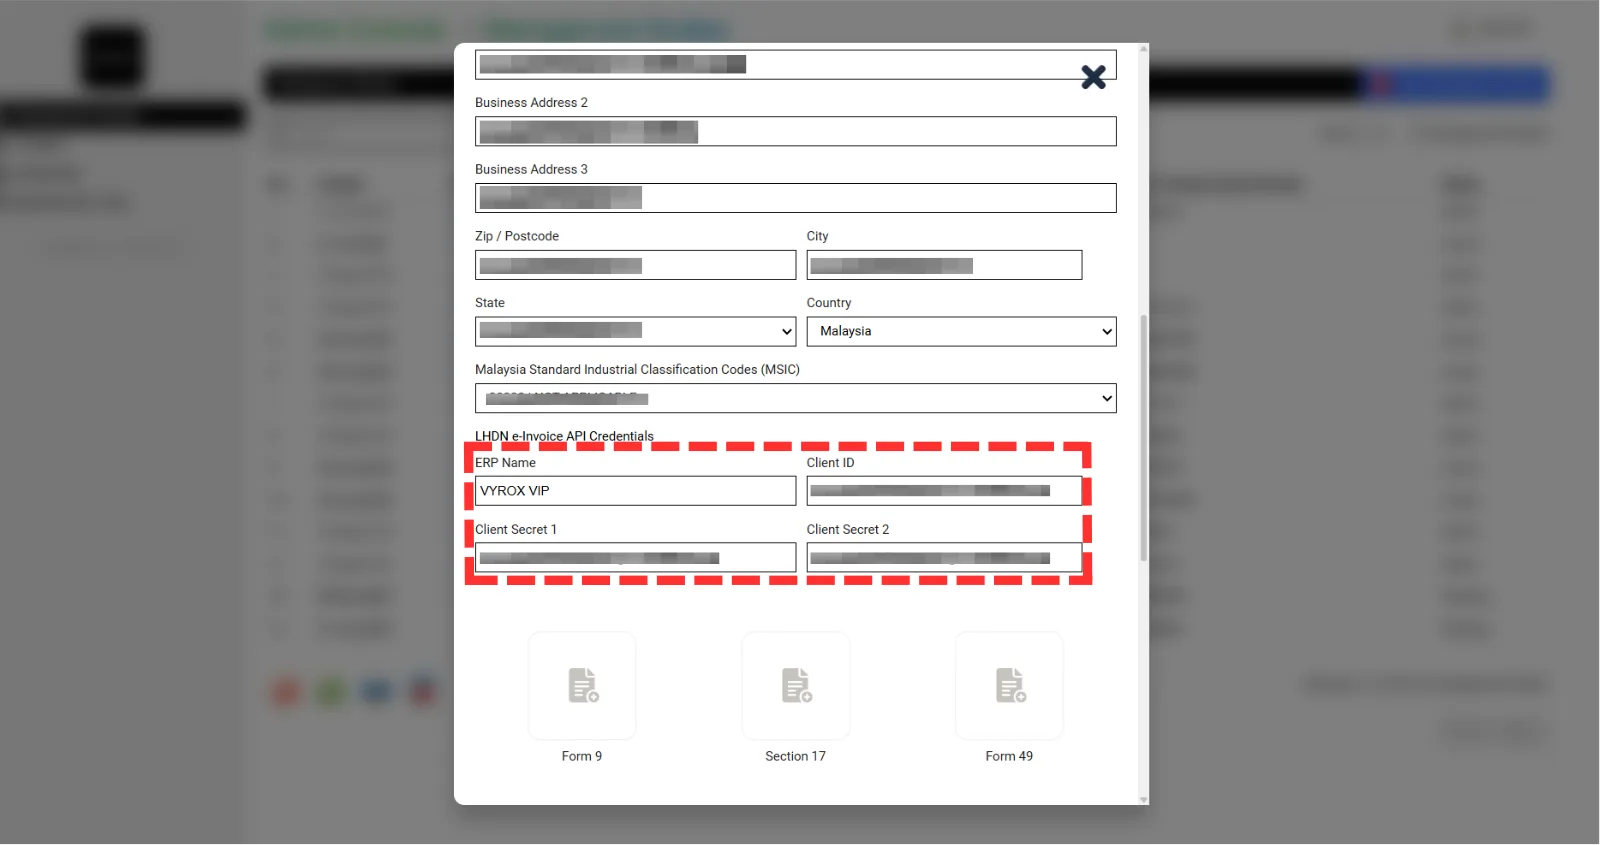
Click Edit > Fill in ERP Name, Client ID, Client Secret 1 and Client Secret 2
2. Set VYROX VIP as E-Invoice ERP
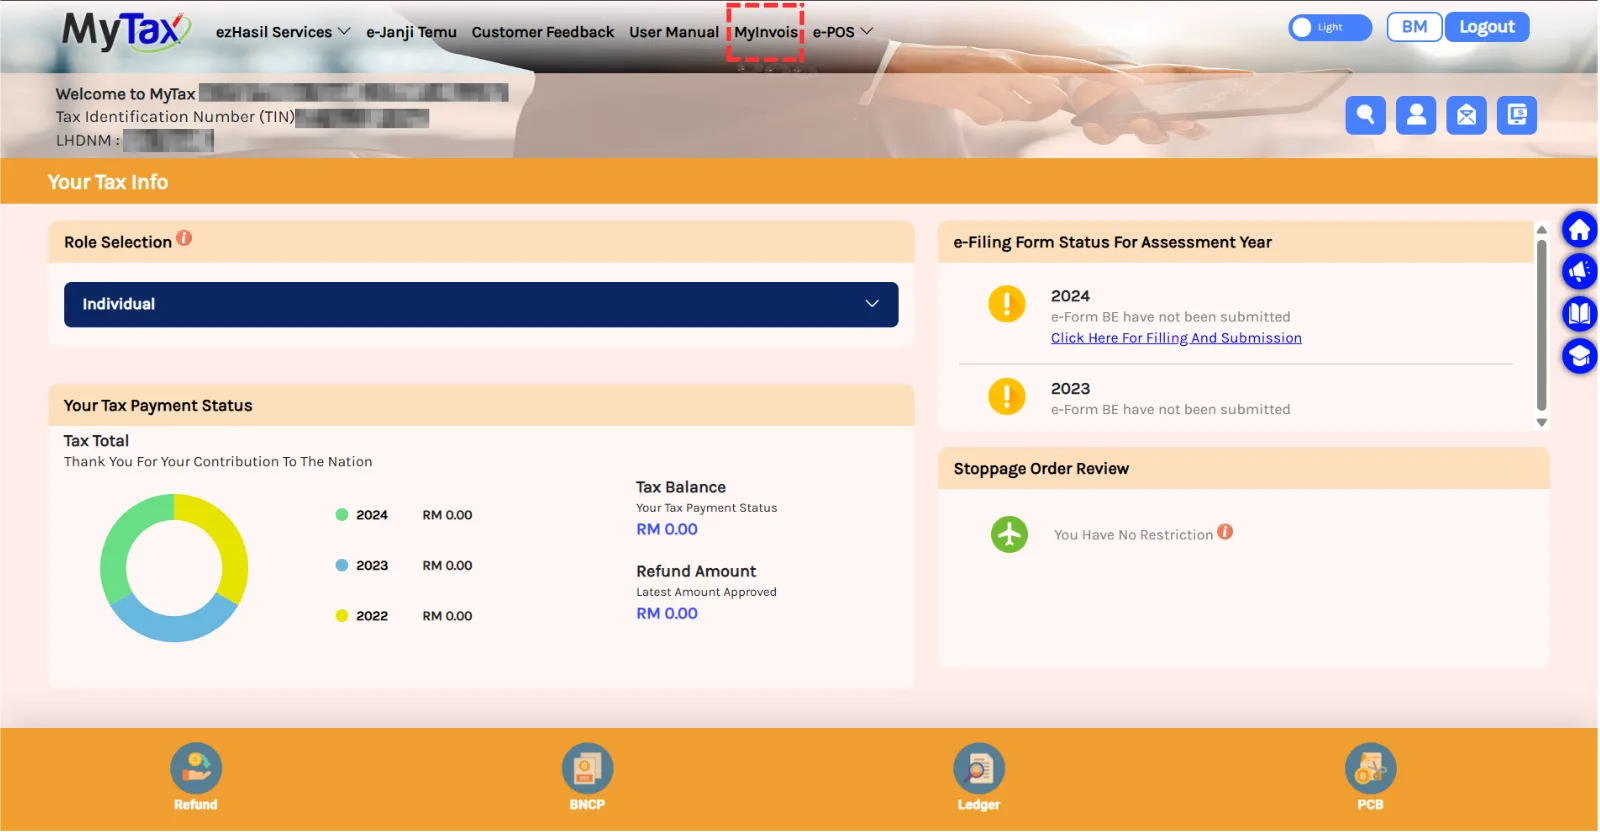
3.1 Go To MyInvois Website
Visit https://mytax.hasil.gov.my/ and click on MyInvois.
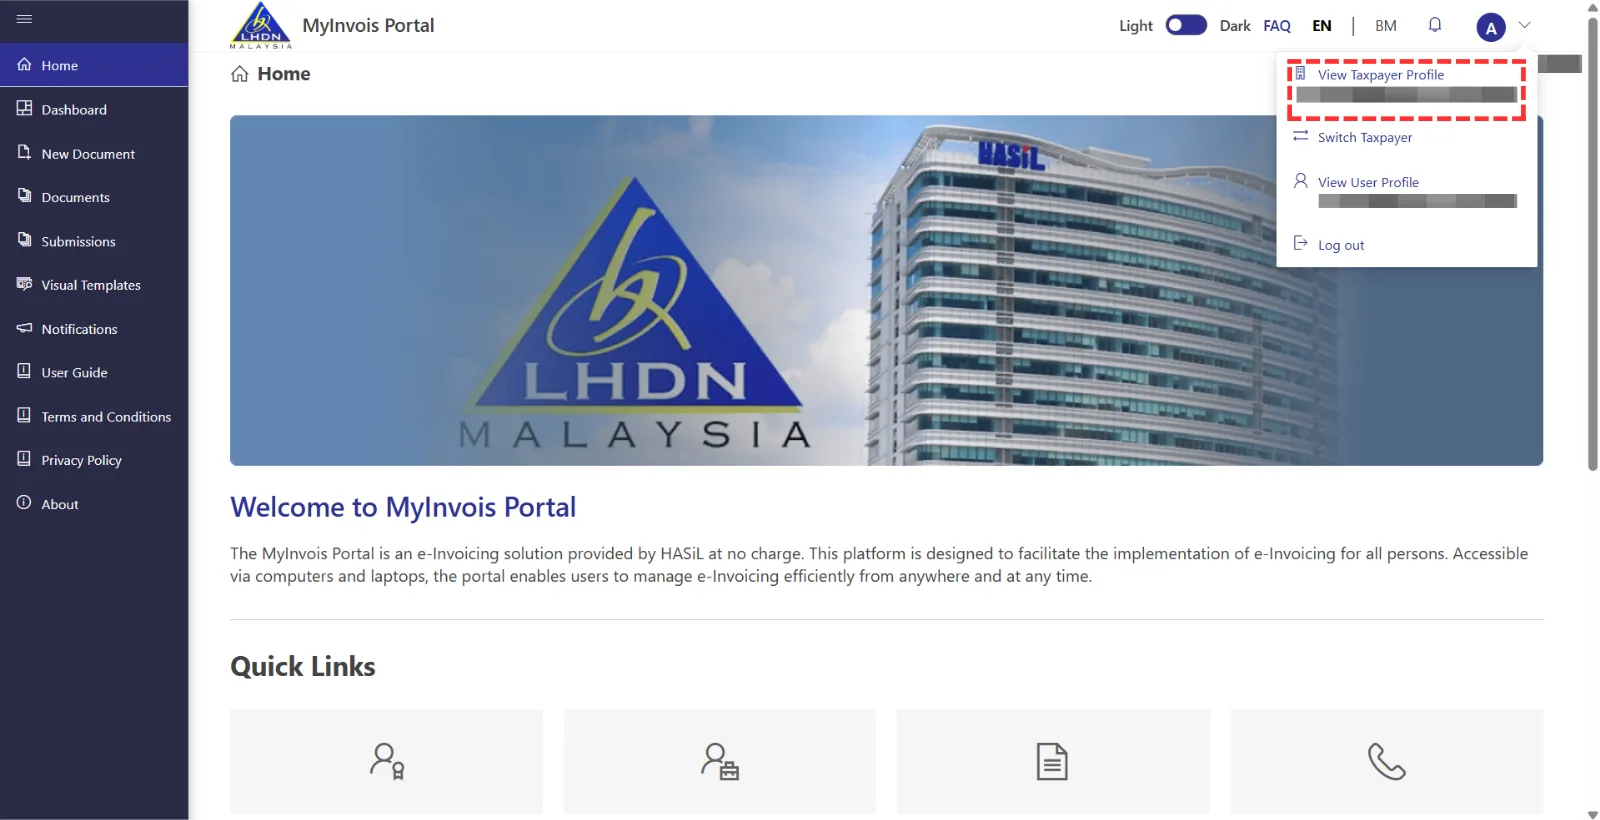
2.2 Go To Taxpayer Profile
Click on the profile icon located at the top right, then select "View Taxpayer Profile".
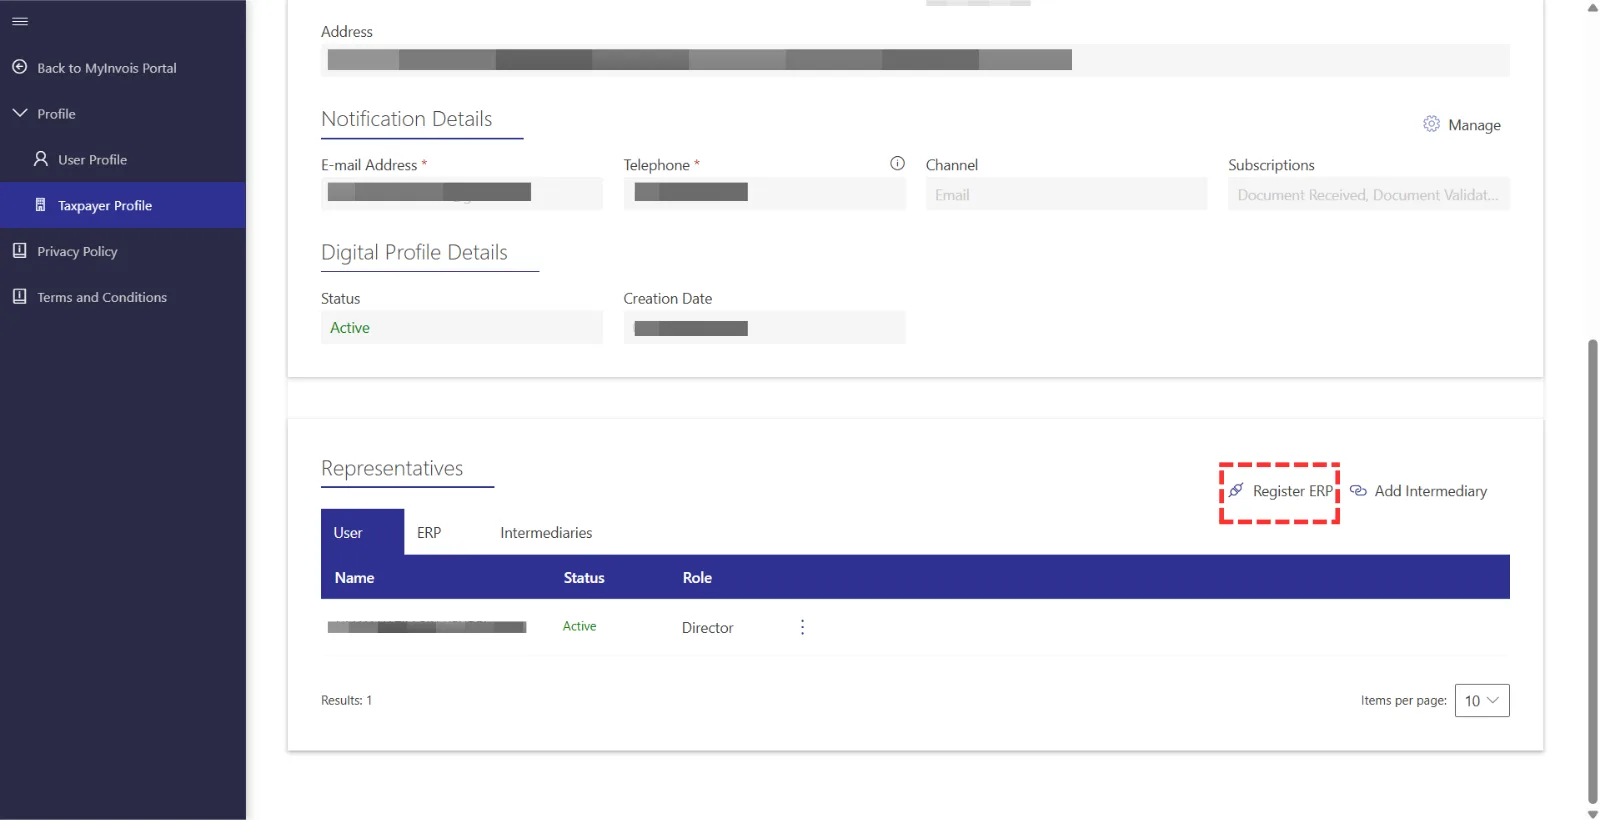
2.3 Register VYROX VIP
Scroll down to the "Register ERP" section and click on the "Register ERP" button.
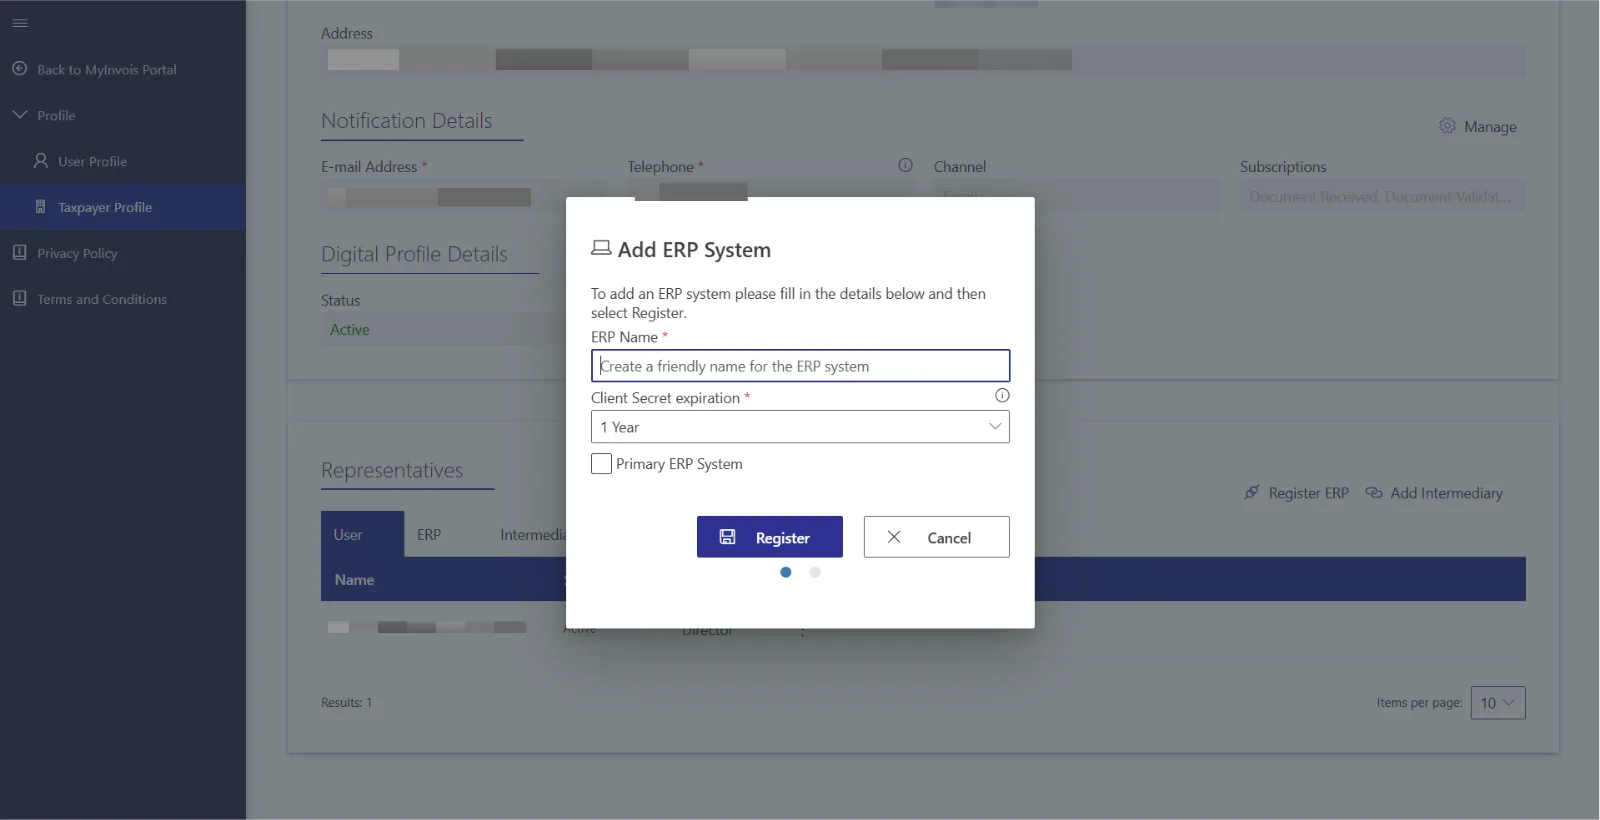
Enter an ERP name, like "VYROX Account ERP", and choose a secret expiration period, ideally three years. Set it as the primary ERP system and complete the registration.
2.4 Get the ID
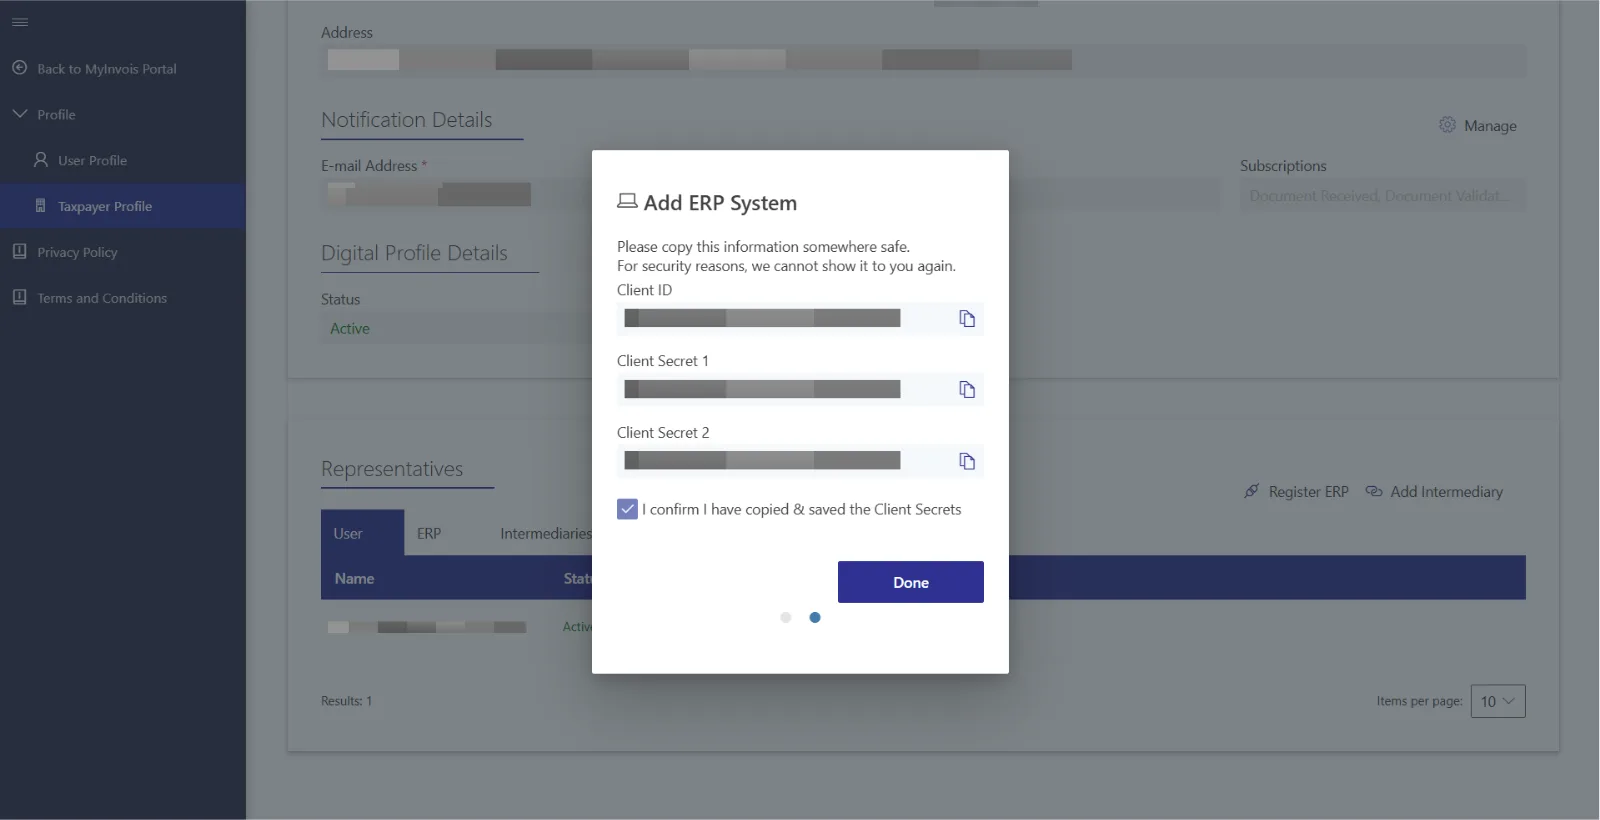
Please copy the Client ID, Secret 1, and Secret 2 individually and paste them at the step. Continue the step by inserting an e-invoice into VYROX VIP.
Note: Company name, BRN, and TIN are required fields.
3. Create and Validate Individual E-Invoice (by Staff)
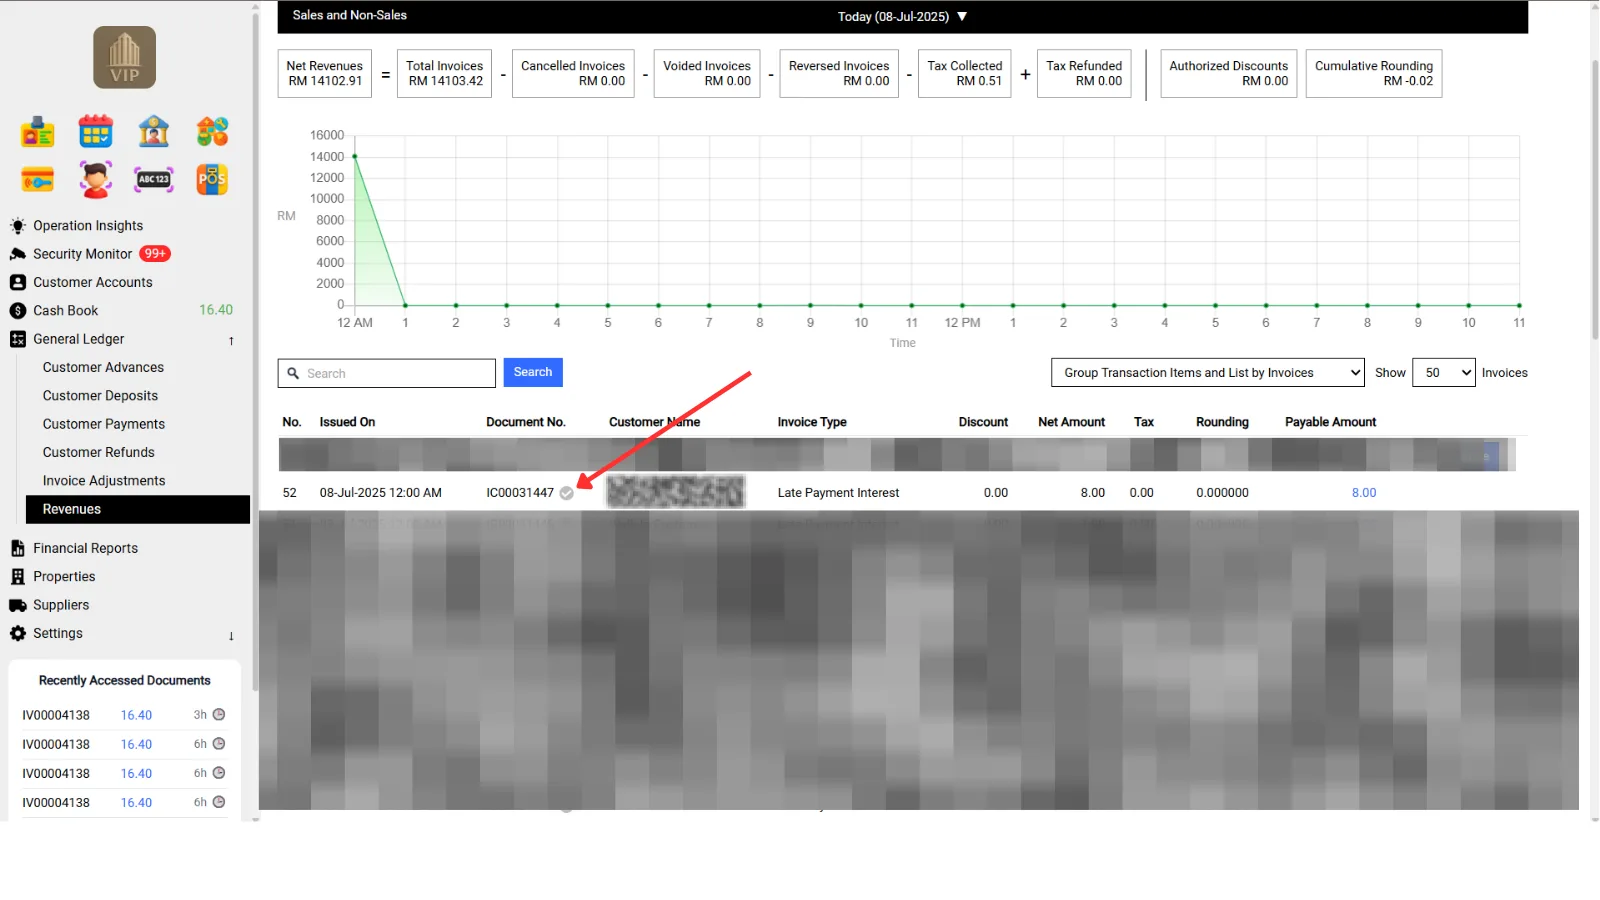
3.1 Staff Validate Individual Invoice
Click the icon at each document.
3.2 Fill In Customer Information
Enter the customer name, NRIC, TIN number, and address, then click on the "Confirm Submit e-invoice Validation" button.
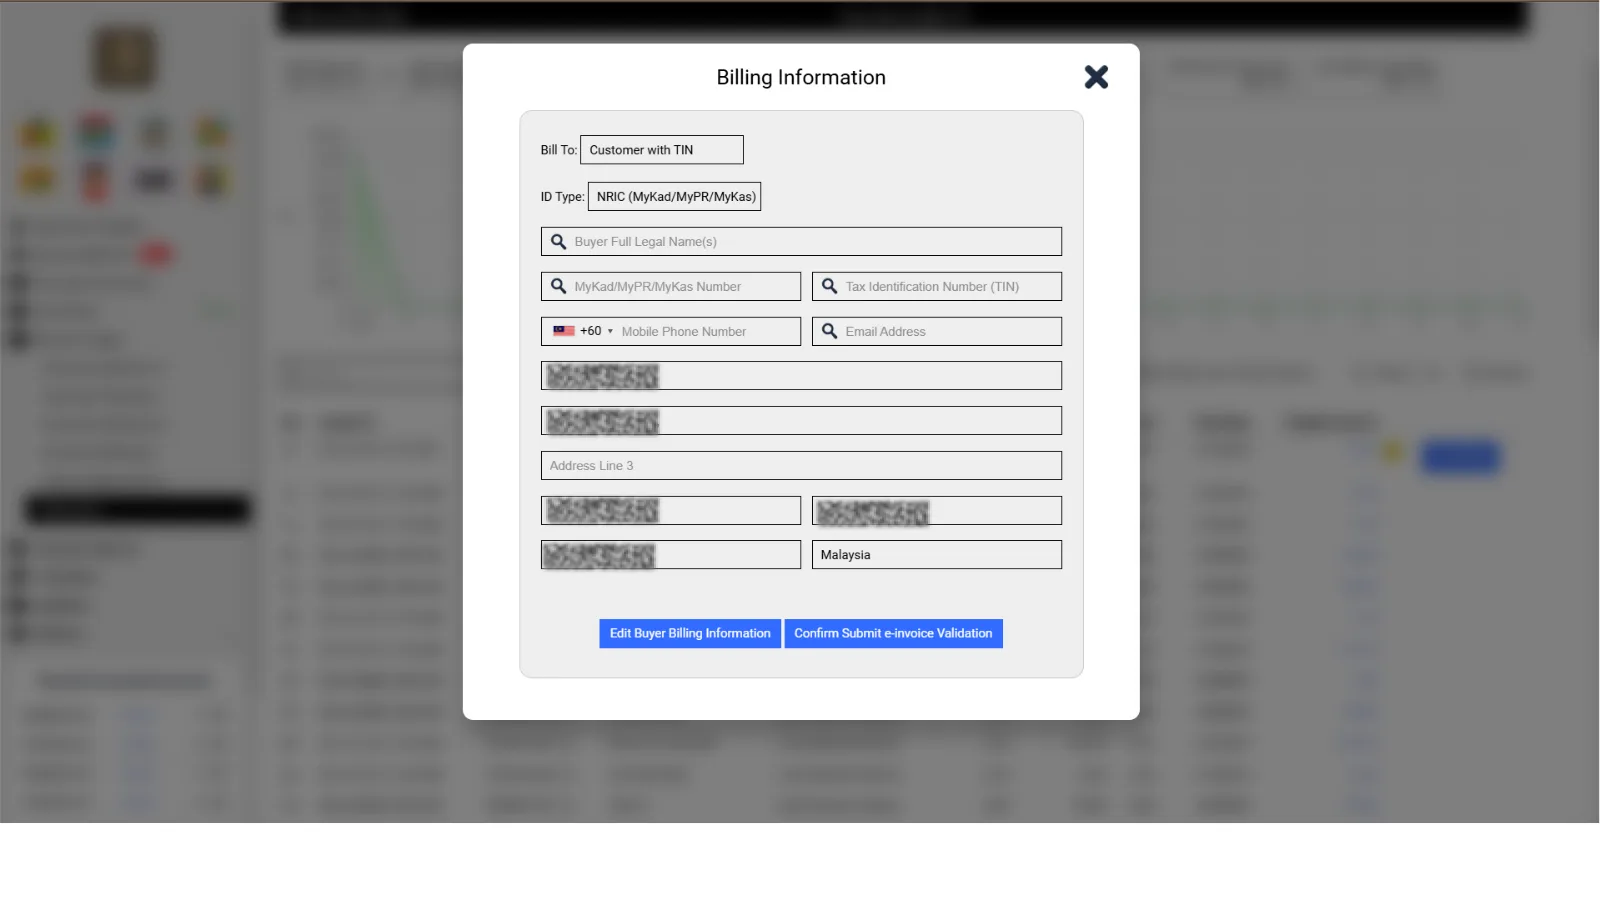
*Note: Grey checkmark: Not Submitted, green checkmark: Valid, Caution ⚠: invalid, Blue checkmark: Pending for LHDN verification
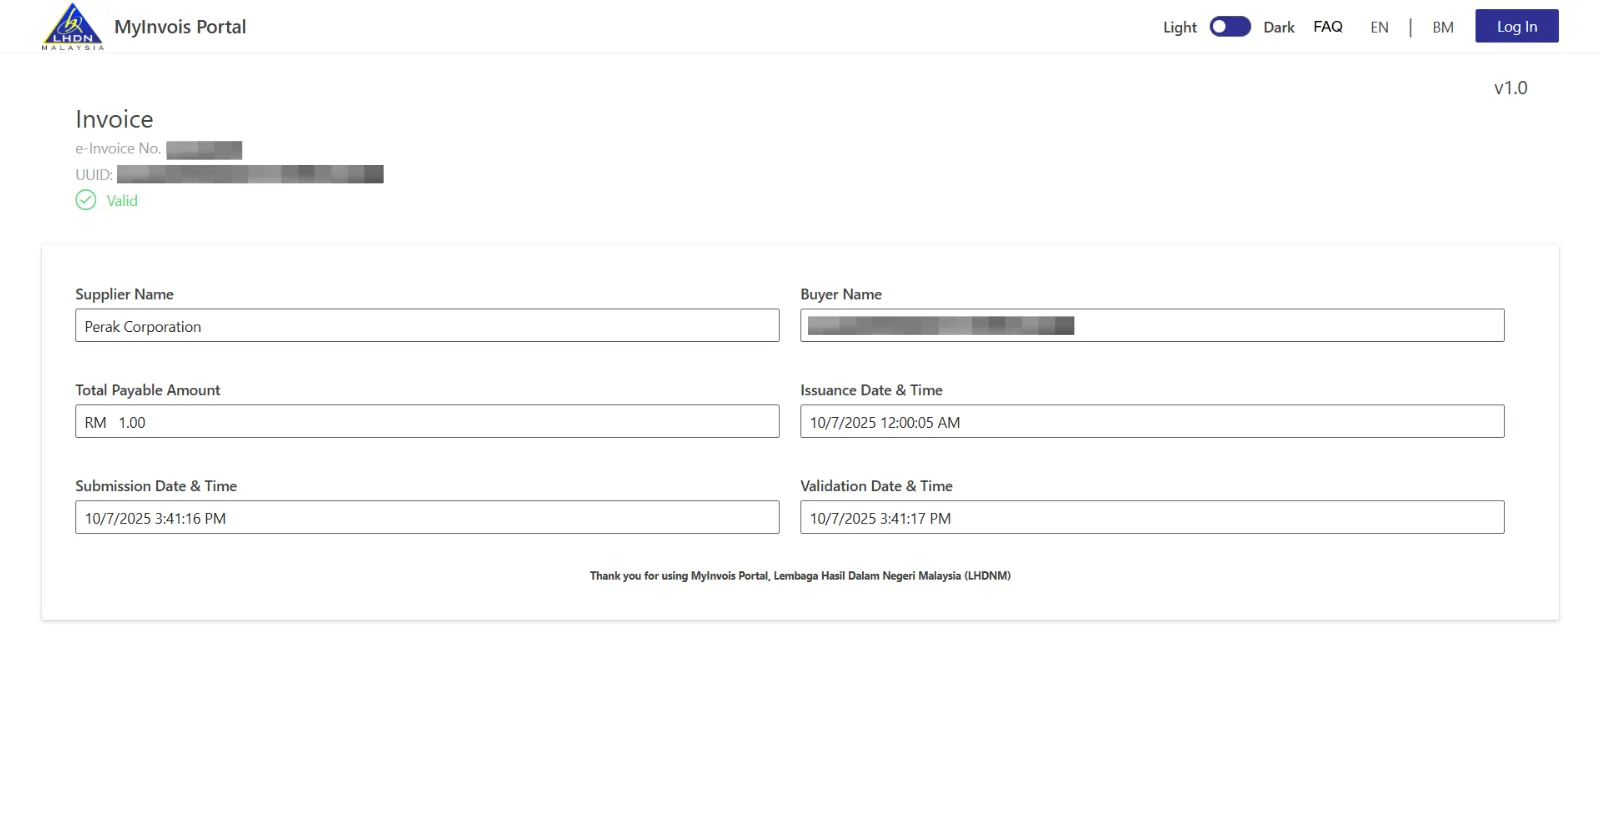
Upon completion of the submission process, select the green checkmark that will appear in the following manner.
4. Create and Validate Consolidated E-Invoice (by Staff)
4.1 Set up e-invoicing
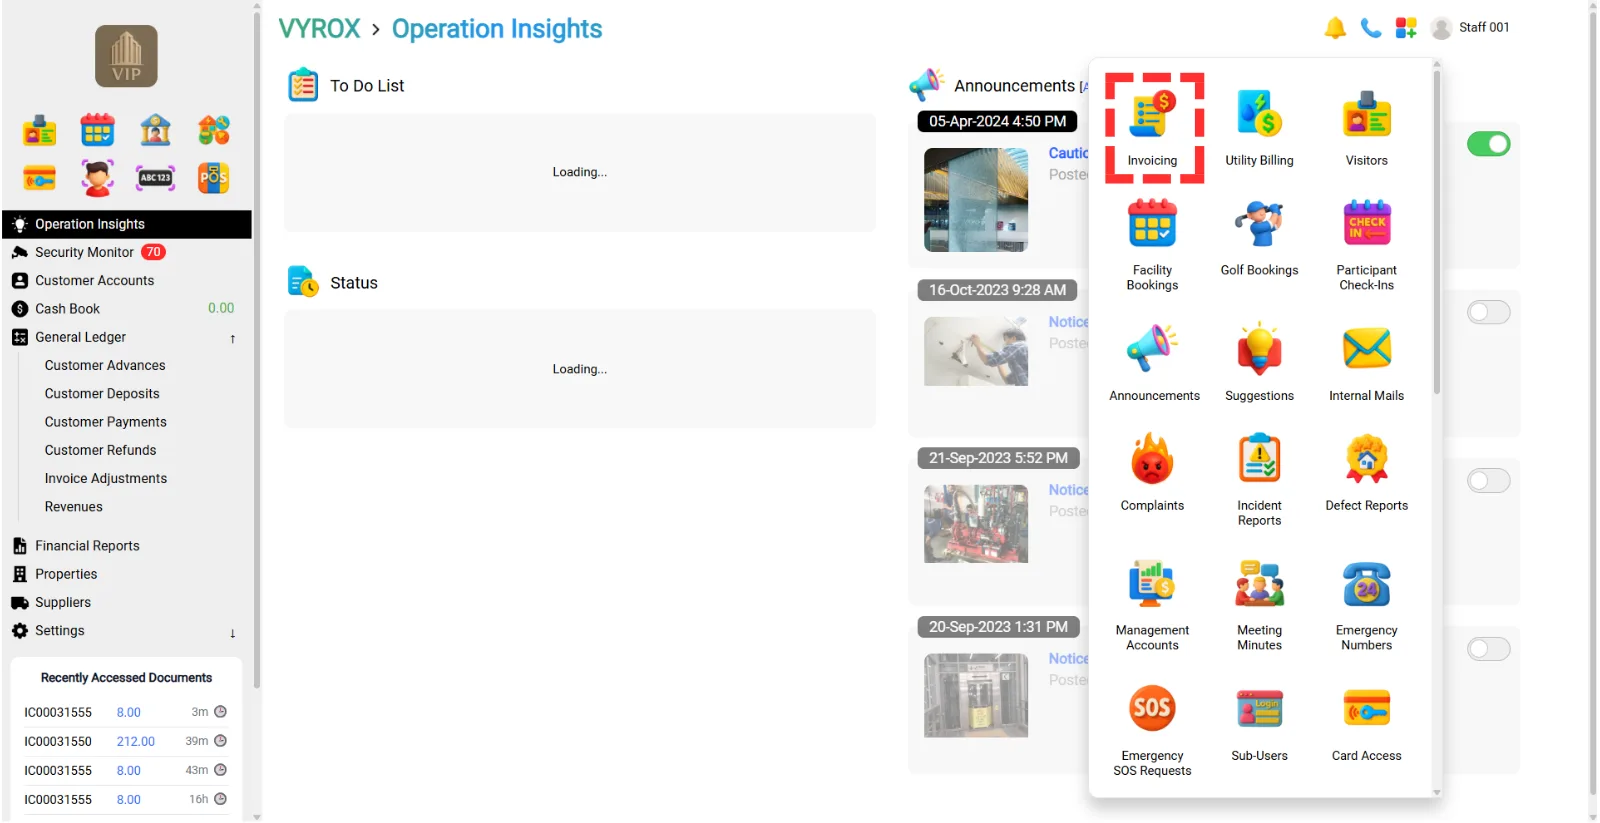
Configure your e-invoicing settings, including your company's tax information for MyInvois portal integration, according to VYROX VIP documentation > Click invoicing
4.2 Consolidate invoices
- In the browse screen, select the "New Consolidated E-invoice" function.
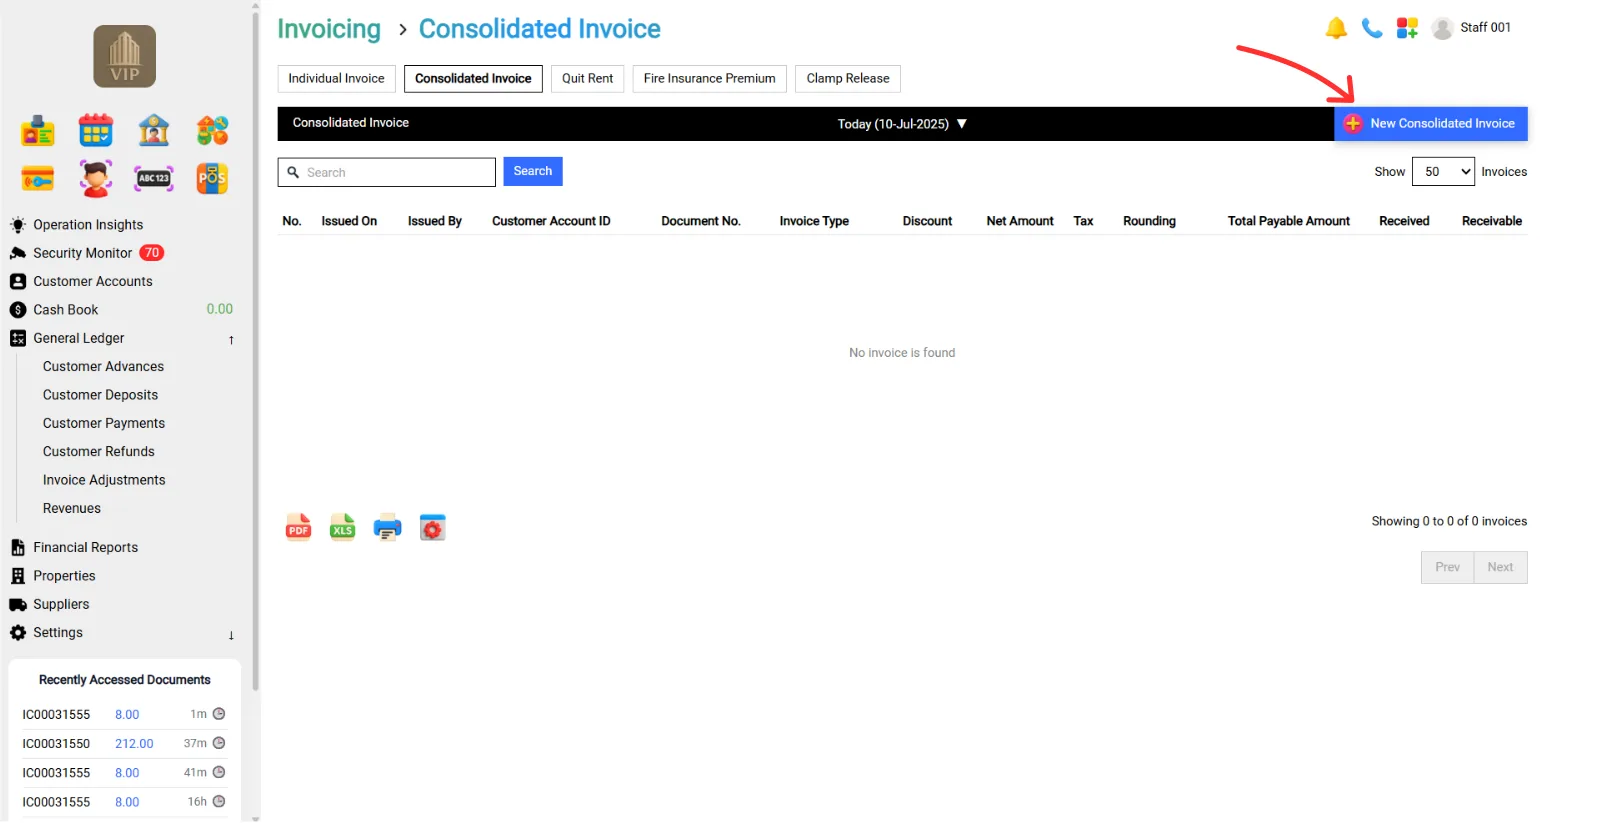
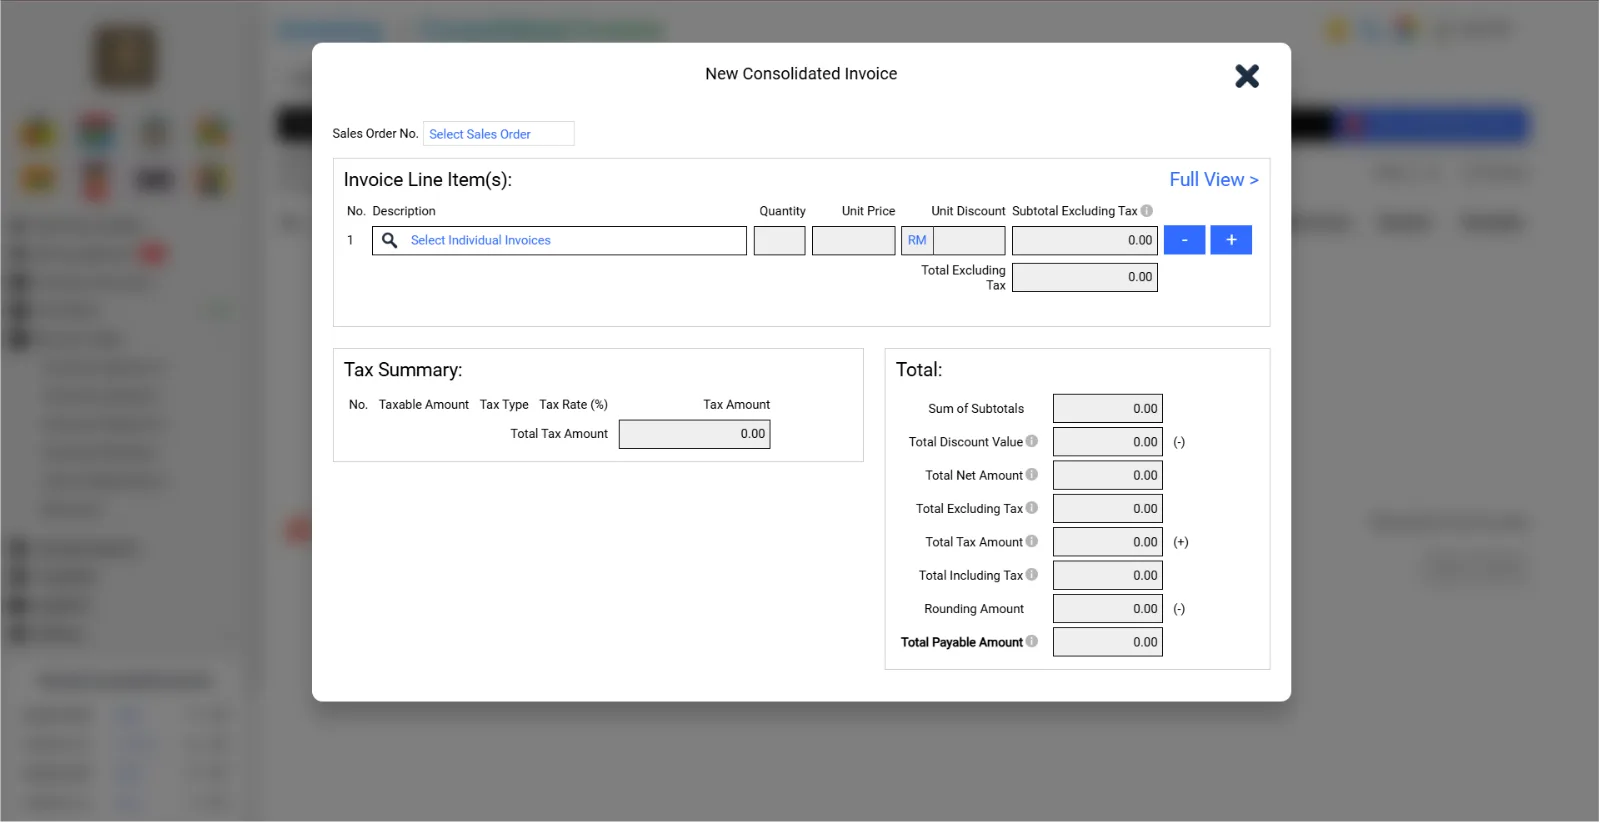
- Choose the relevant invoices for consolidation. Review the aggregated invoice details and click "submit".
Upon submission, the system will proceed to validate the consolidated e-invoice. The status of your e-invoices can be monitored within the VYROX VIP Account, indicating whether they are submitted, validated, invalid, or cancelled.
Upon validation, the supplier is required to provide the e-invoice to the buyer, typically incorporating a QR code. The buyer is able to use the QR code for invoice validation on the MyInvois portal.
5. Validate Individual E-Invoice (by Customer)
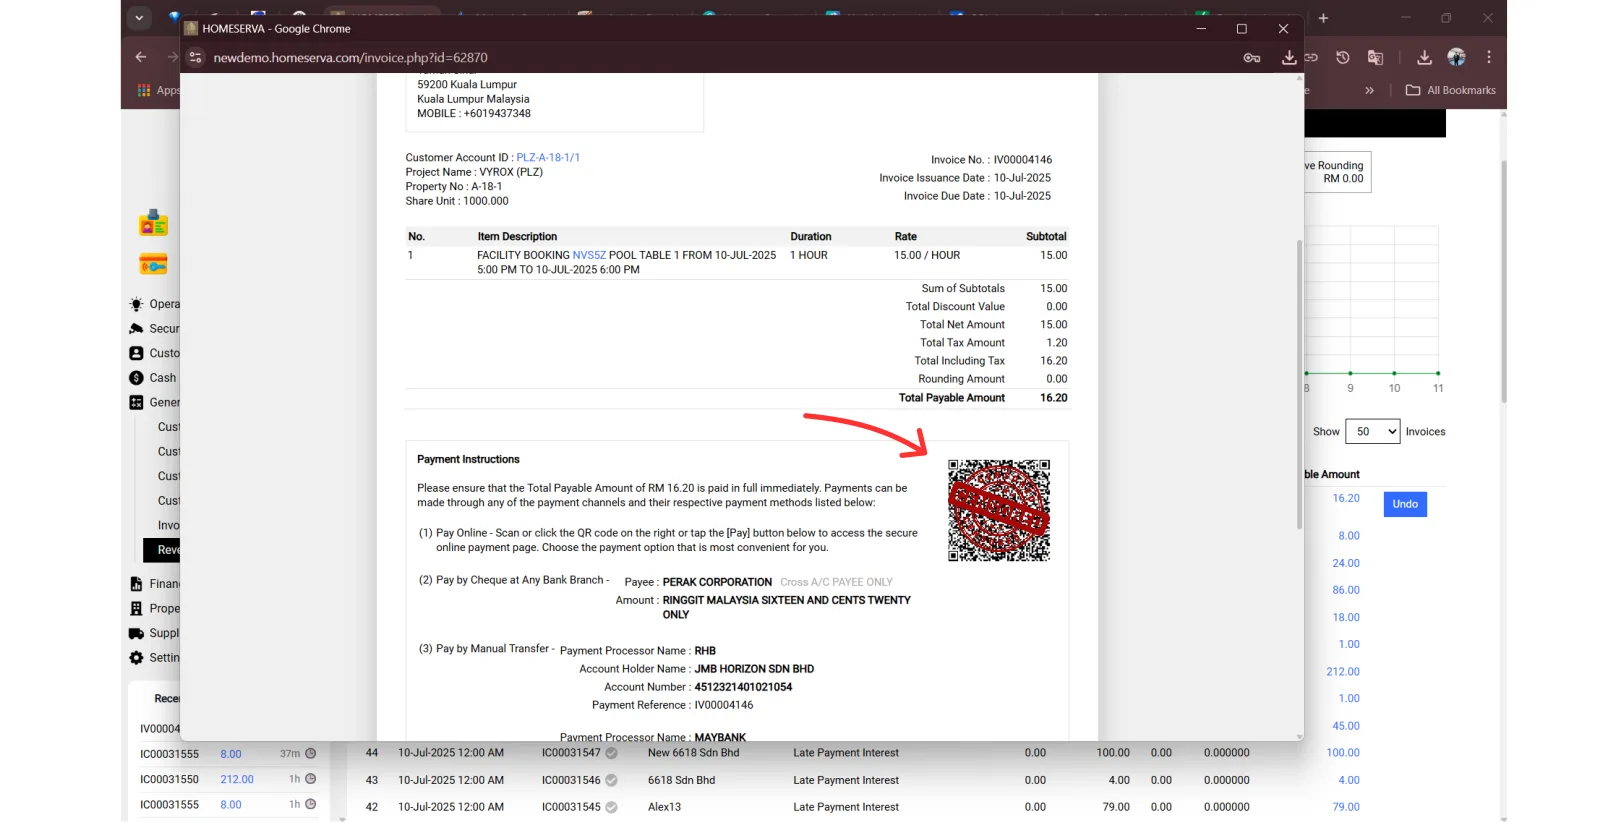
5.1 SCAN QR On Invoice
Once the customer receives the invoice, they have to scan the QR code at the bottom of the invoice.
5.2 Customer Validate E-Invoice
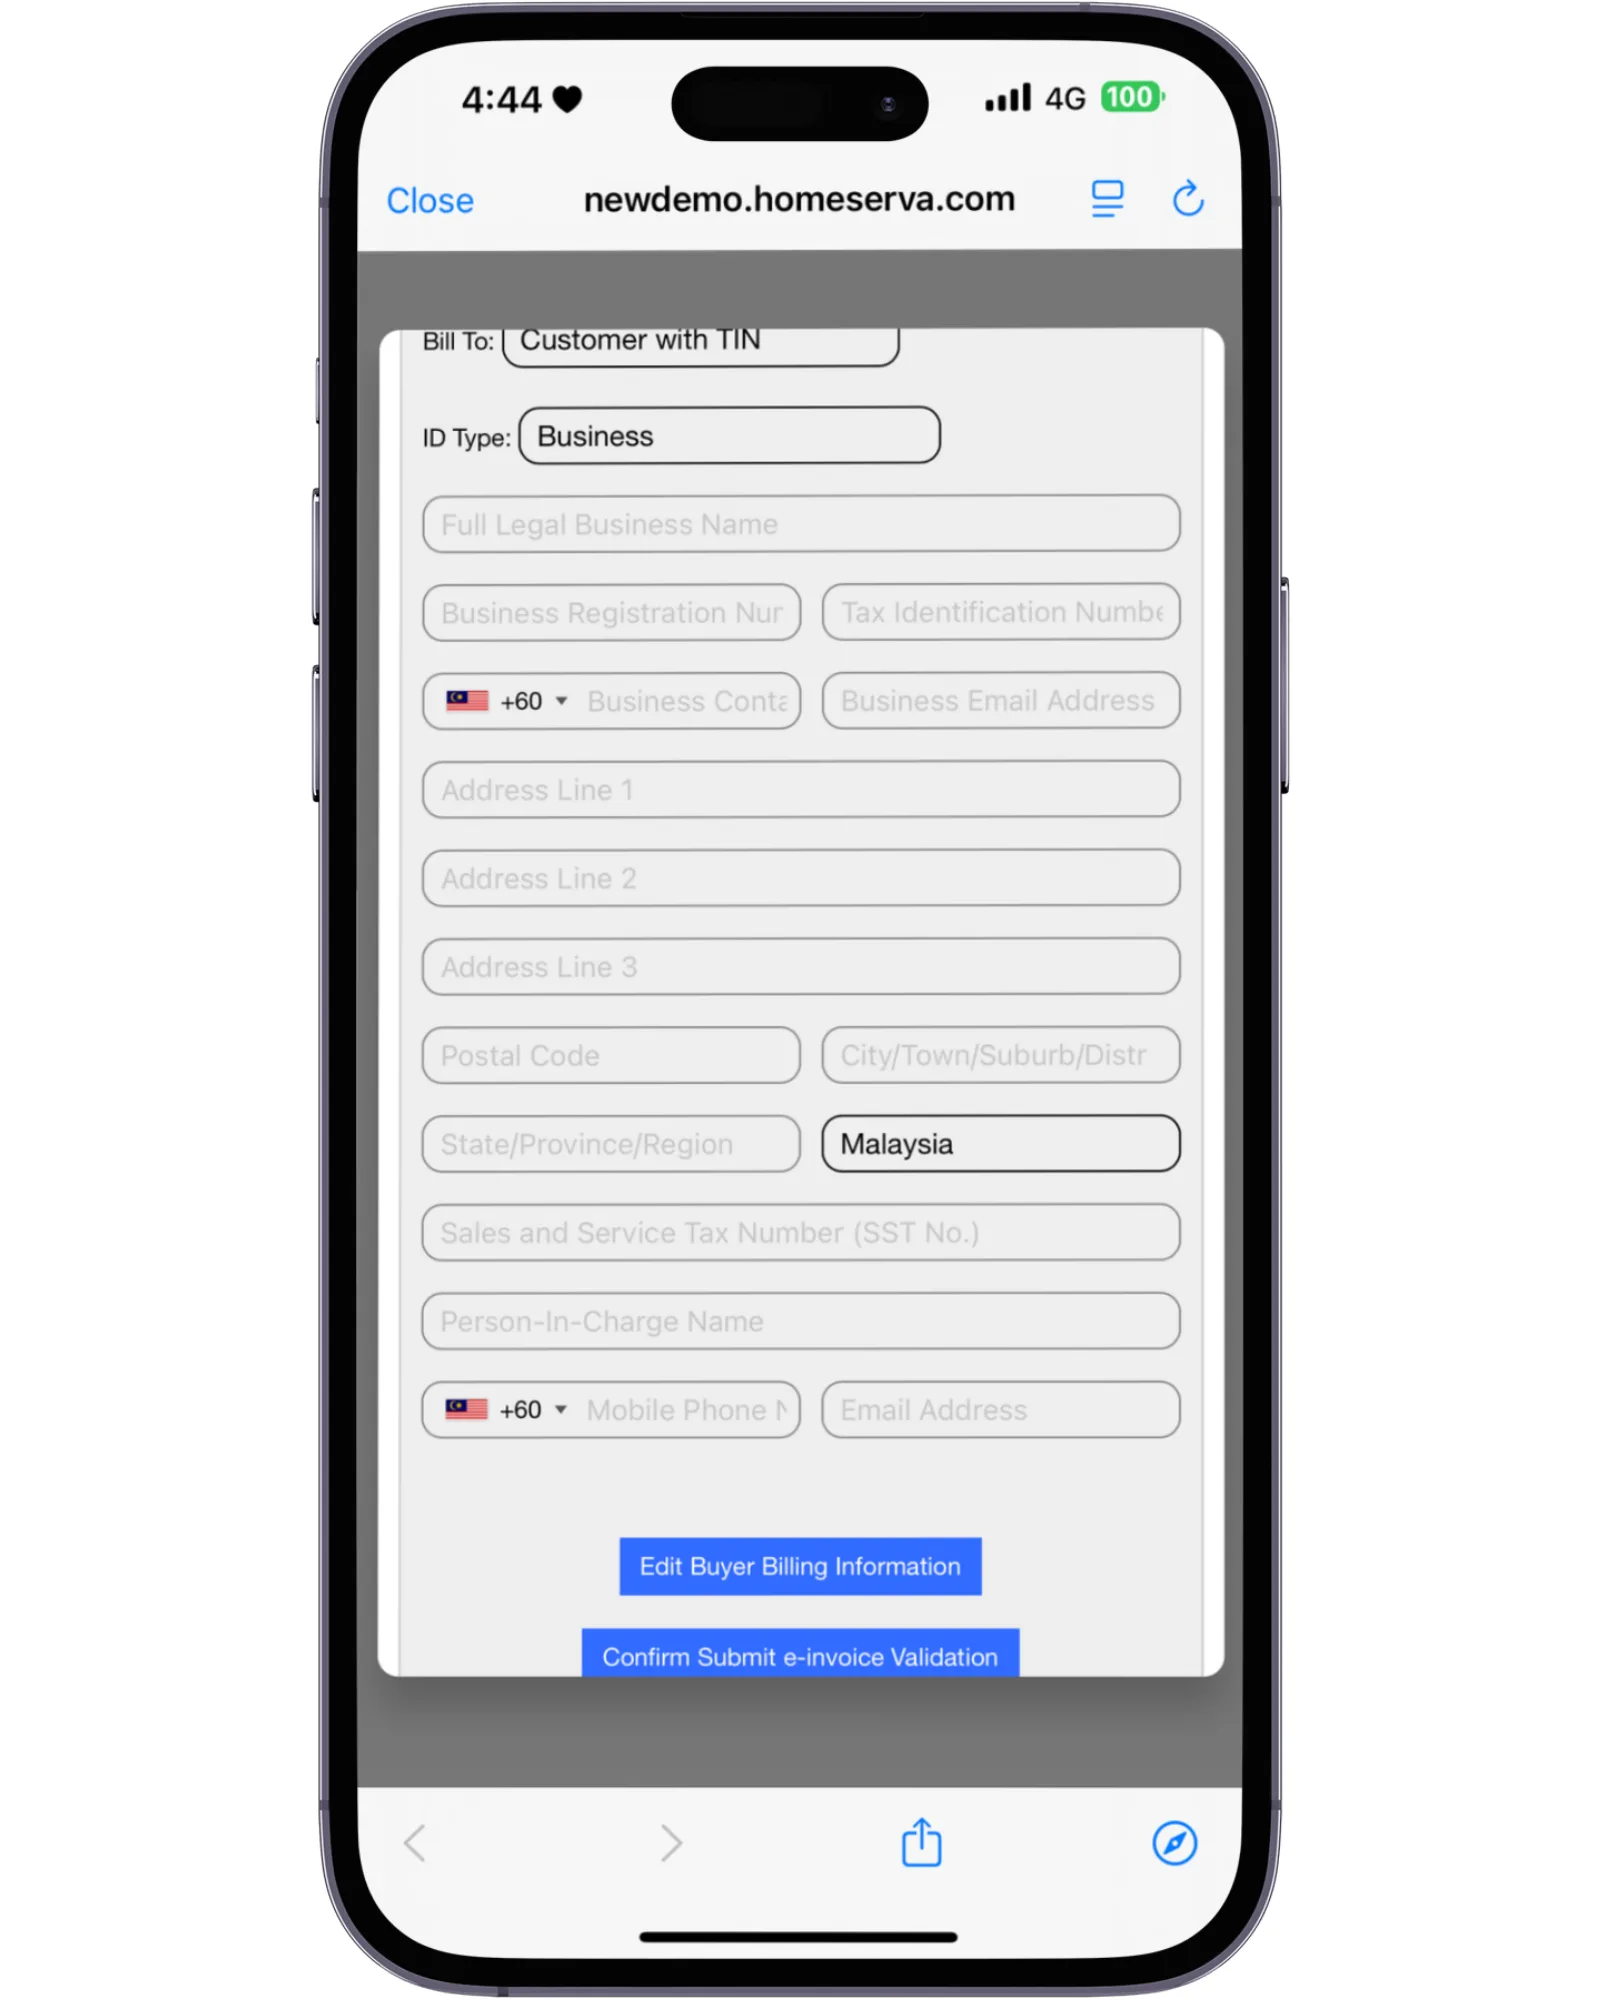
Customers fill in their information, like name, NRIC, TIN number and address, then click on the “Confirm Submit e-invoice Validation” button.
5.3 Success Validate E-Invoice
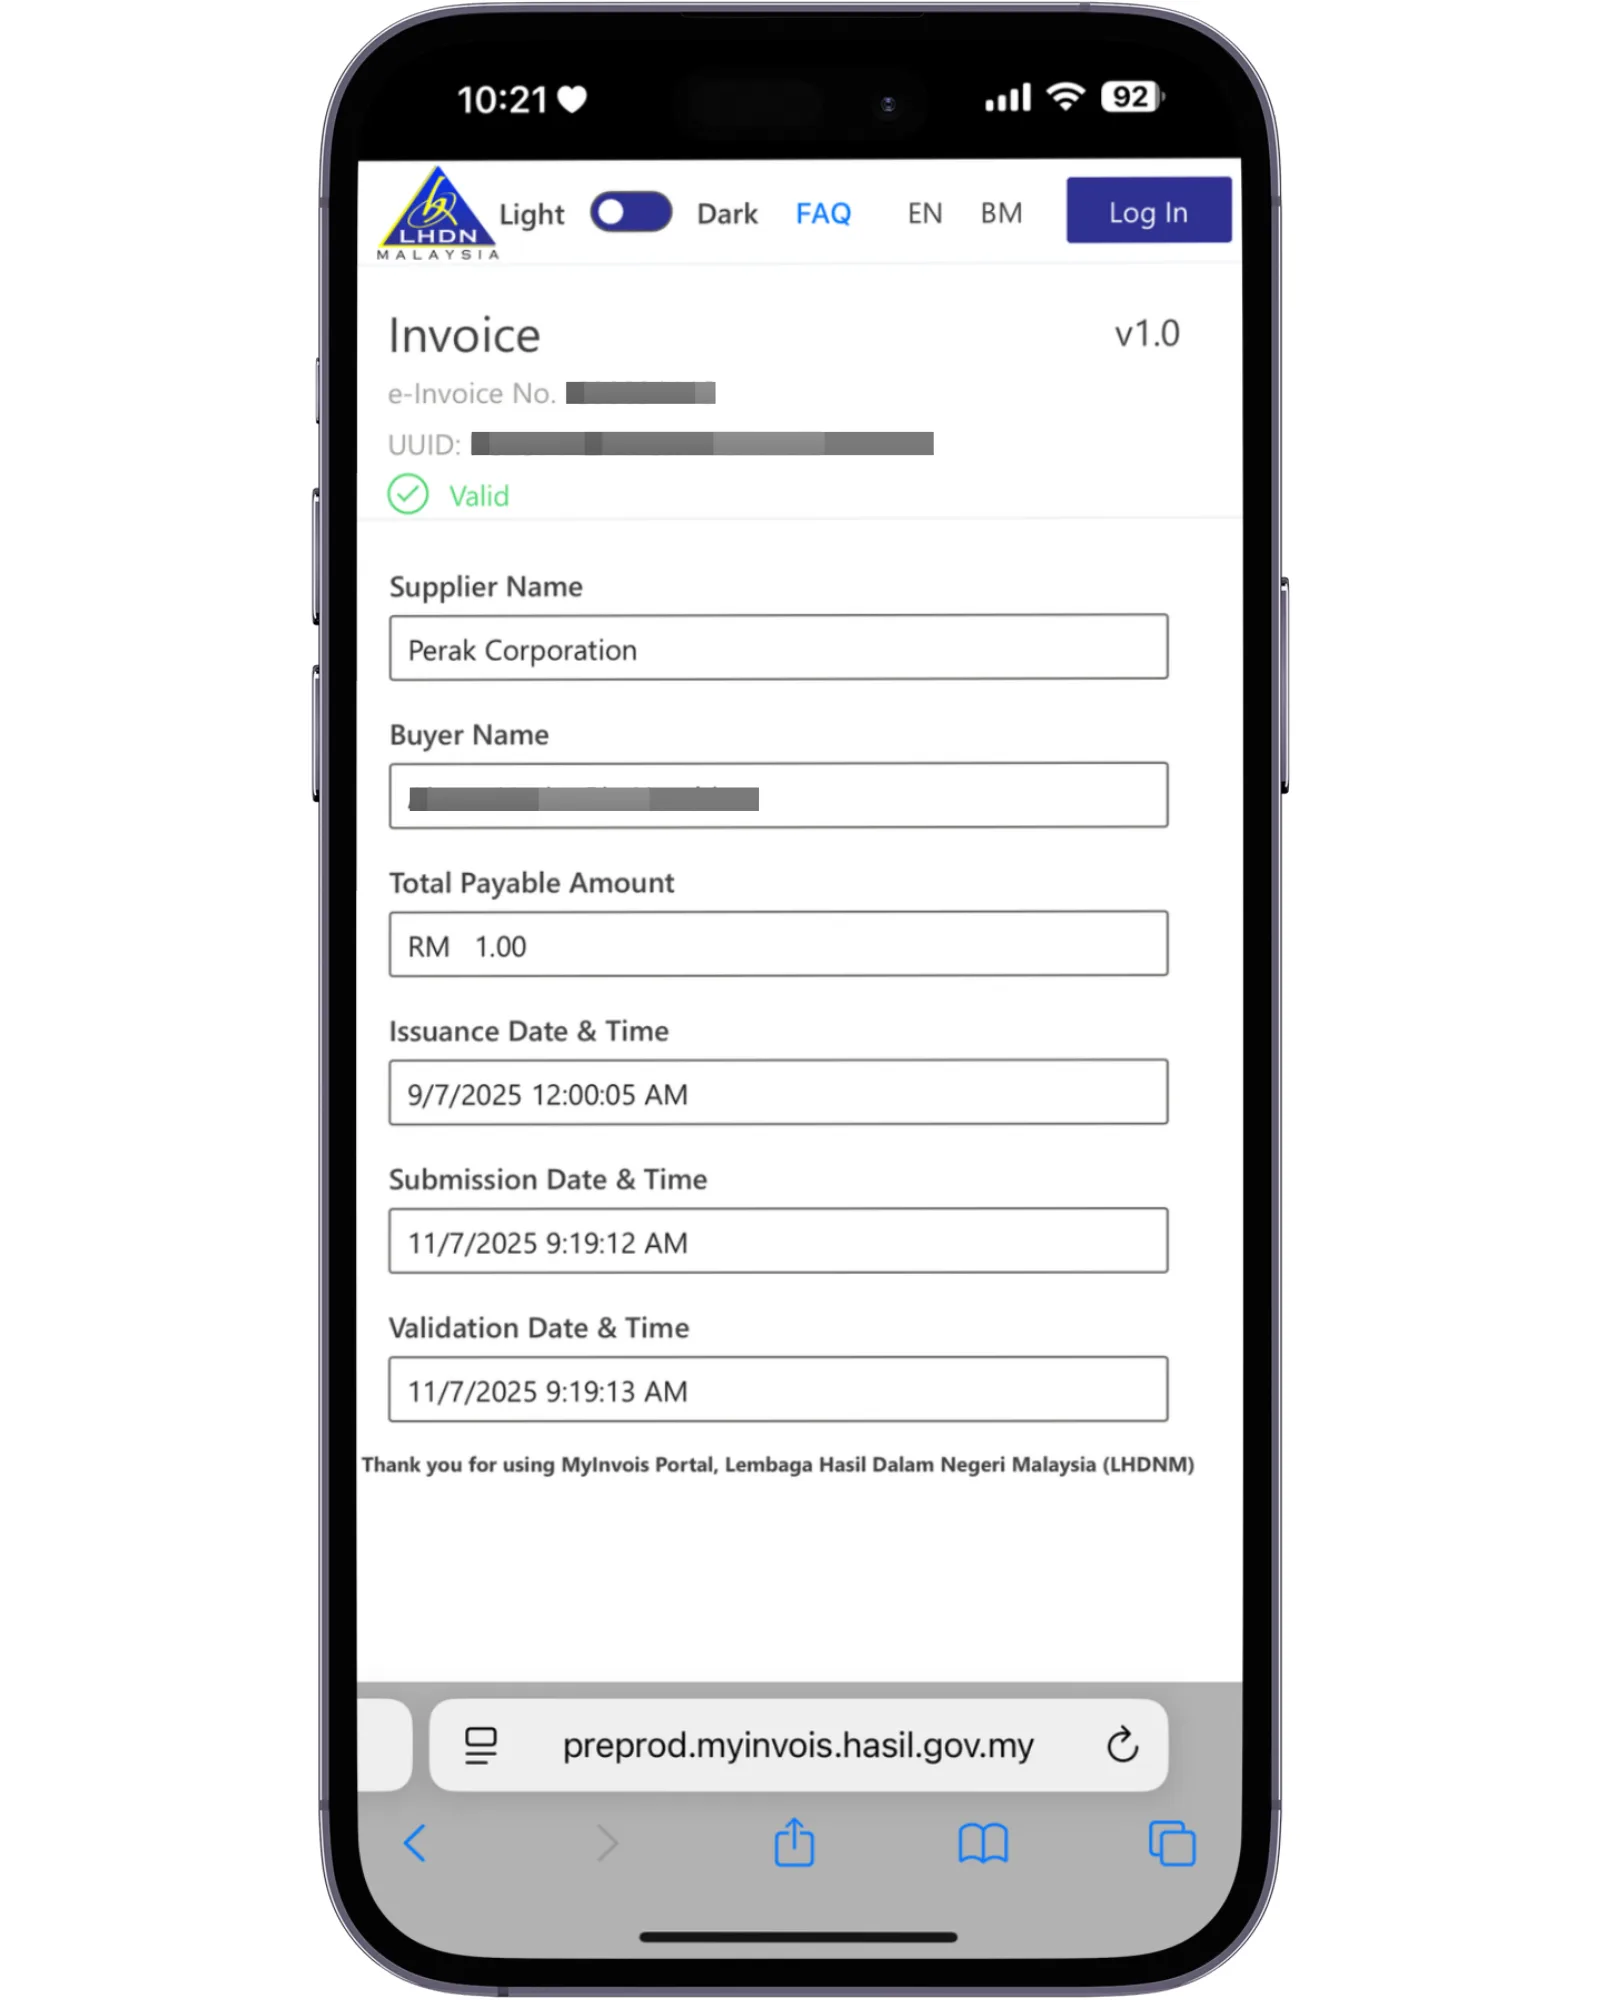
If the validation is successful, the customer will see the following confirmation screen: