Sport Club King
4. Membership Management
Read this chapter to learn how to set up membership profile and create membership card, to principal account and sub account.
4.1 Create Membership Package
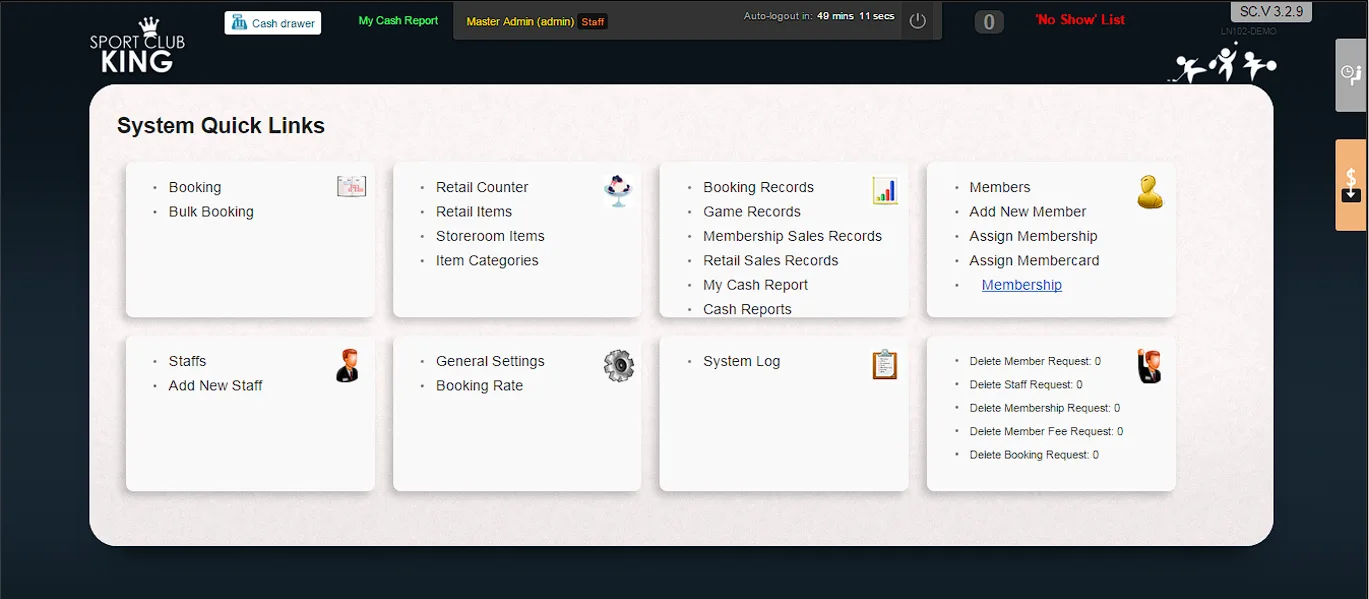
1. Click “Membership” at the main interface.
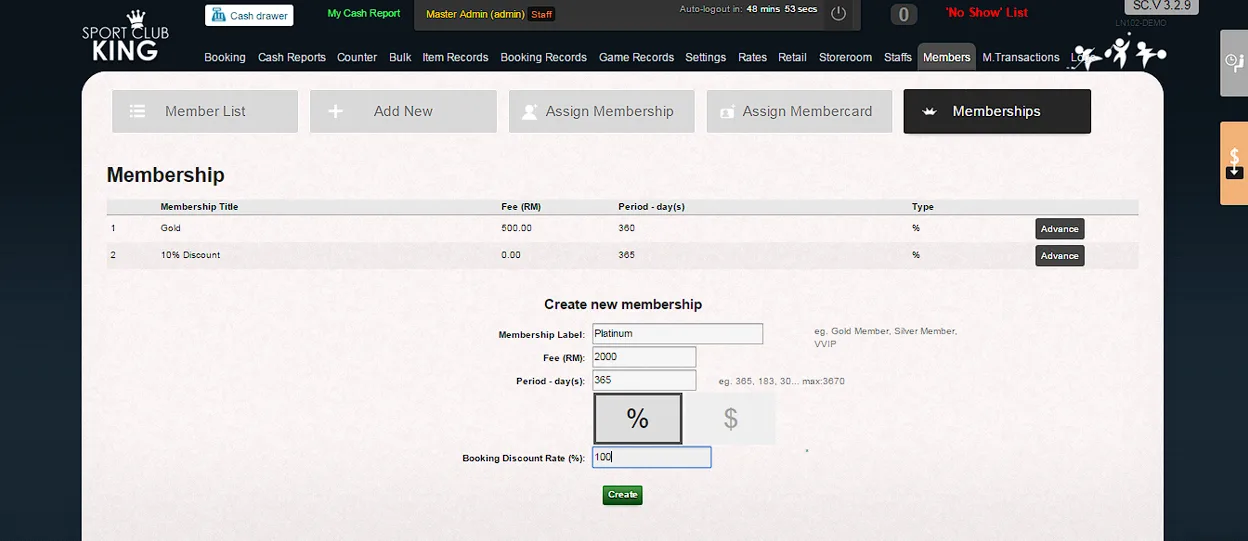
2. Fill in “Membership Label”, “Fee”, “Membership period –days”, “Booking Discount Rate (%)” and “Item Discount Rate (%)”. For example: If your membership fee is RM 1200/year, then, you can enter membership name and fee as the membership label, membership period is 365 days and Fee is RM 1200.
3. Click “Create” to complete creating membership package.
4.2 Create Principal Member Account
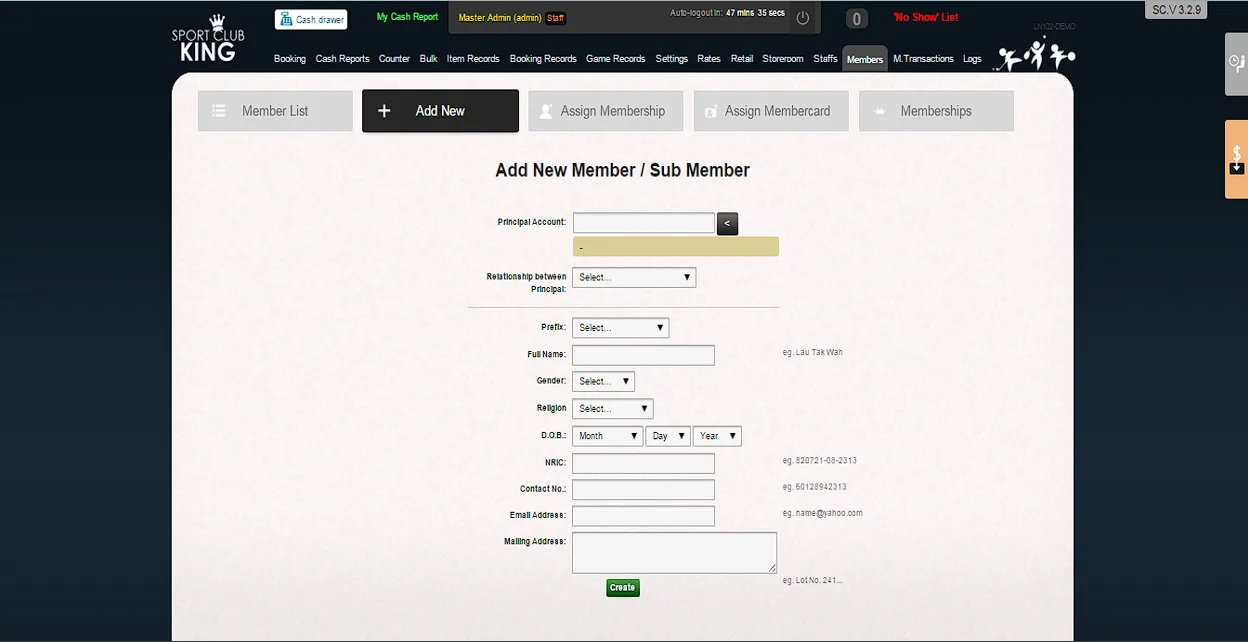
1. Click “Add New Member” at the main interface.
2. Fill in “Prefix”, Full Name, Gender, Religion, D.O.B, NRIC, Contact No., Email Address and Mailing Address.
3. Click “Create” to complete creating principal account.
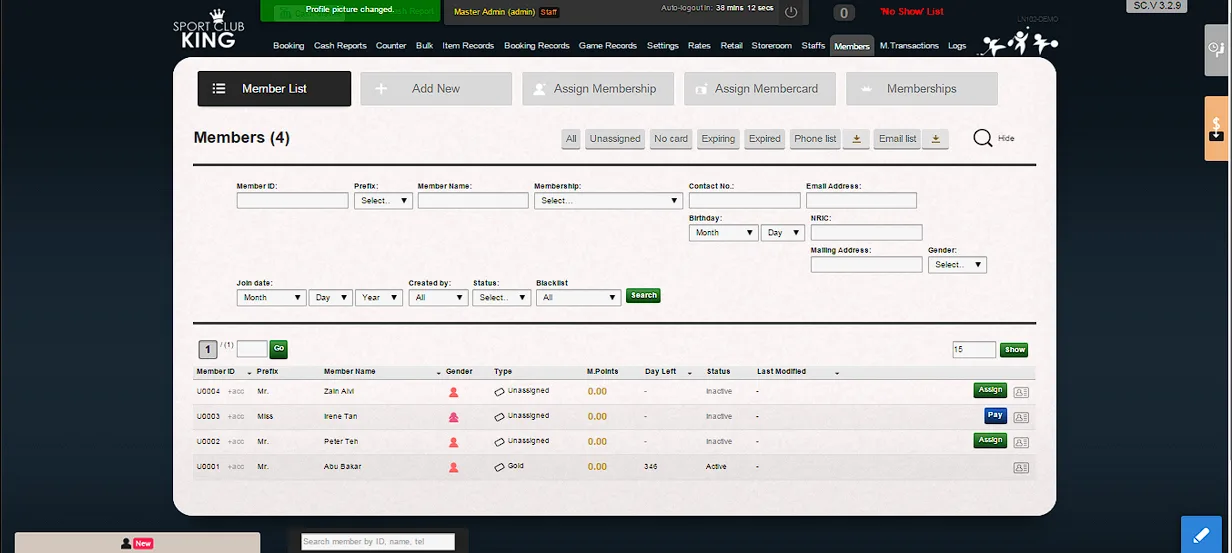
4. Member ID will be assigned automatically in sequence U0001, U0002, U0003, U0004, U0005 ……
5. Upload member’s photo.
6. Click “Choos file” to upload photo file like jpeg or jpg.
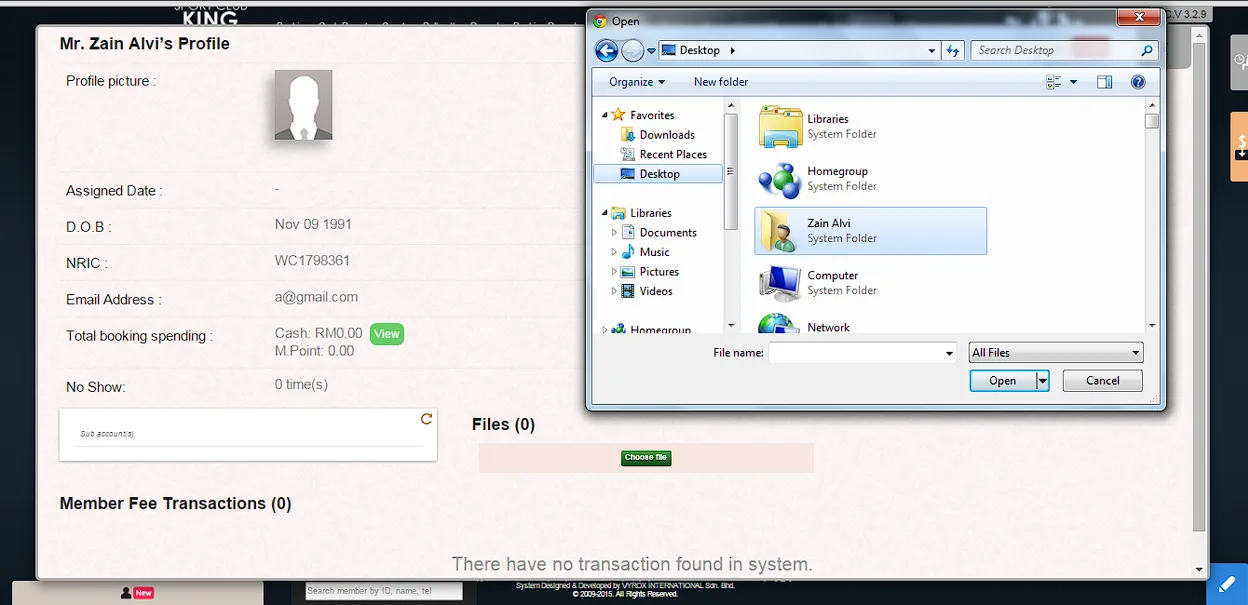
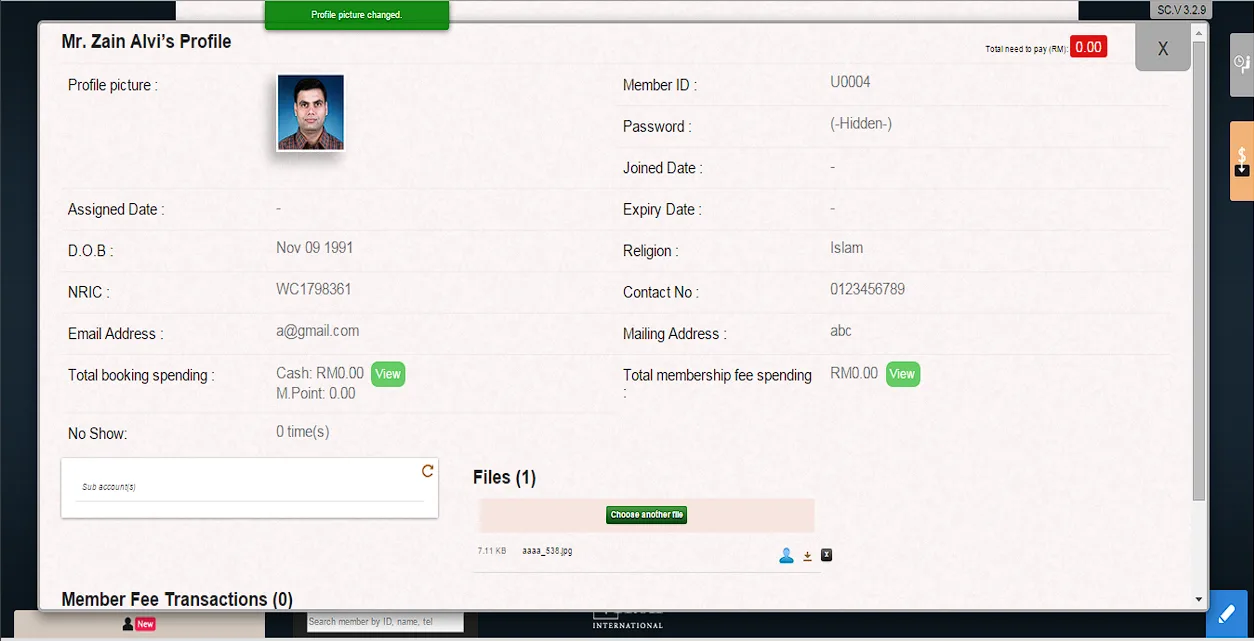
7. Click “profile” icon to make this photo become profile picture.
8. Principal member account is created successfully.
4.3 Assign Membership Package
1. Click “Assign” on one principal member in the “Members List” page.
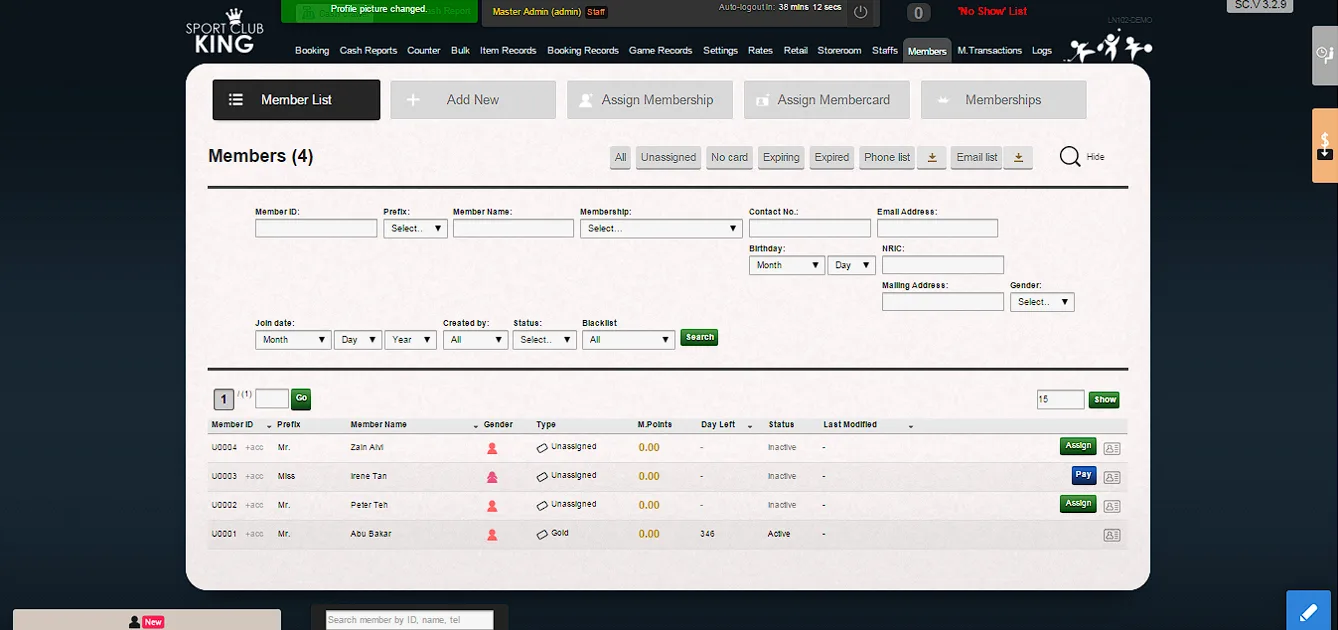
2. Then, “Assign Membership” page will pop up as follows.
3. Member ID will be created automatically.
4. Select membership package options which is created in chapter 3.1.
5. Click blank column in “Assign member card “and touch the membership card on the card reader.
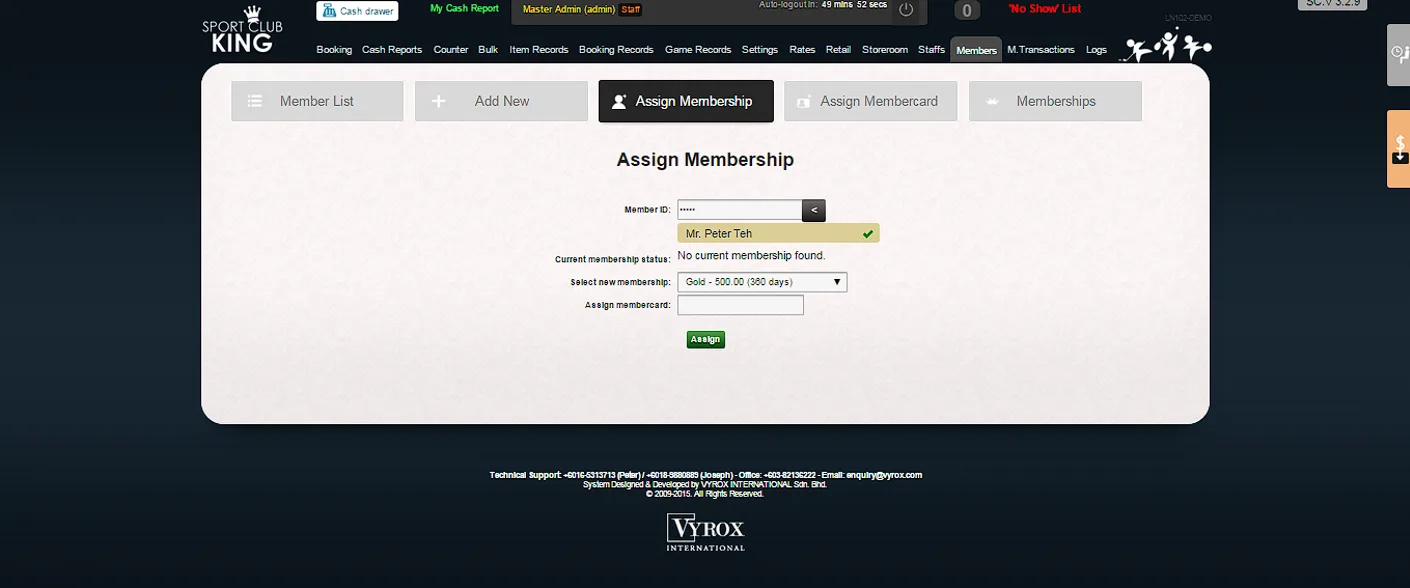
6. Click “Assign” to complete creating card to principal member.
4.4 Invoicing Members
1. Click “Pay” in “Member List” page.
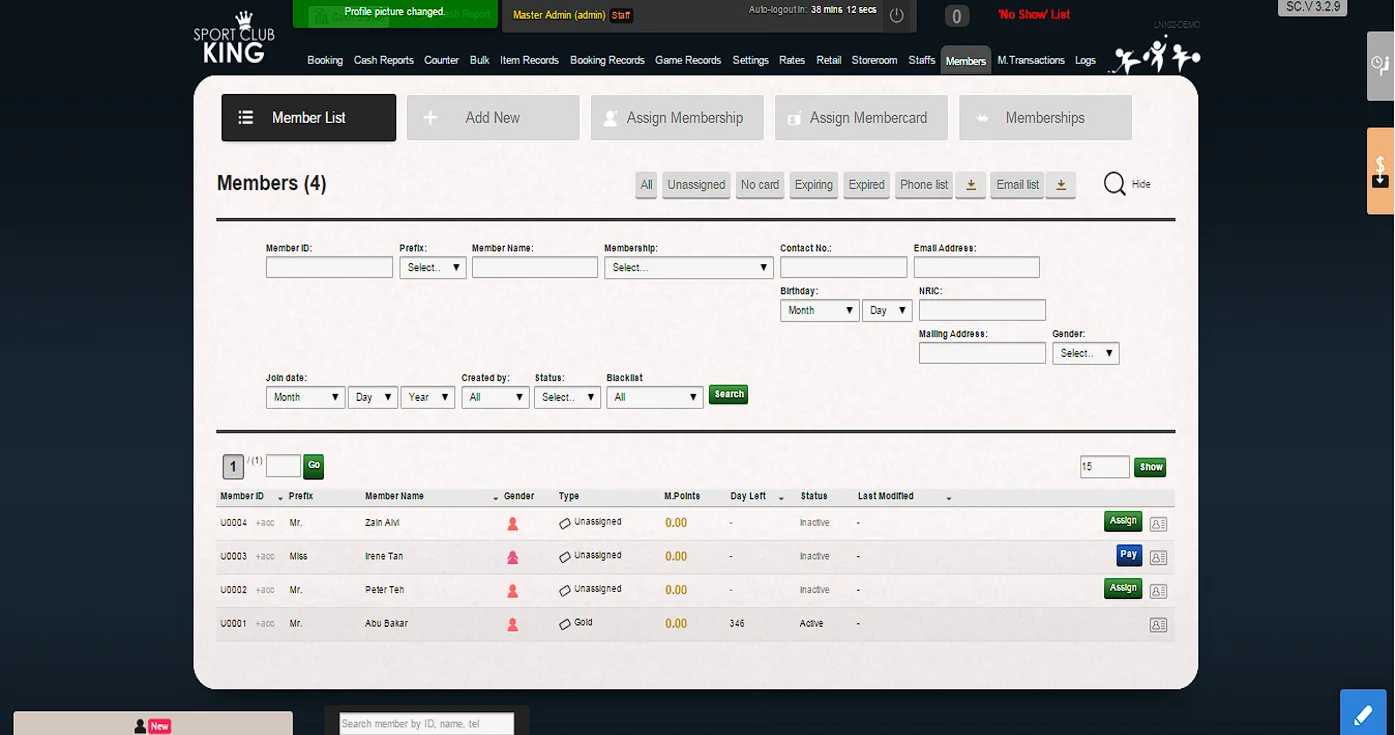
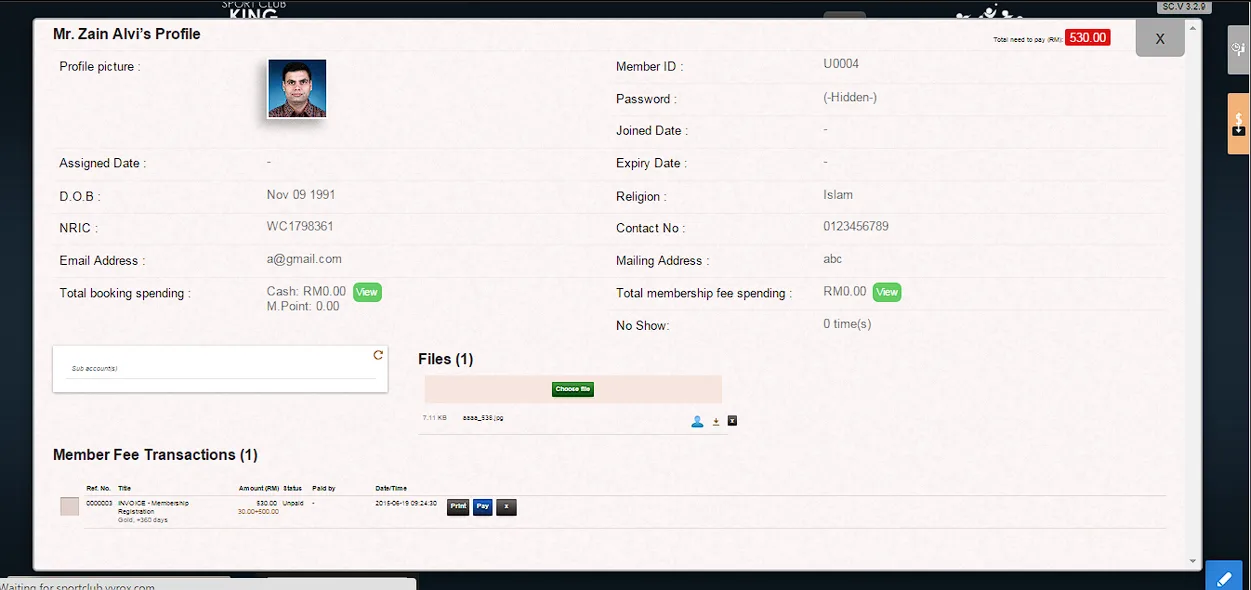
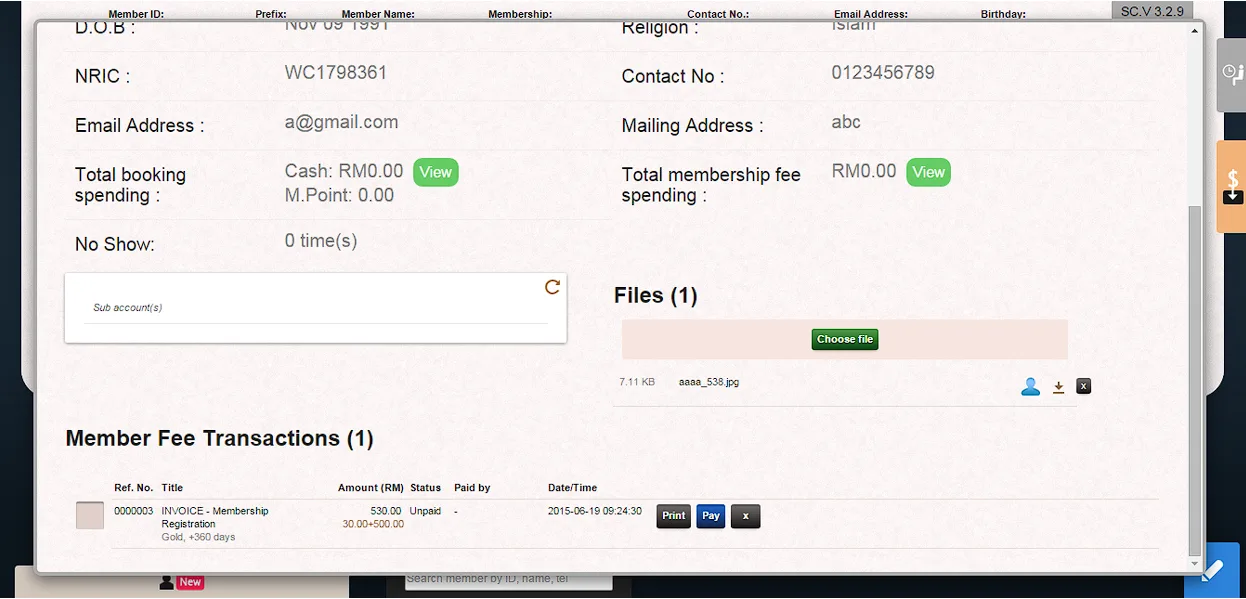
2. “Member Fee Transactions” page will popup.
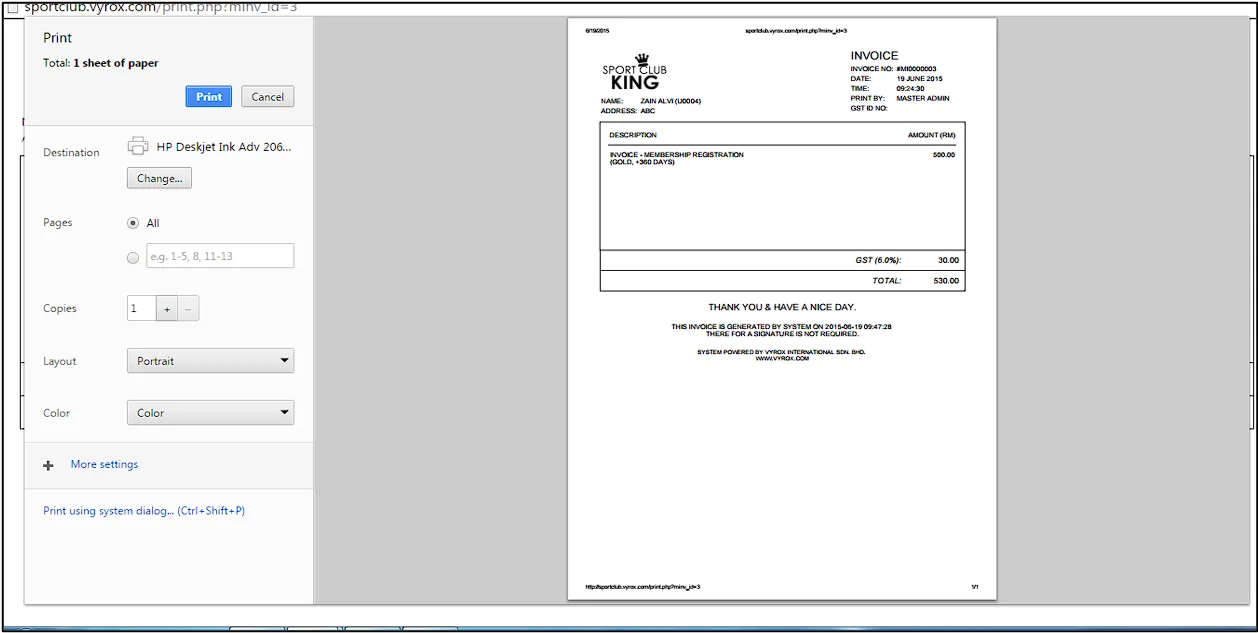
3. Click “Print” to print an invoice to members.
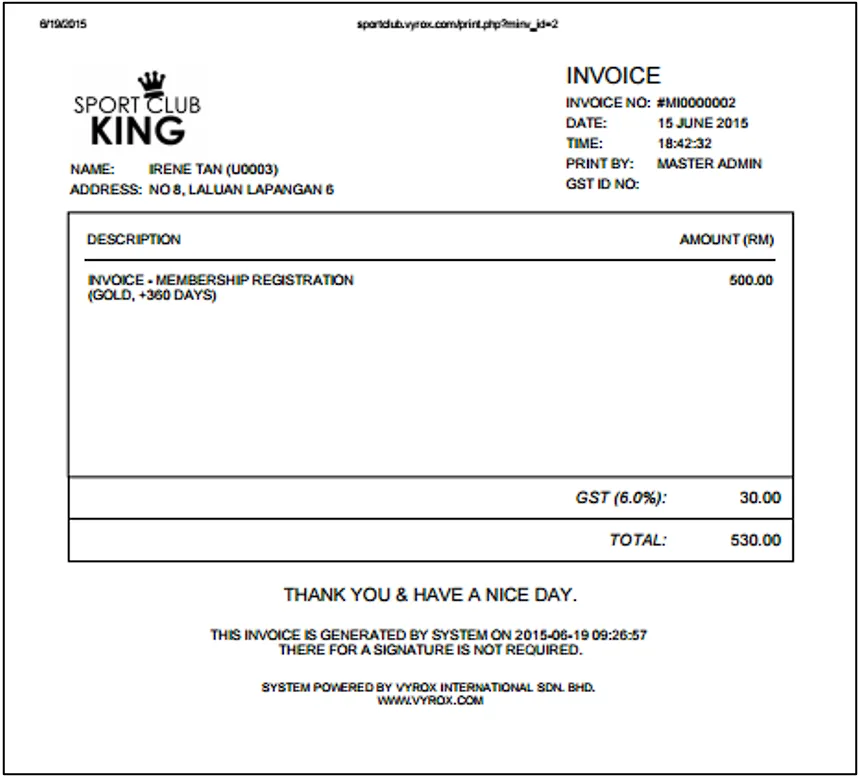
4.5 Payment Options
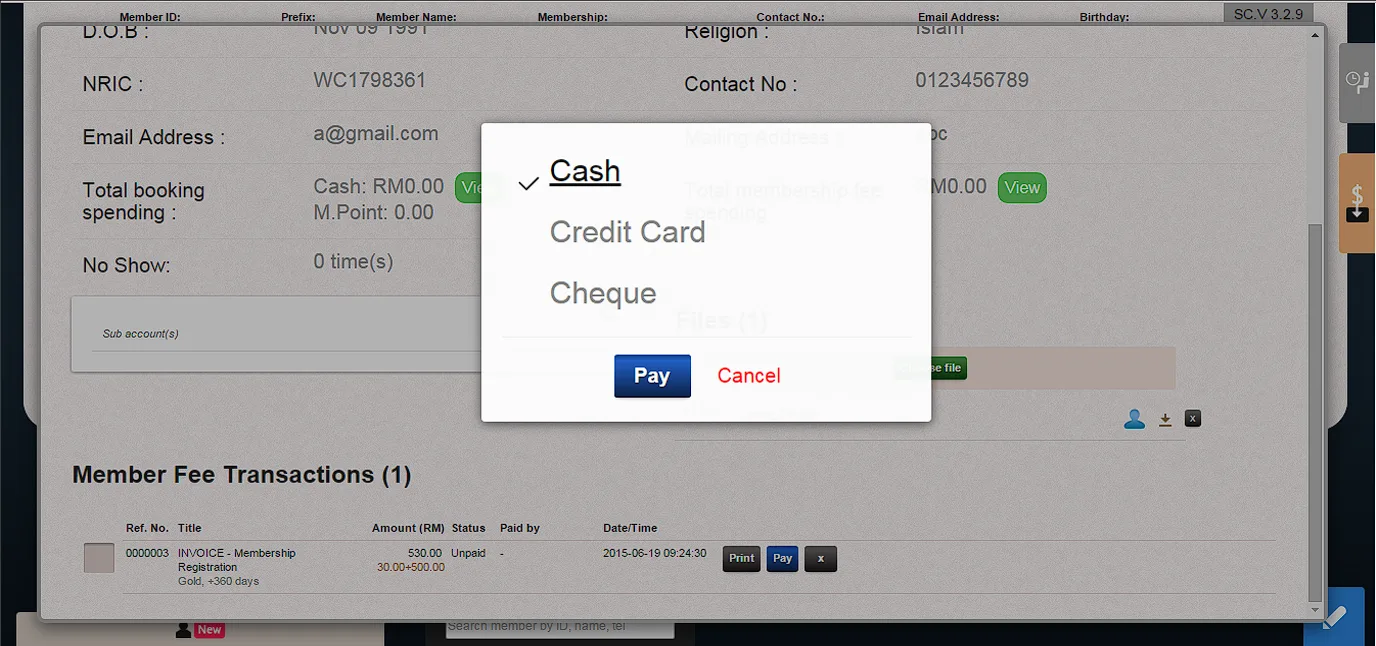
1. Click “Pay” to process member payment in “Member Fee Transaction” page.
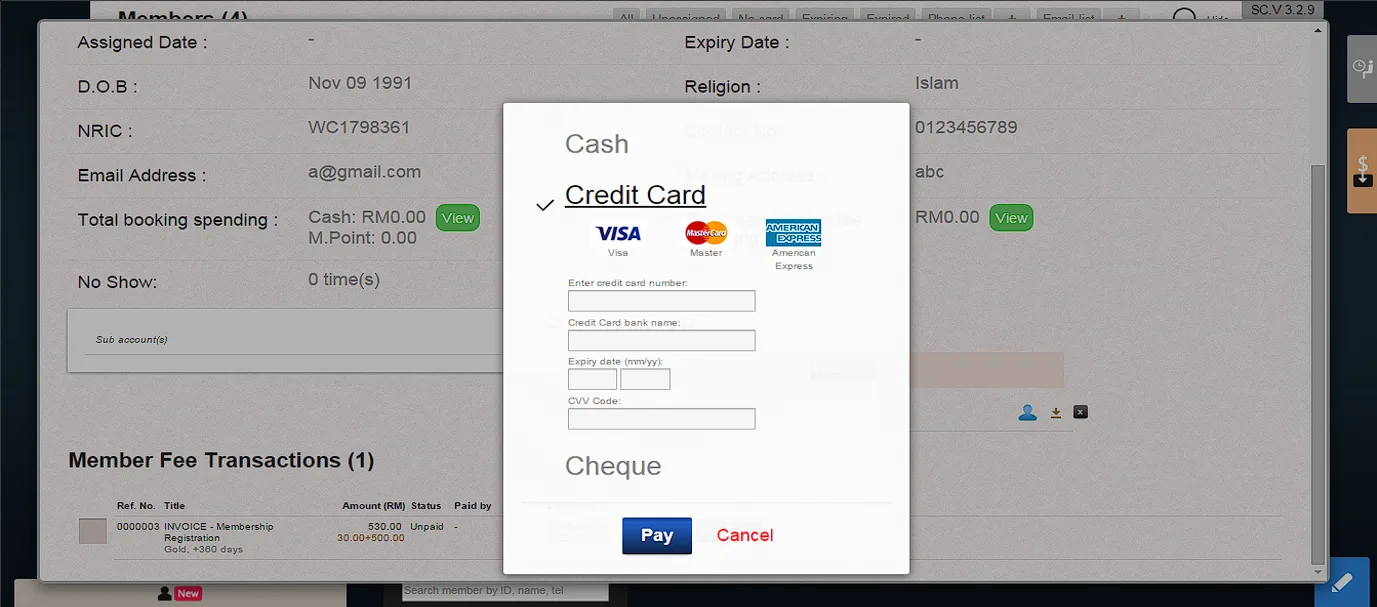
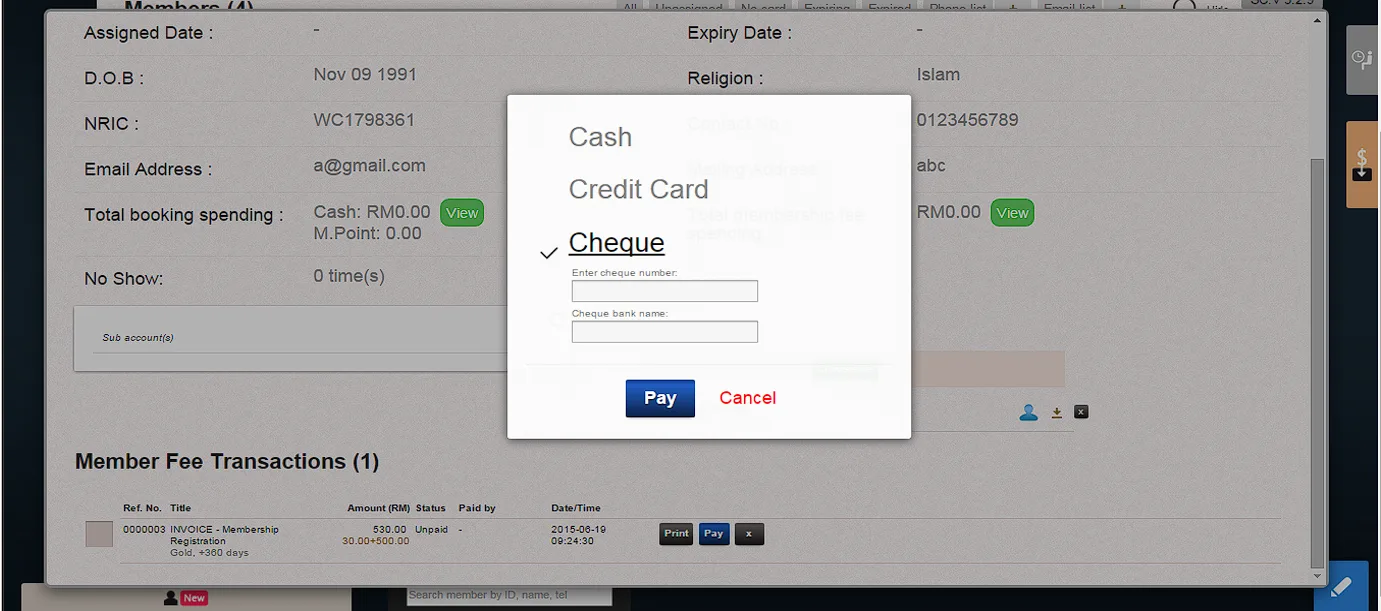
2. A payment option dialog box will pop up and select “Cash”, “Credit Card” or “Cheque” option.
3. Then, click “Pay” in dialog box.
4. If “Credit Card “option is selected, enter credit card number and credit card bank name and click to complete the payment process.
5. If “Cheque” option is selected, enter cheque number and bank name and click “Pay” to complete the payment process.
4.6 Receipt
1. Click “Print” to print receipt in “Member Fee Transactions” page.
4.7 Create Sub Account
1. Click “+acc” to create Sub Account for Principal Member.
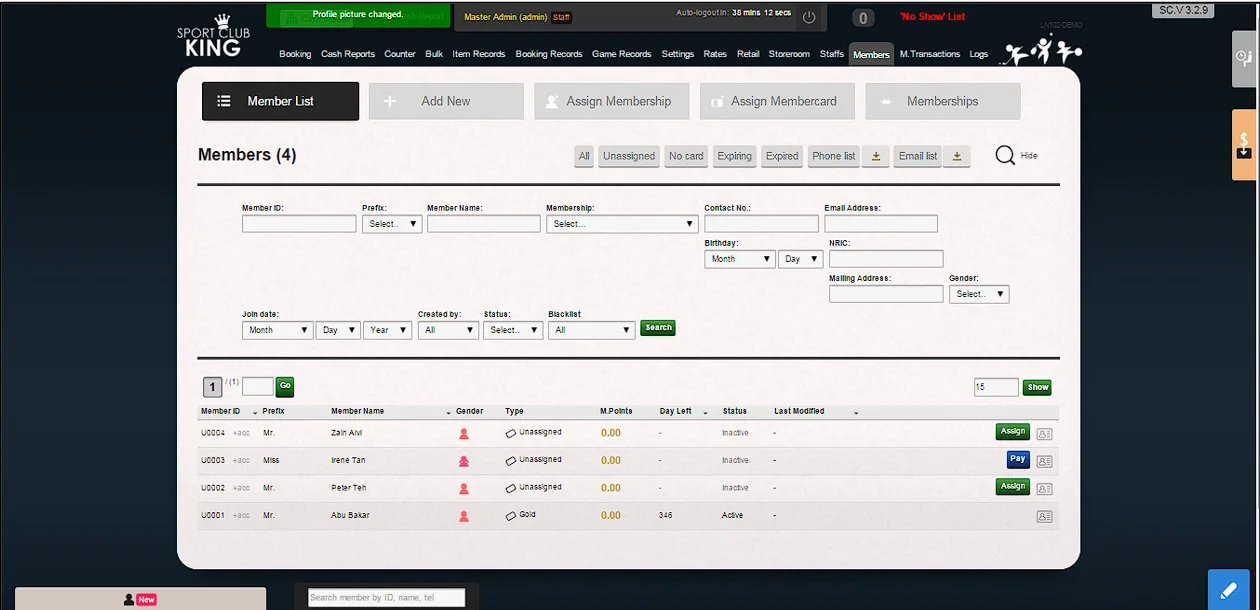
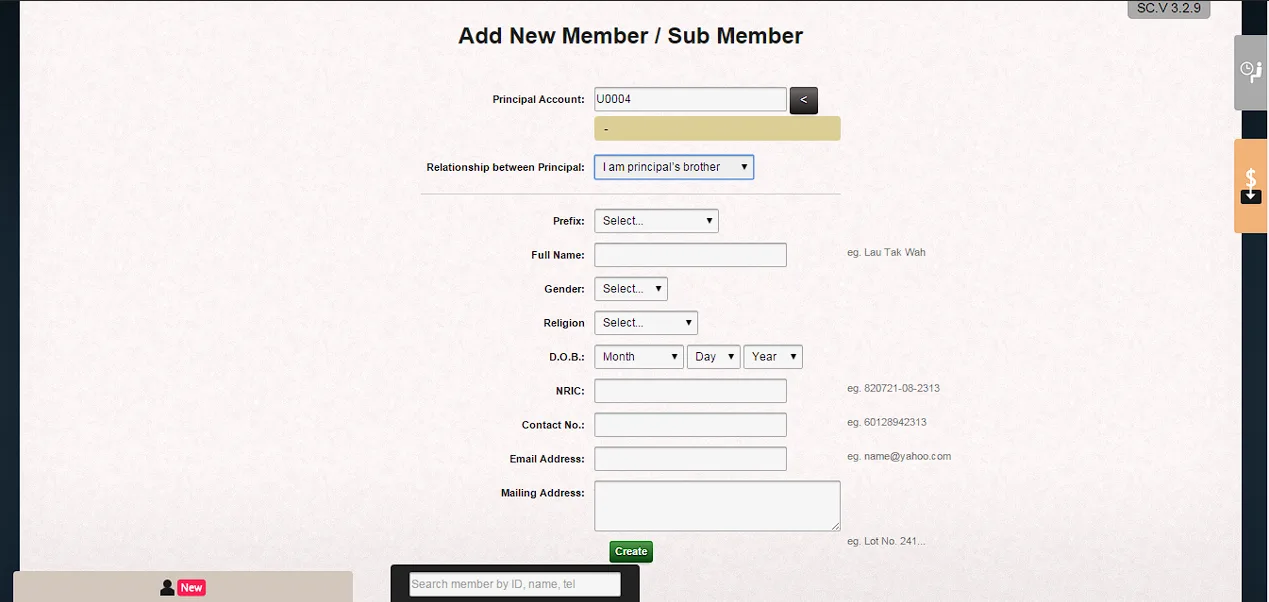
2. Principal account will be automatically filled up.
3. Select “Relationship between principal” option.
4. Fill in “Prefix”, Full Name, Gender, Religion, D.O.B, NRIC, Contact No., Email Address and Mailing Address.
5. Click “Create” to complete creating Sub Account.
4.8 Assign Membership Card
1. Click the tab of “Assign Member card”, then swipe card on card reader and click “Assign” to save membership card data; complete creating membership card process.
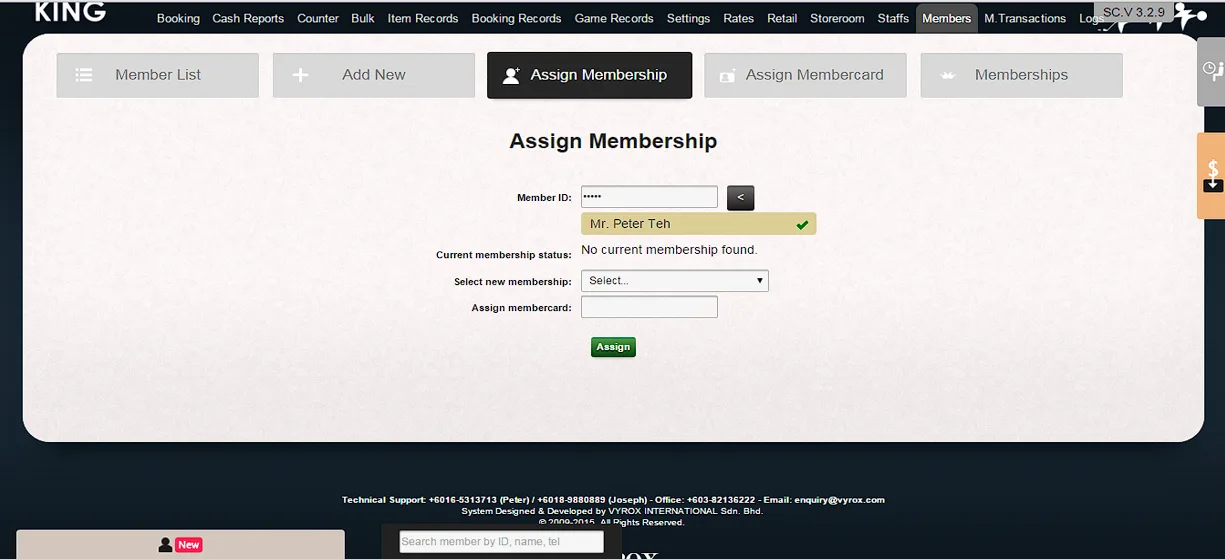
2. After membership card is completed, a card icon will change from “empty box” to “checked box”.
3. Repeat the step on Sub Account.