VYROX Very Intelligent Platform (VIP) · Very Intelligent Platform: Management Guide
This guide will walk you through the steps to effectively add and manage facilities on your platform. With an intuitive design inspired by best-in-class user interfaces, managing your facilities has never been easier.
This step helps you access the central hub for managing your facilities. The dashboard provides an overview of all facilities and tools to manage them efficiently.
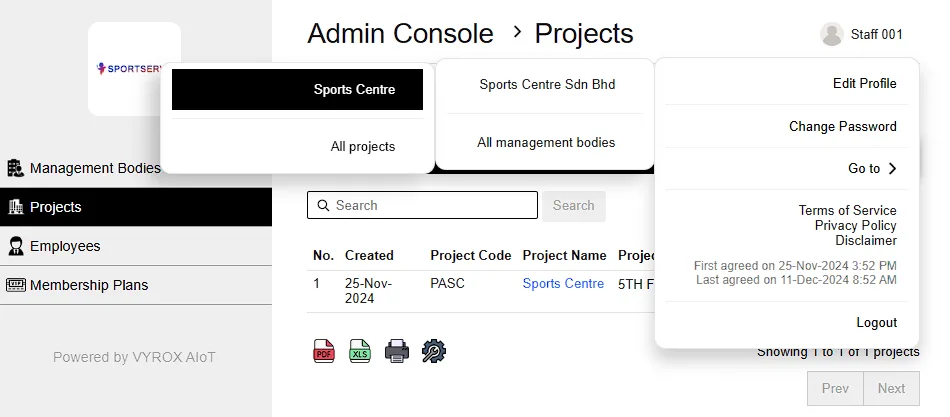
At the top-right corner of the webpage, Go to the profile icon > Go to > SPORTS CENTRE SDN.BHD. > Sports Center
This brings you to the facility management dashboard.
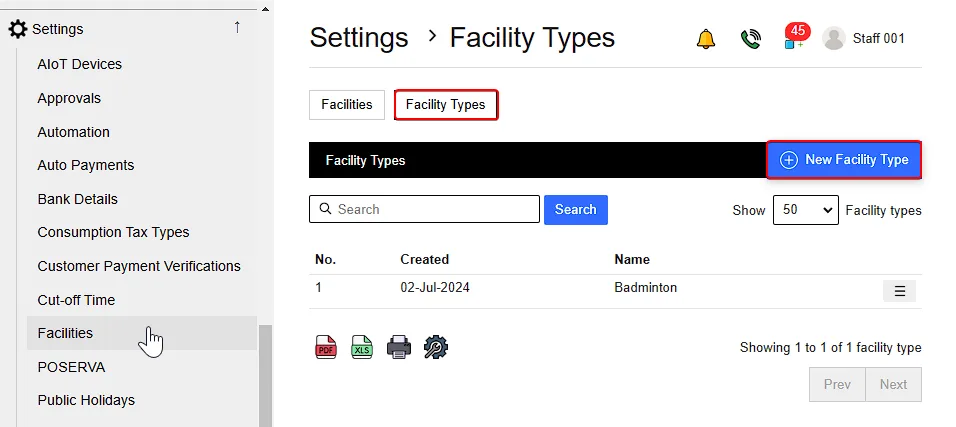
On the left-side menu, go to Settings > Facilities.
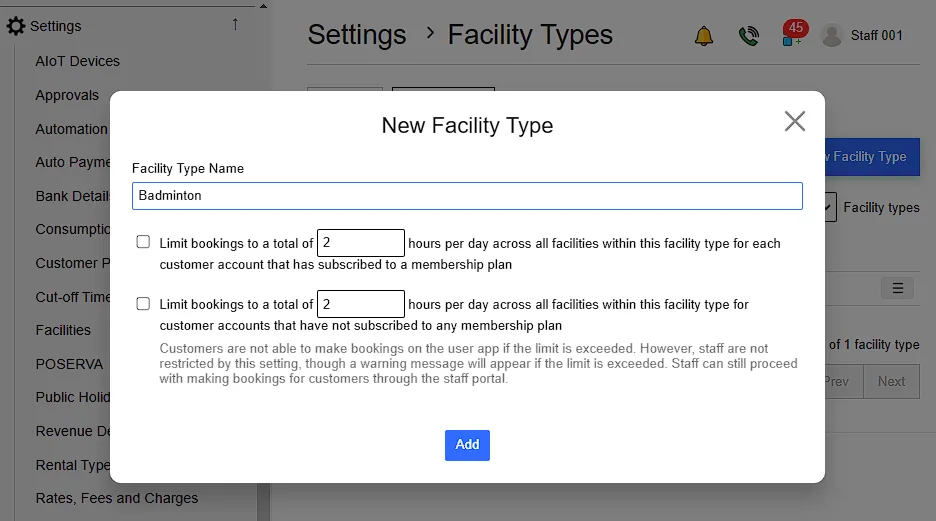
At the top of the page go to Facility Types > New Facility Type, enter the facility type name and customizations
This feature allows you to categorize your facilities (e.g., meeting rooms, gyms, pools) to streamline management and user selection.
Booking Limit Policy :
This means Customers cannot make further bookings through the user app once the limit is exceeded. However ,Staff are not restricted by these booking limits when processing customer bookings through the staff portal. If a customer exceeds the daily limit, a warning message will appear, but staff can still proceed with the booking.
When done click Add to save it.
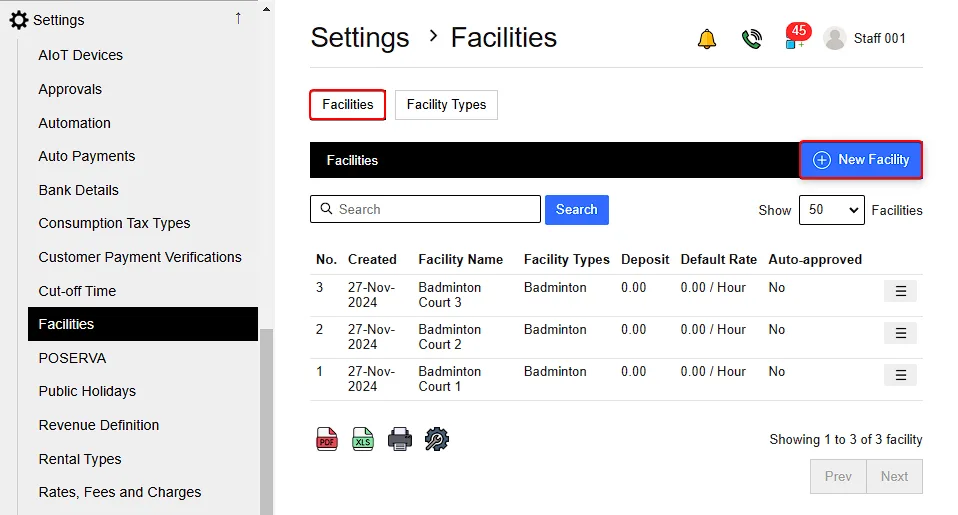
This feature enables you to add new facilities to the platform for user bookings.
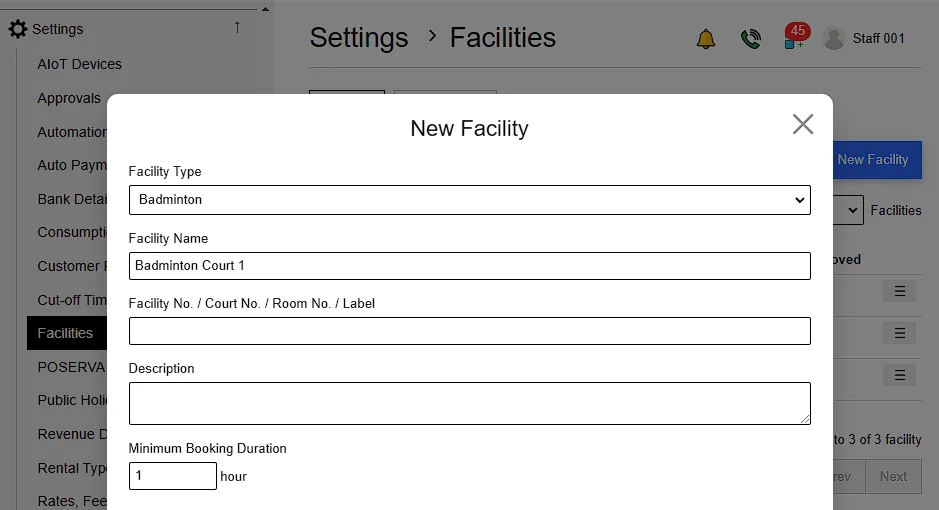
Return to Facilities > New Facility.
Complete the required fields for the new facility This allows you to categorize the facility based on its intended use (e.g., meeting room, gym).
2.4.1. Select Facility Type (e.g., badminton court, gym, pool).
2.4.2. Enter Facility Details such as Name, Number, and a Description.
2.4.3. Specify the Minimum Booking Duration (e.g., 1 hour, 30 minutes).
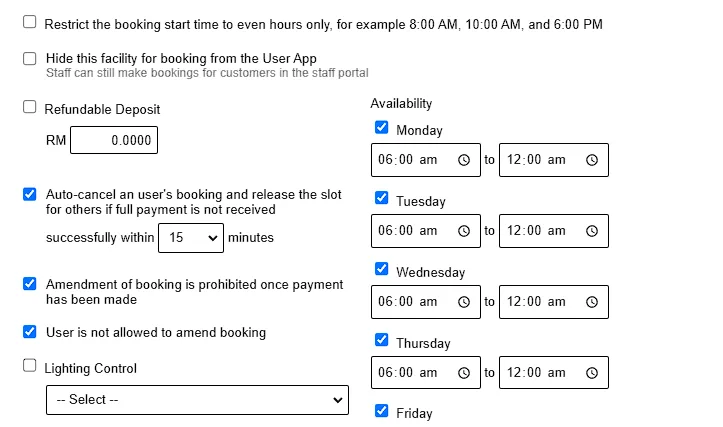
Management can choose to :
2.6.1. Restrict Booking Start Time to specific intervals (e.g., even hours such as 8:00 AM, 10:00 AM, 6:00 PM).
2.6.2. Hide Facility from User App
2.6.3. Select whether a refundable deposit is required and specify the amount and conditions.
2.6.4. Enable Auto-Cancellation for Unpaid Bookings
2.6.5. Prohibit Amendments to bookings after Payment
2.6.6. Enable Lighting Control
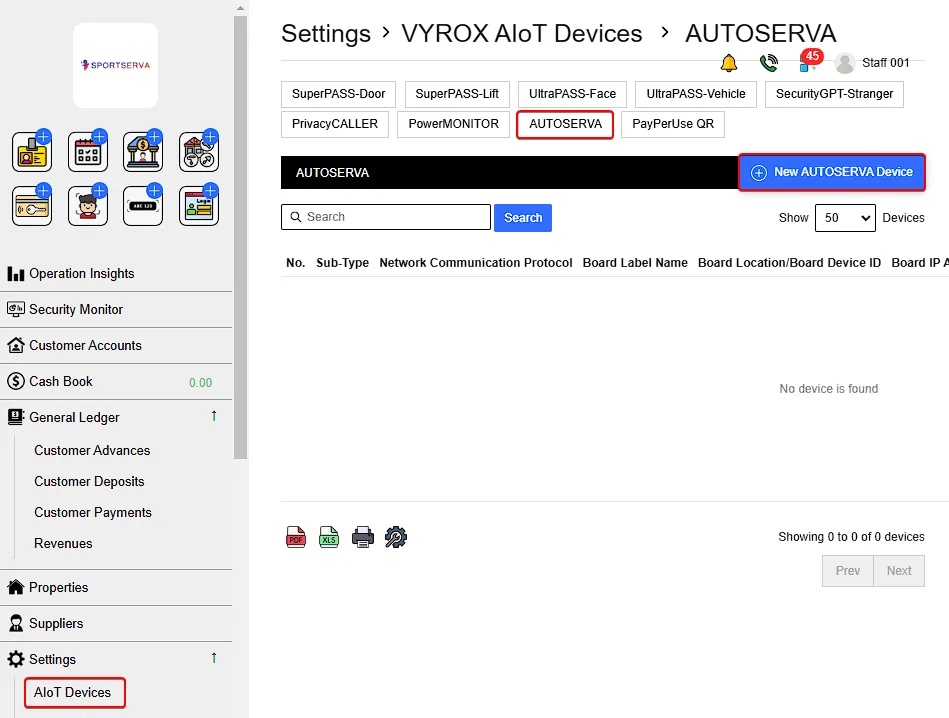
To add lighting control
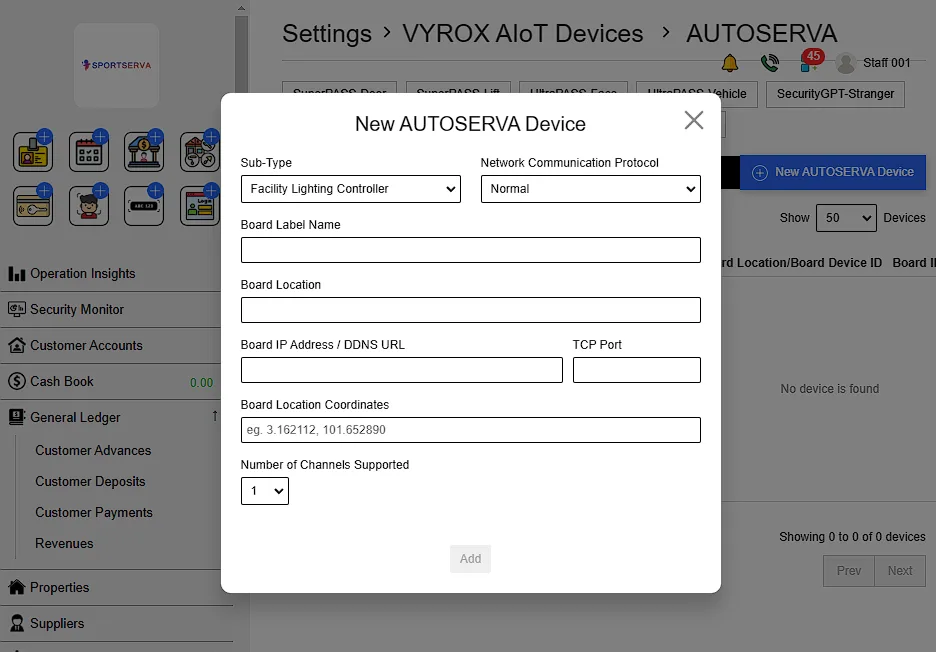
Go to Settings > VYROX AIot Devices > AUTOSERVA > New AUTOSERVA Device
Fill in details such as Sub-Type, Network Communication Protocol ,Board Label Name, Board Location, Board IP Address / DDNS URL,TCP Port , Board Location Coordinates and Number of Channels Supported. Click add when finish.
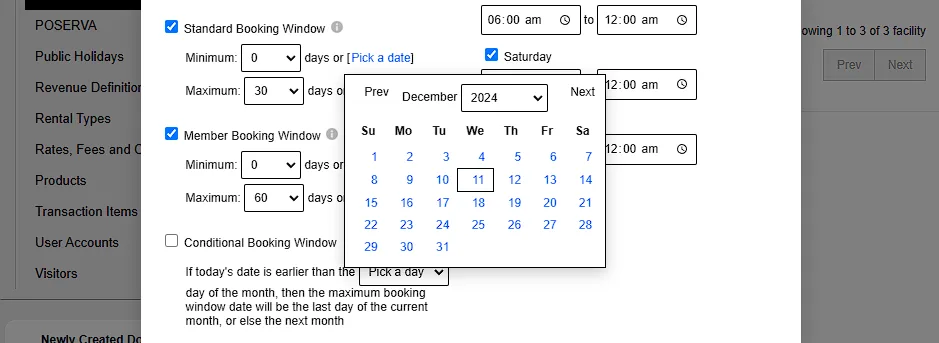
2.8.1. Set Standard Booking Window
2.8.2. Set Member Booking Window
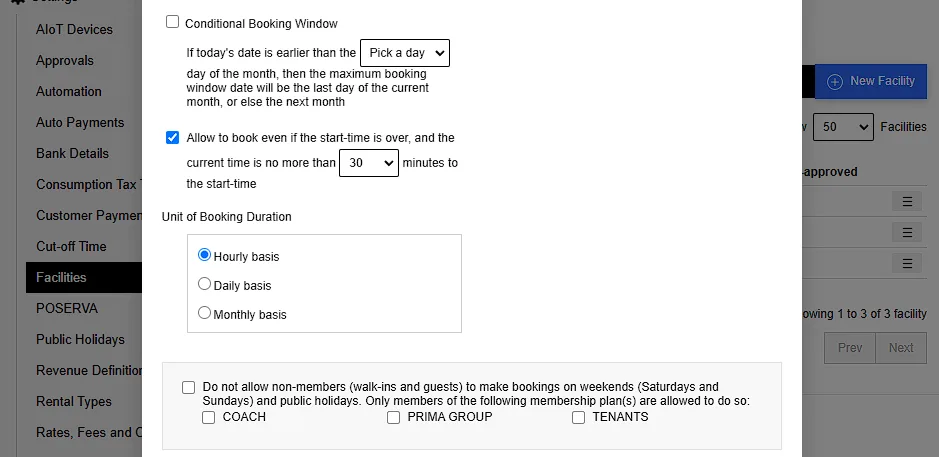
2.9.1. Set Conditional Booking Window
2.9.2. Allow Late Bookings
2.9.3. Set Unit of Booking Duration ( e.g. Hourly, daily, or monthly)
2.9.4. Restrict Non-Members on Weekends and Holidays
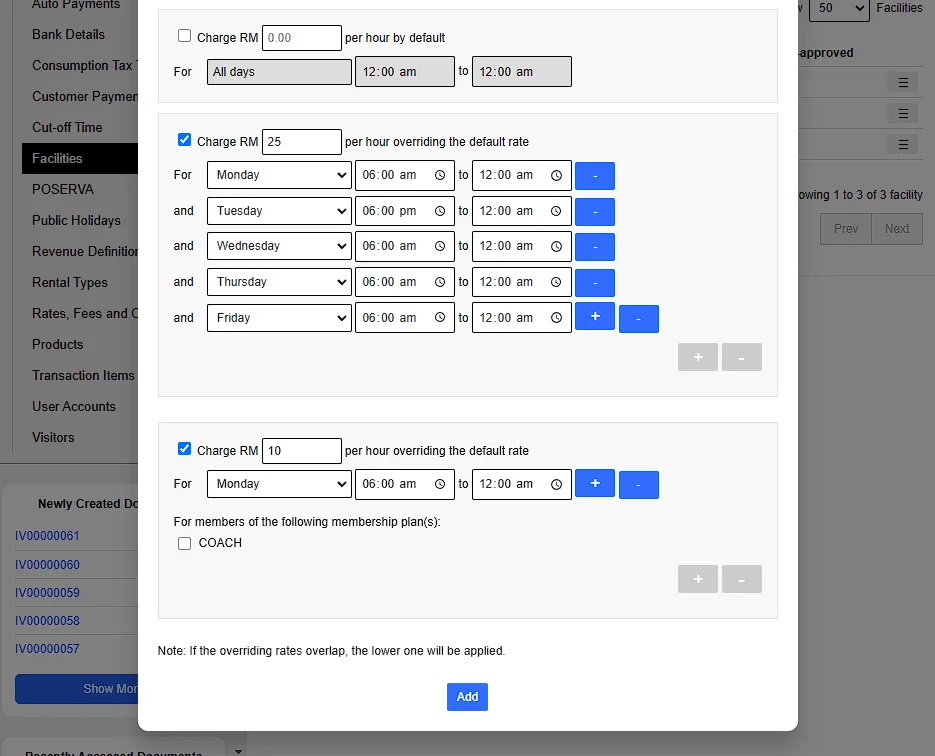
Select Payment Plans from three different payment plans:
2.10.1. Default Plan
2.10.2. Customized Hourly Rate
2.10.3. Membership-Specific Rates
Once finish customization , click Add to save it.
Key Notes!
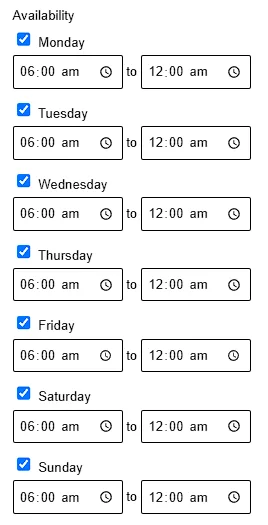
Add each day individually from Monday to Sunday to ensure maximum accuracy for system application, rather than grouping them as weekdays (Monday–Friday) and weekends (Saturday and Sunday).
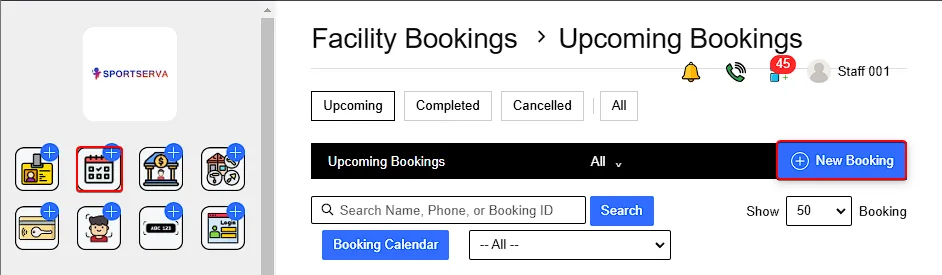
This guide is designed to help management assist walk-in customers with ease and confidence. Follow these simple steps to handle facility bookings efficiently.
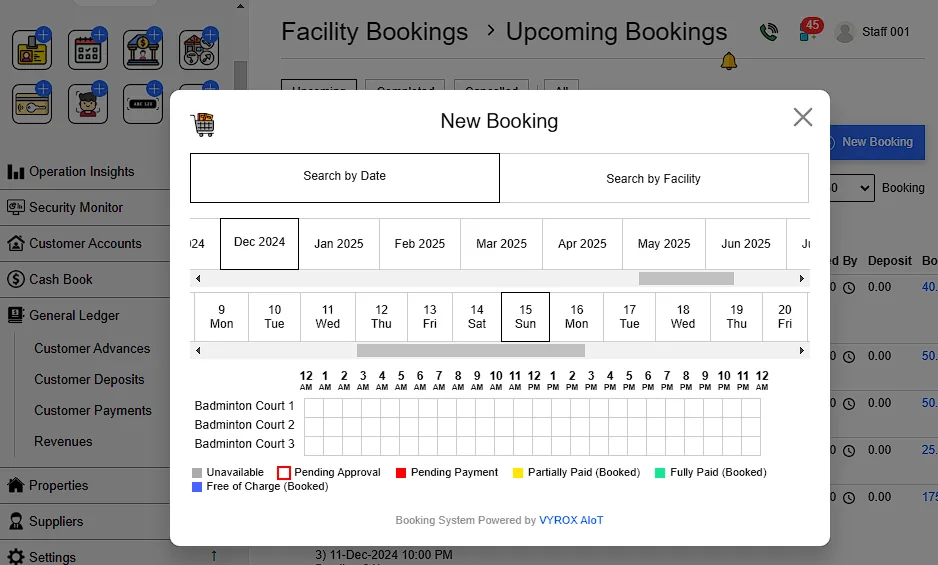
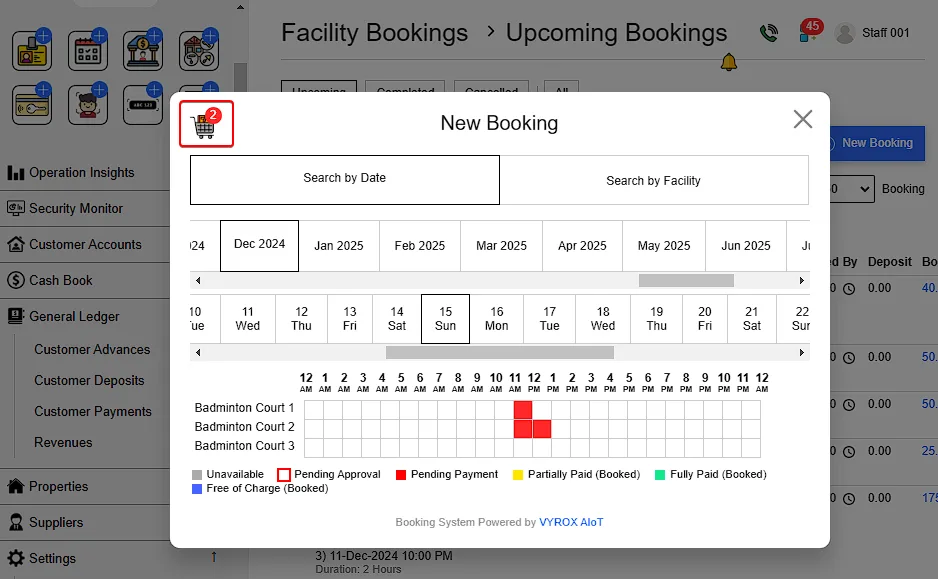
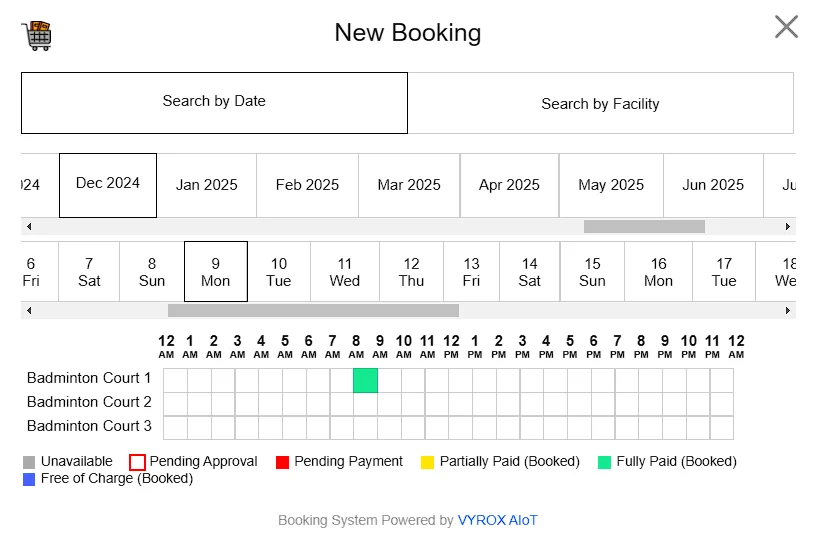
Booking slots can be searched by date or facility.
To book, click on the desired slot. The clots availability are color-coded.
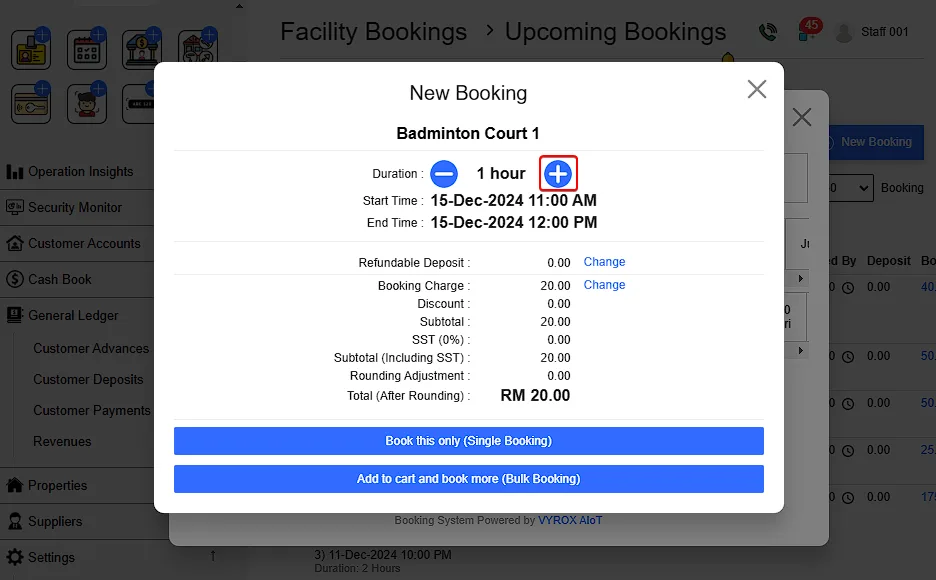
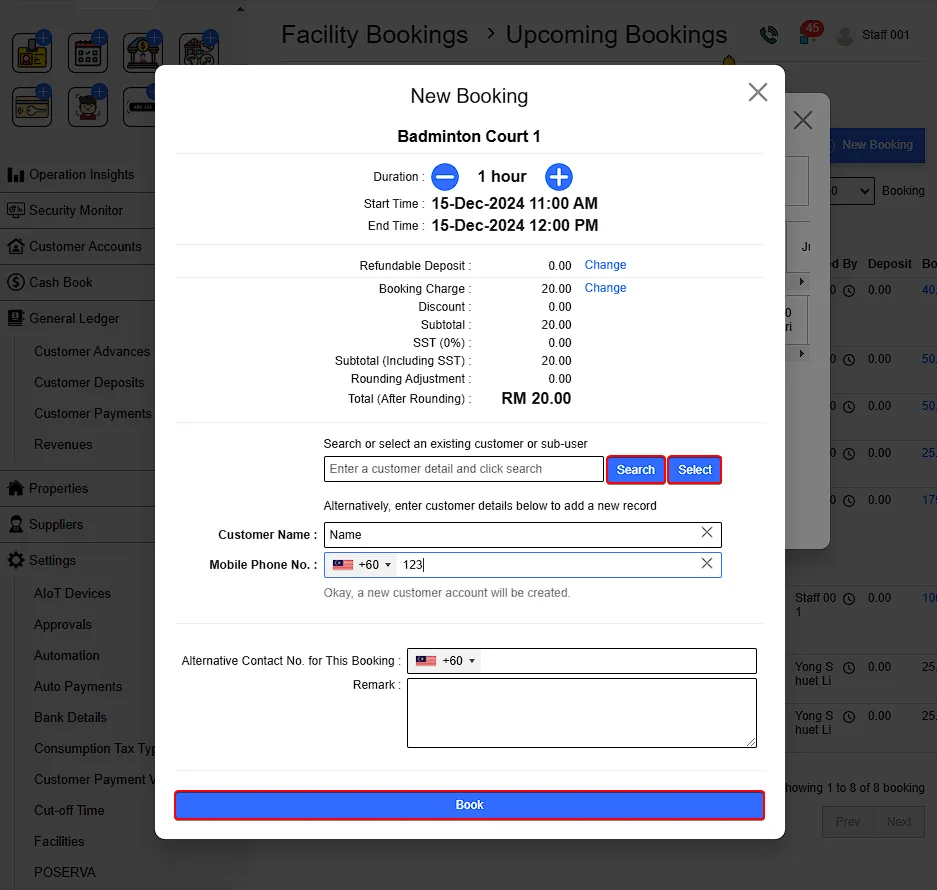
To increase booking hours , click the plus sign.
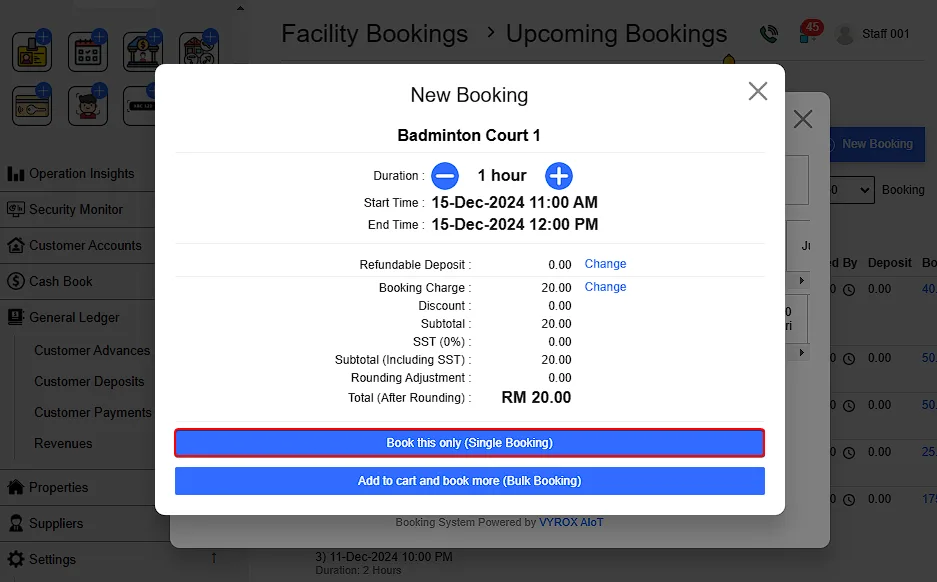
For Single Booking
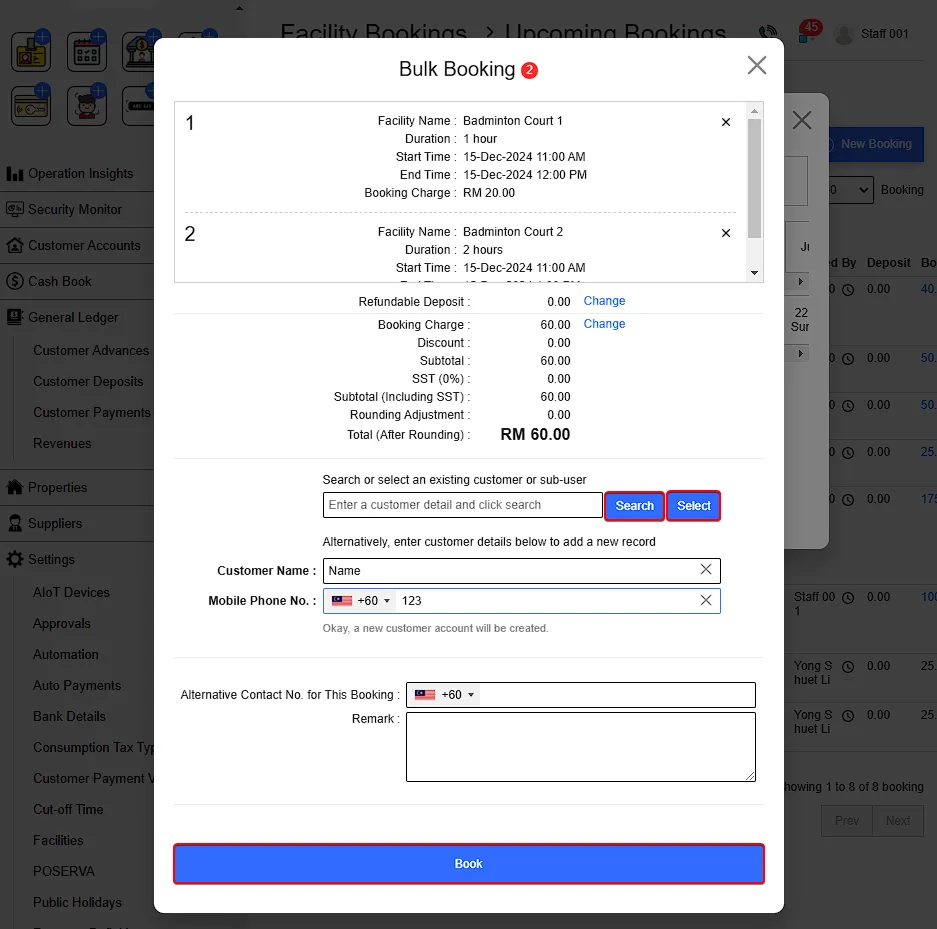
Handle customer details:
Existing Customer:
New Customer:
Click Book to complete.
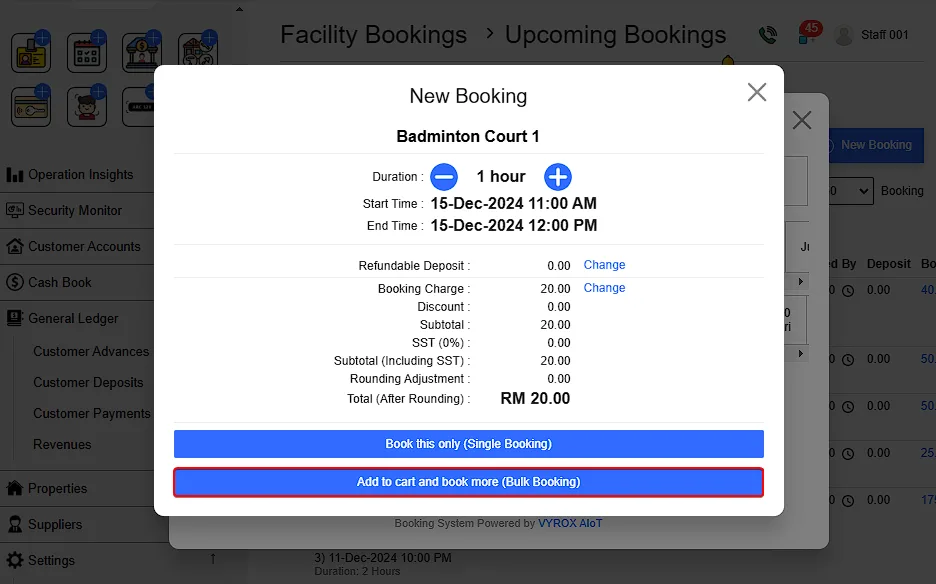
For Bulk Bookings
Add multiple slots to the cart by clicking Add to Cart and Book More (Bulk Bookings) .
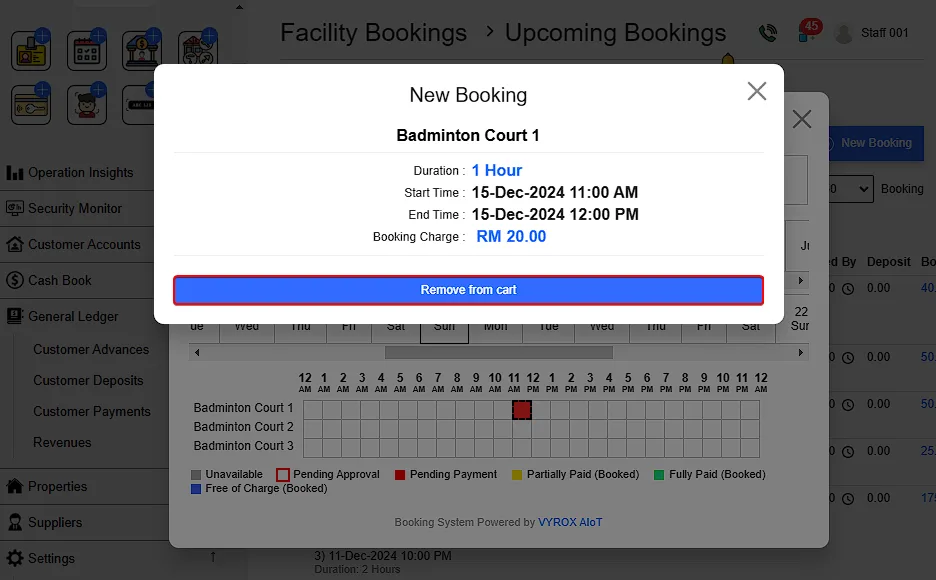
To remove a booking:
To confirm and proceed with payment:
Once all bookings are confirmed, proceed to payment options. After payment, slot is officially booked.
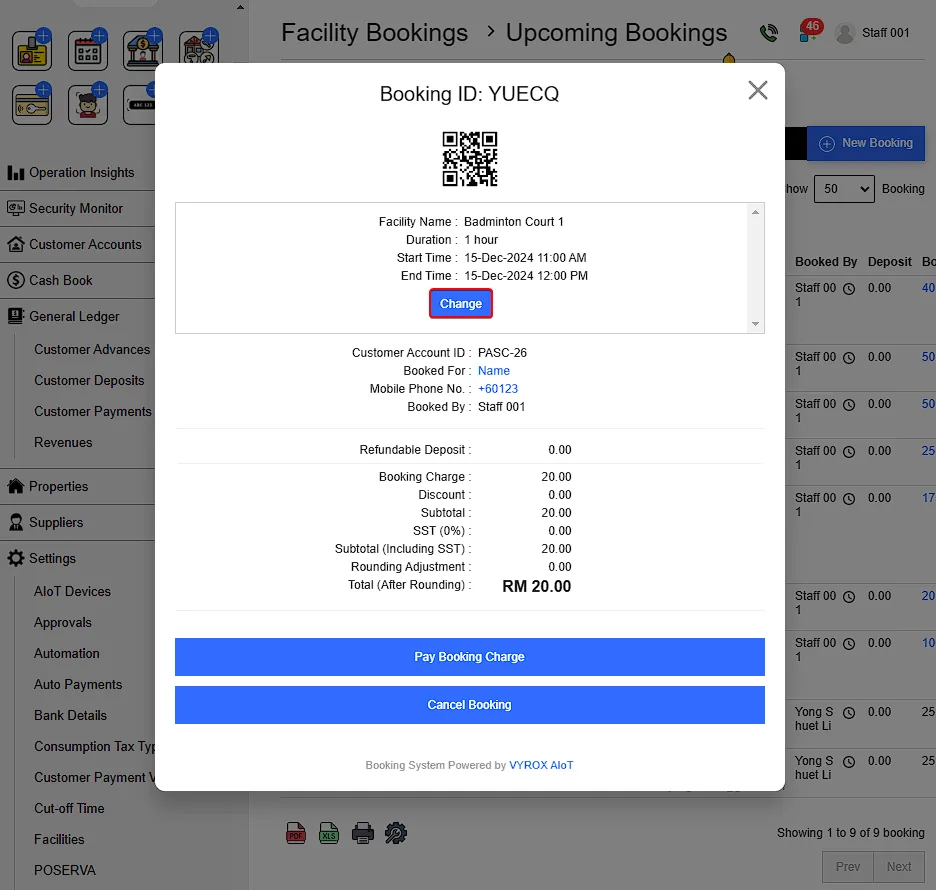
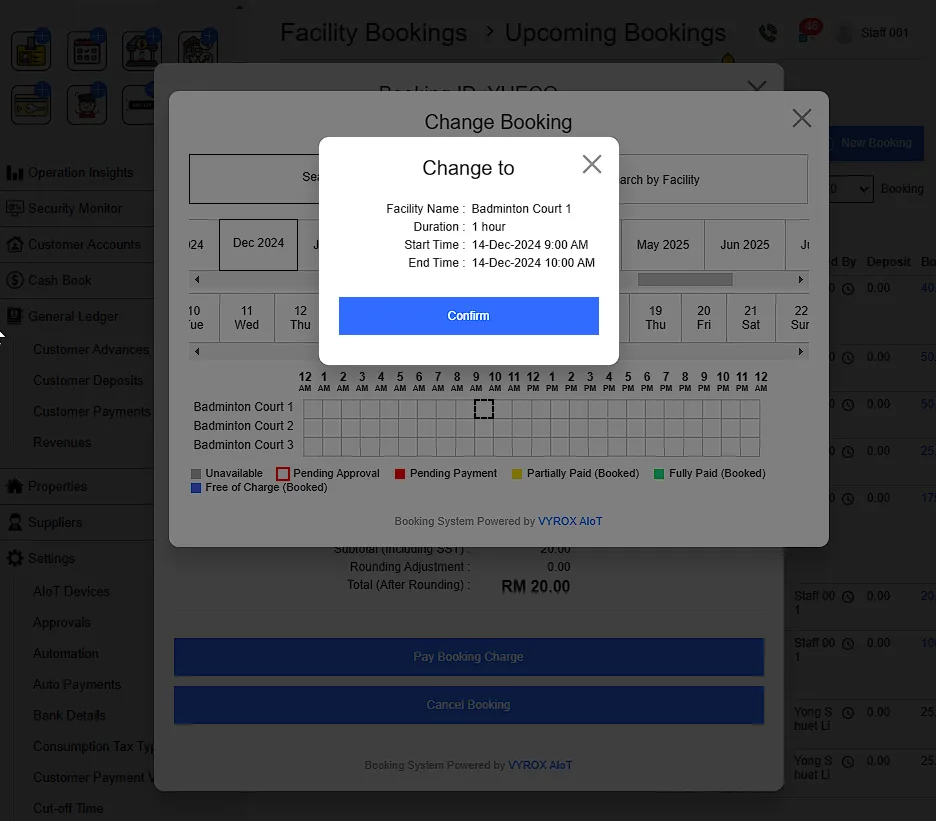
Click Change > Select new booking slot > Confirm when done.
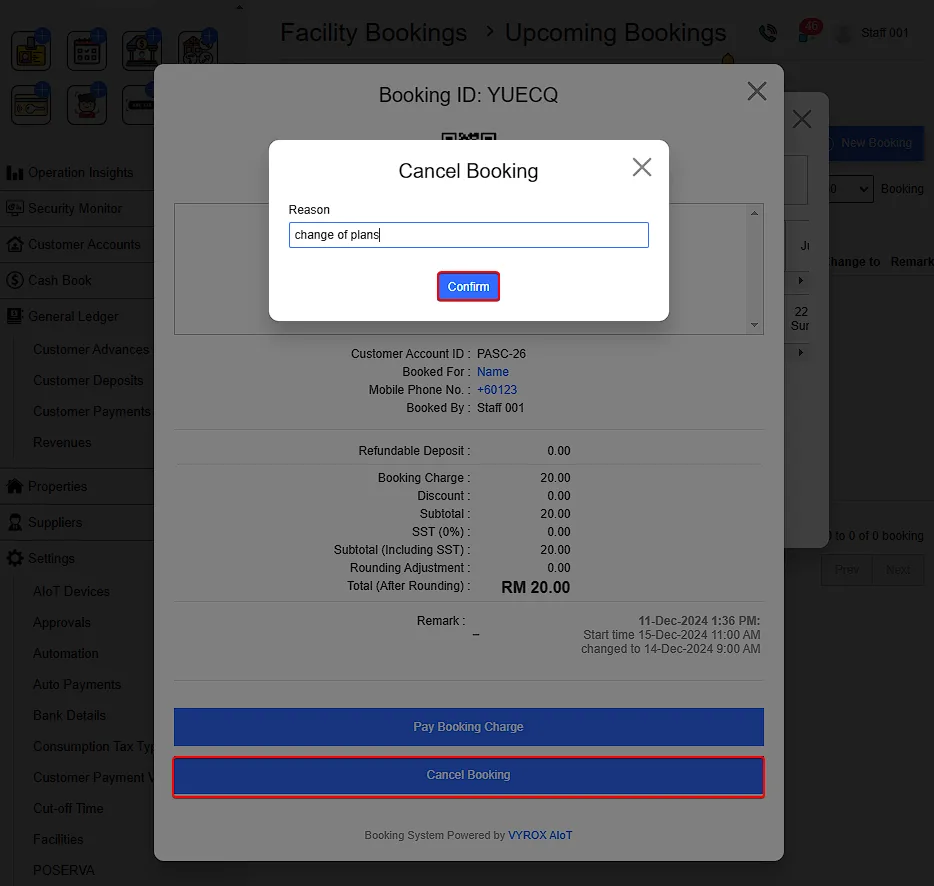
Click on Booking slot > Cancel Booking > State reason > Comfirm
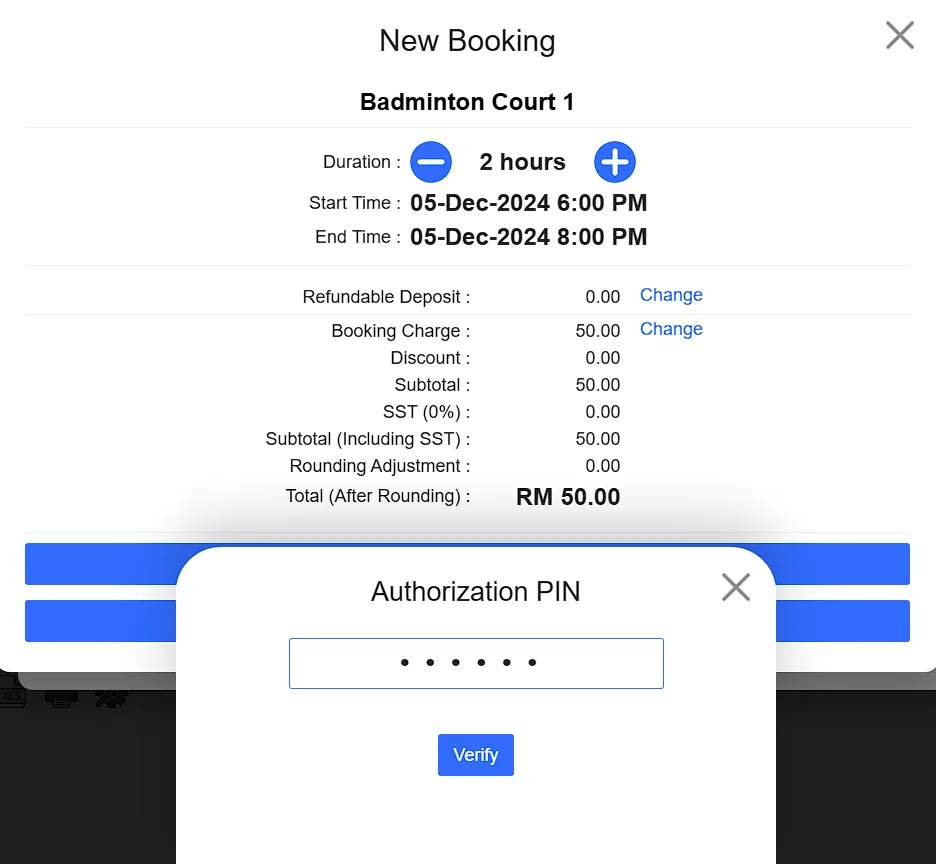
To change the refundable deposit or booking charges,Click Change > Enter the final charges > Enter authorization PIN > Verify to complete the process.
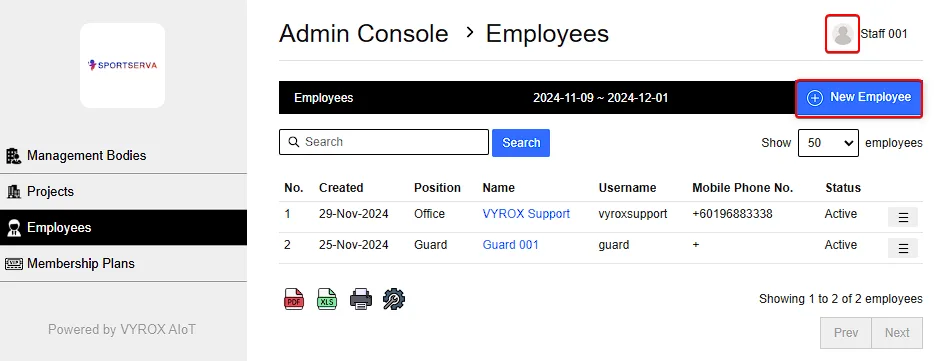
The Authorization PIN Code are unique to each employees and is set by going to Profile > Admin Console > Employee > New employee
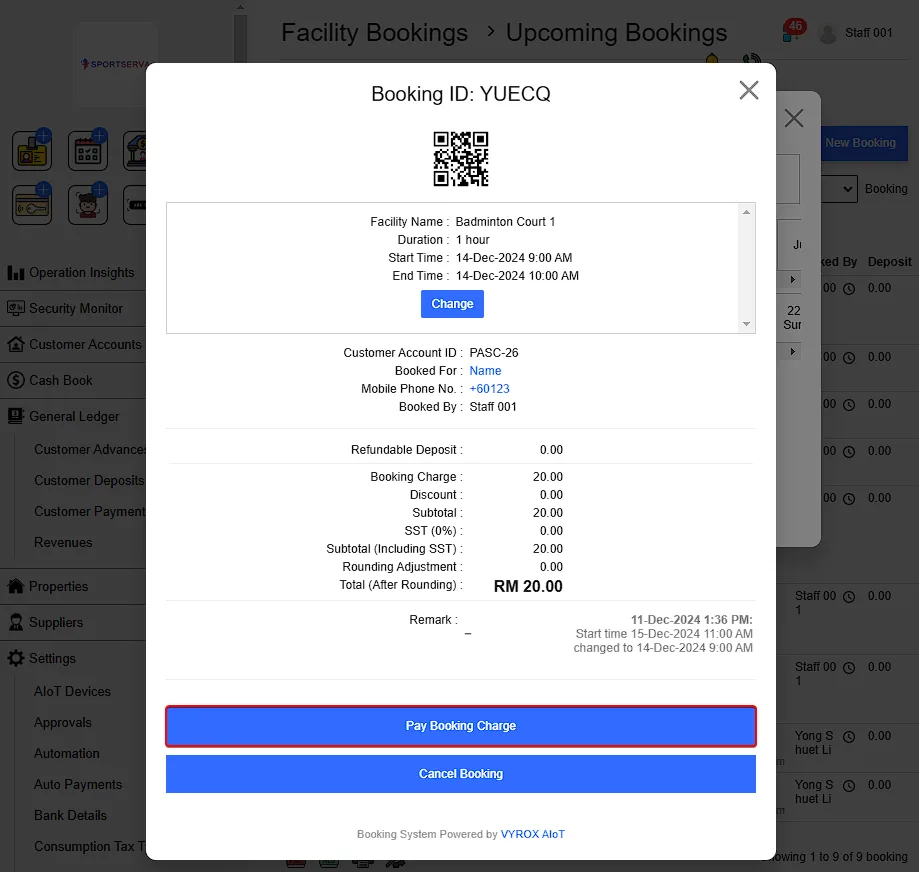
To pay the booking slot, click Pay Booking Charge.
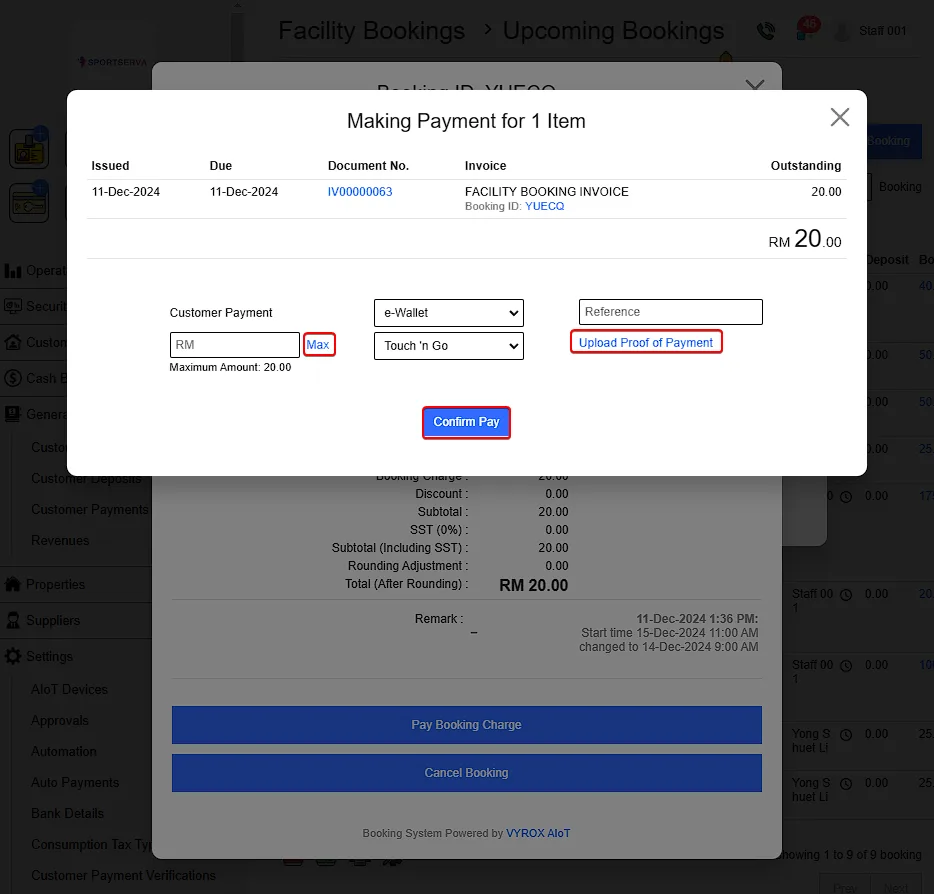
Click Max for customer to pay maximum amount of charged booking
Select Payment option > Upload proof of payment > Click Confirm pay
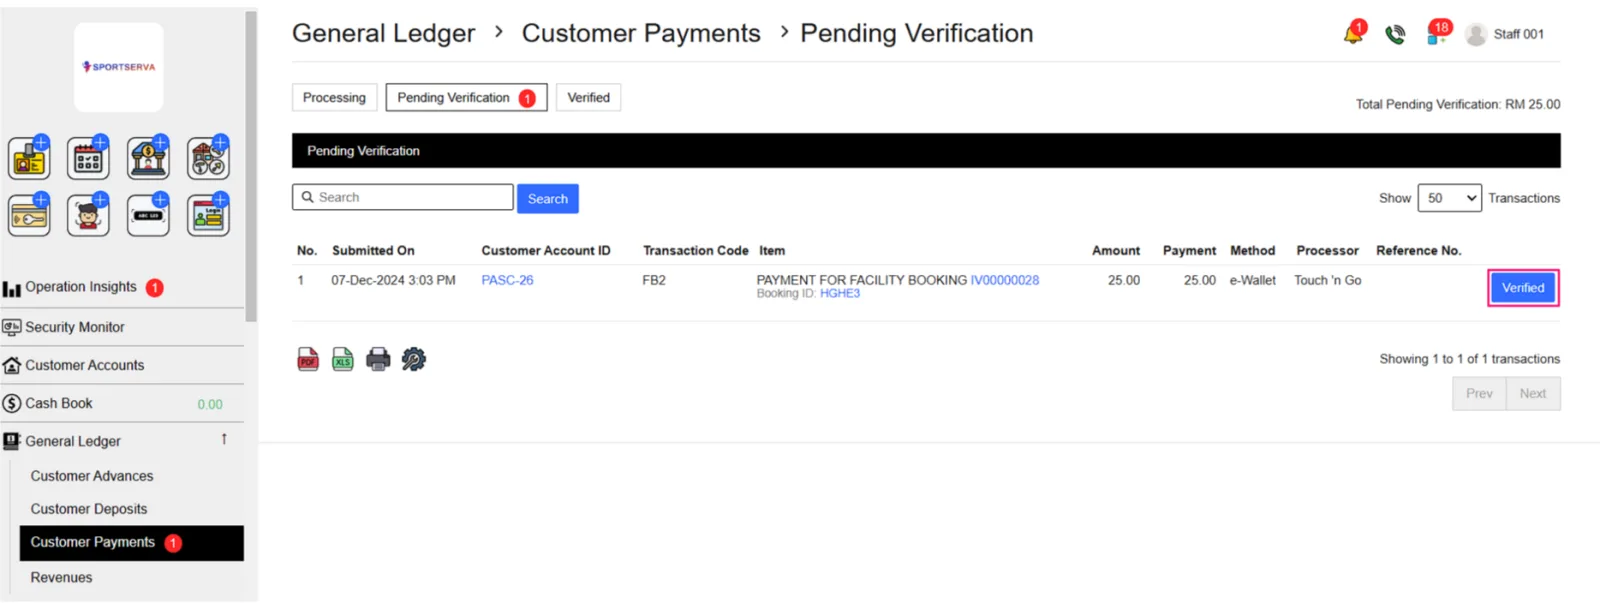
Verify payment receive by going to Customer Payents > Pending Verification
Once payment is verfified, slot will turn green indicating its officially booked.
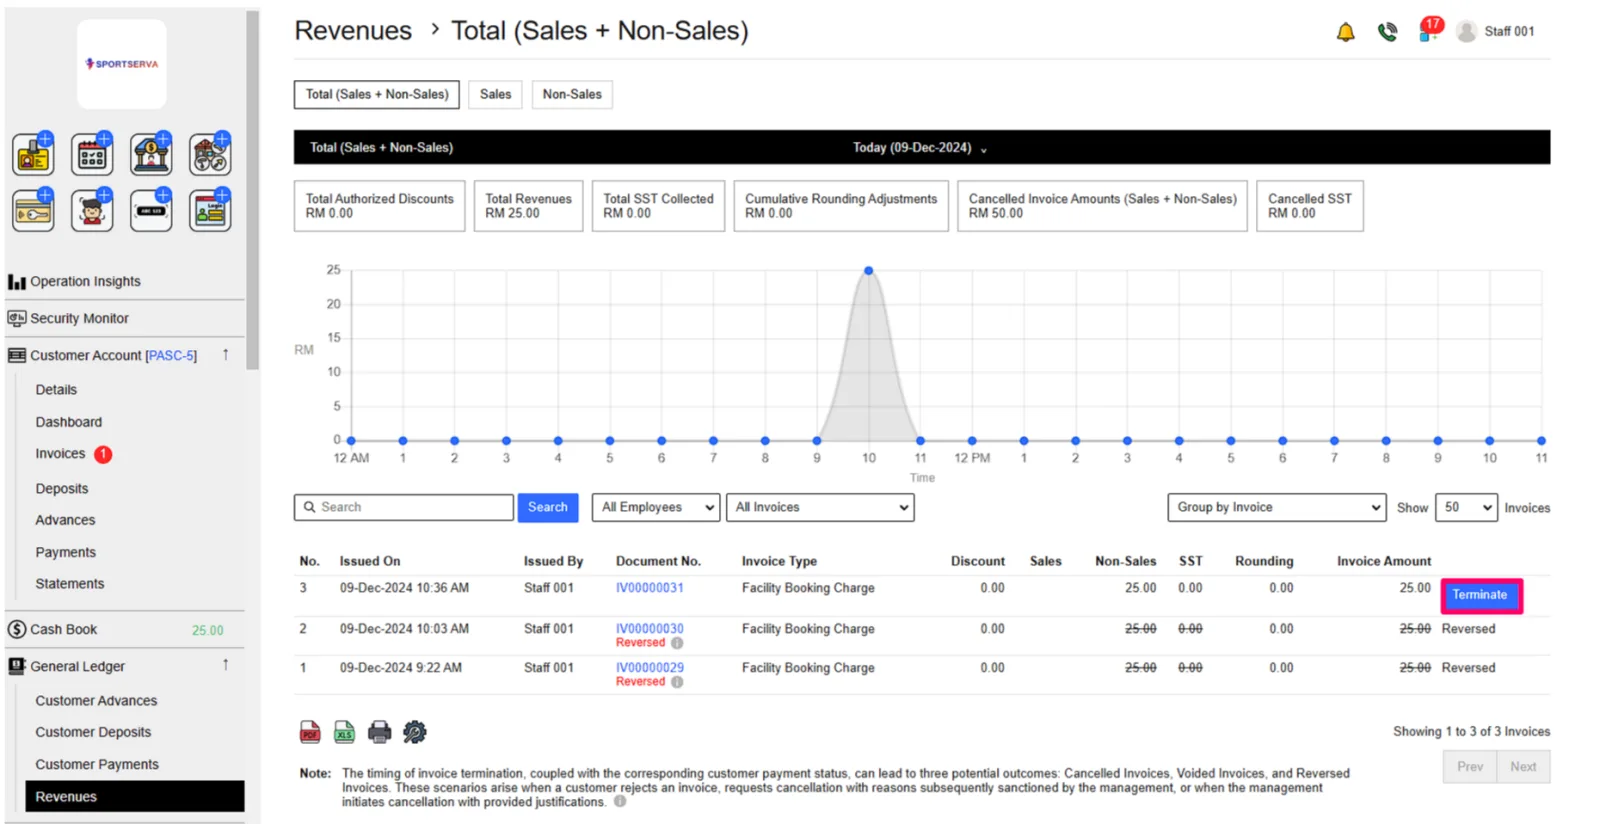
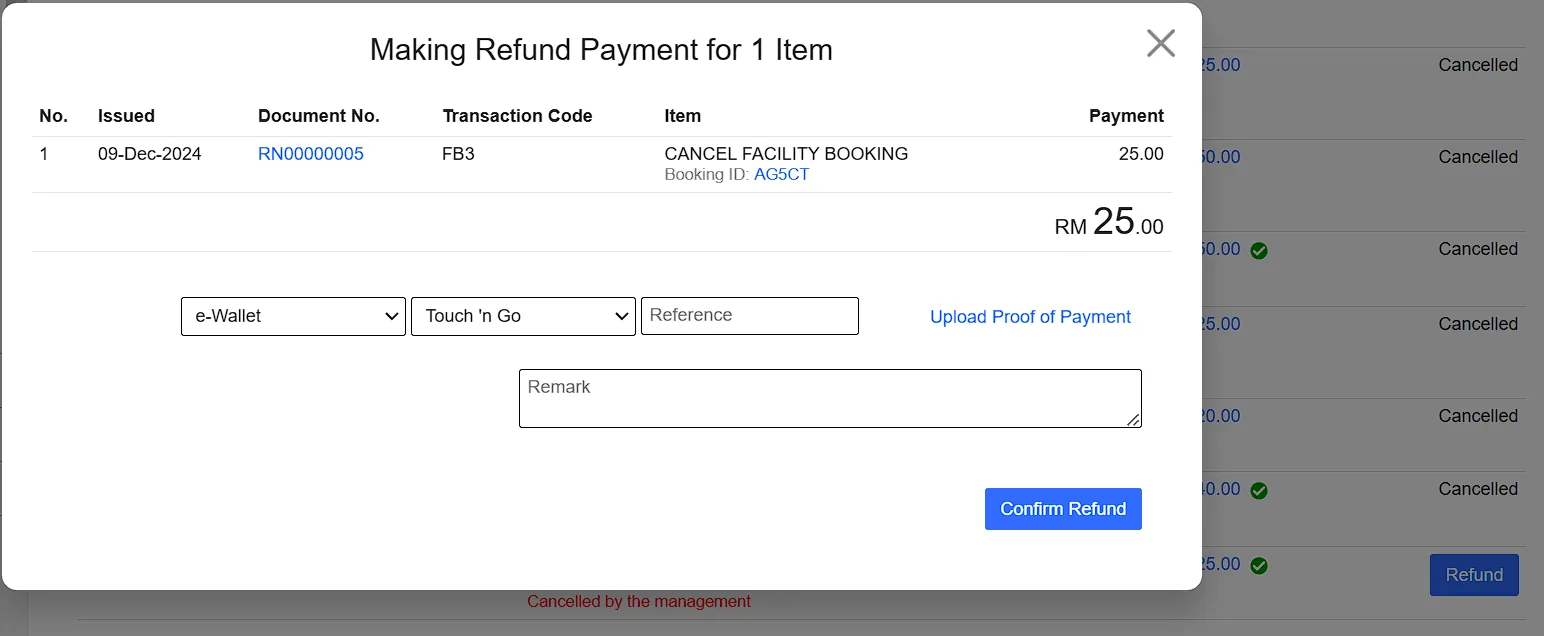
If a booking is made with payment but the customer requests a refund and cancellation, follow these steps:
Go to Revenue and terminate the customer invoice. This will reverse the customer invoice and free up the booking slot.
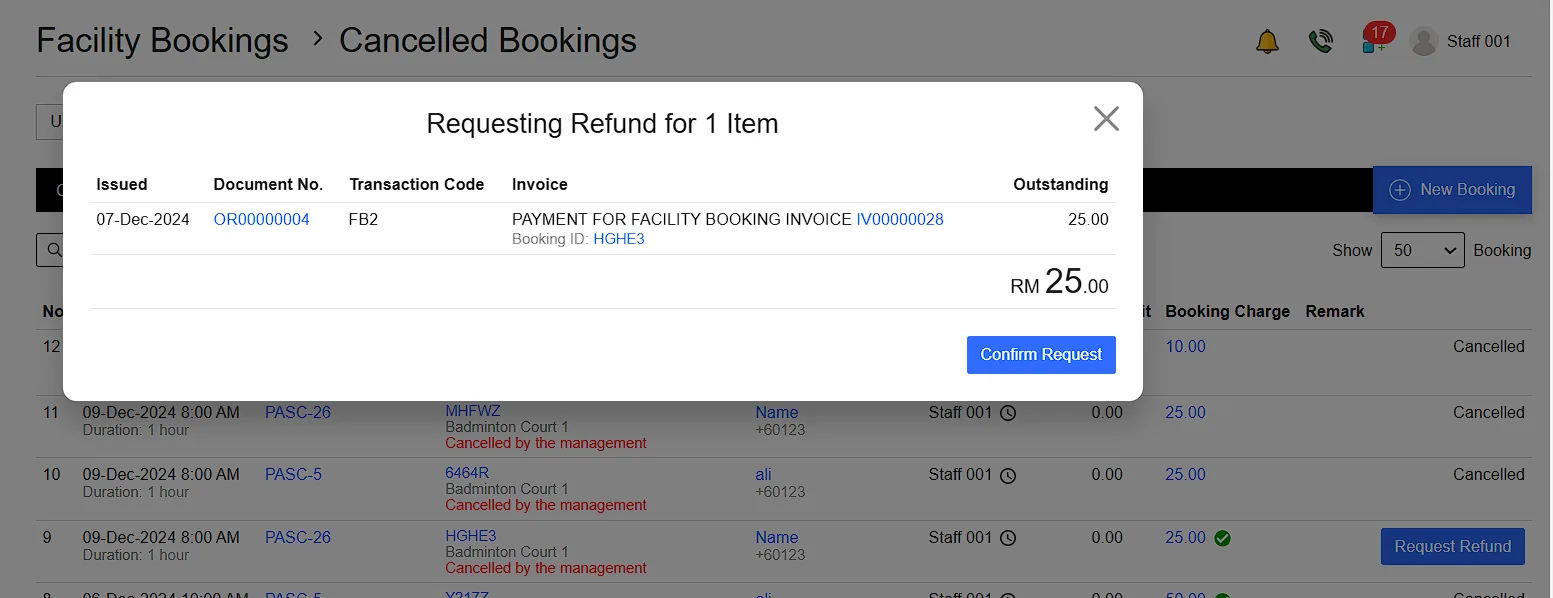
To update the cash book and reflect the refund:
Navigate to Facility Booking > Cancelled > Request Refund > Confirm Request > Refund > Confirm Refund.
Once completed, the cash book will be updated to reflect the correct amount.